
Create a 'list' for a traveller on the app
By using the 'Lists' feature, you can provide a list manually or with help from AI (for example a packing list) for your client.
To create a list for your client, follow the steps below:
Select the applicable 'Upcoming' trip itinerary. The 'Upcoming' itinerary needs to have specific dates in order to set a task for a specific date.
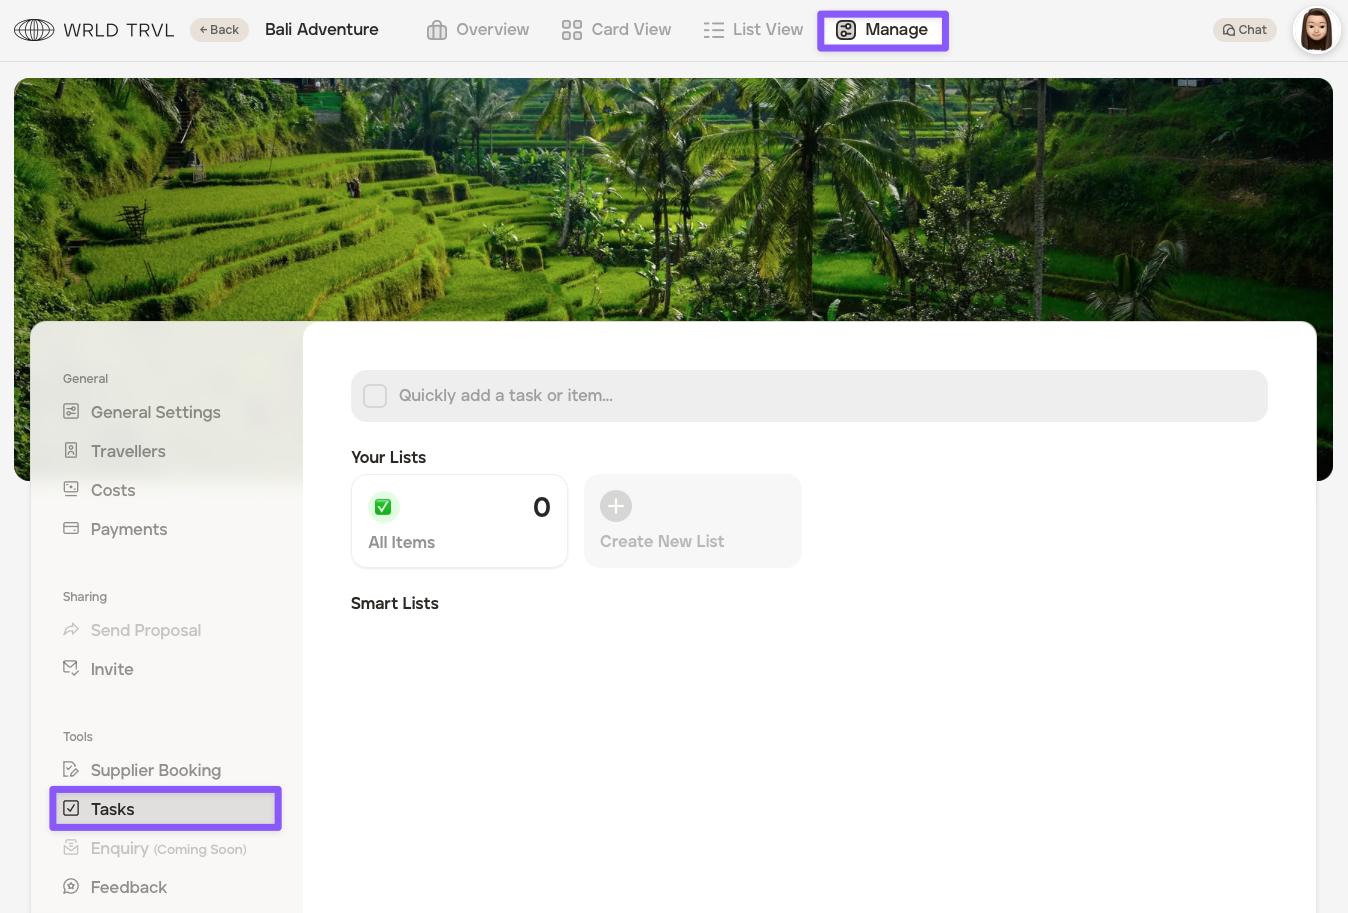
Click 'Manage' and then 'Tasks'.
To create a new list, click 'Create New List'.
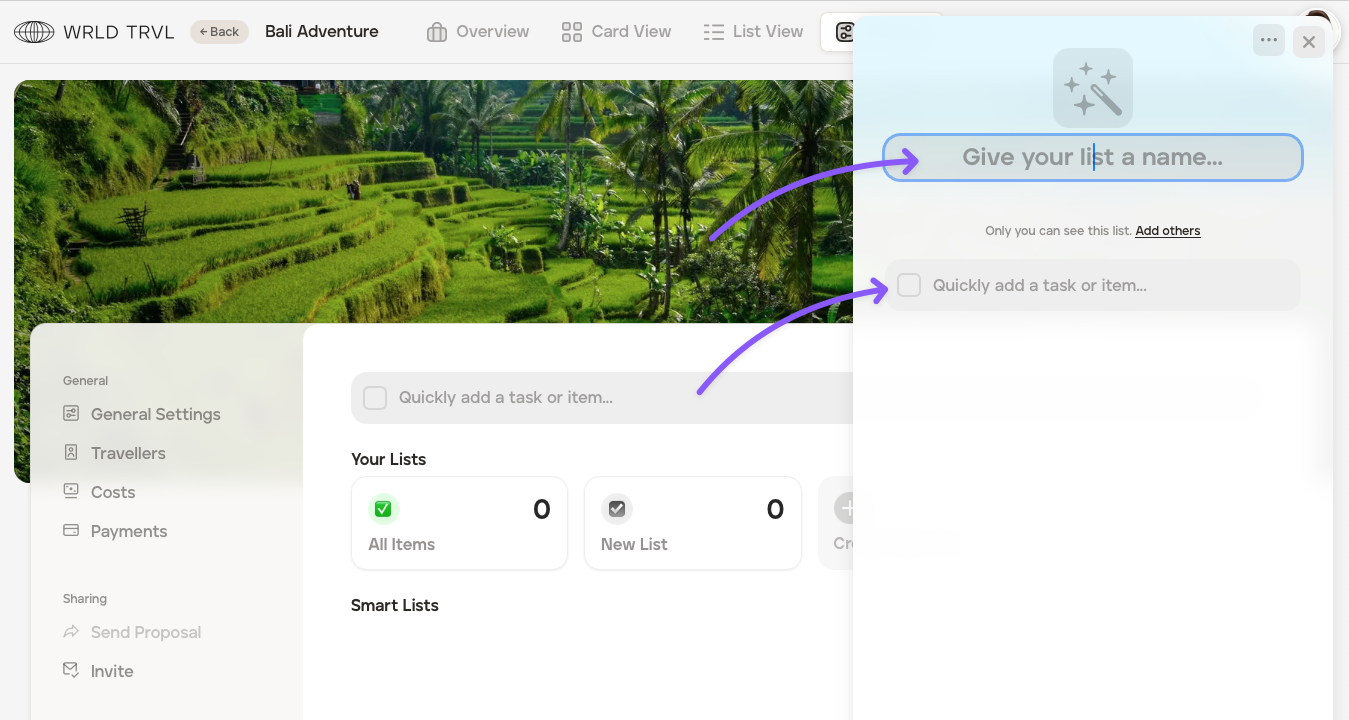
A draw will slide in from the right. Give your list a name, for example, 'Packing List'.
Click the wand icon to add a relevant icon eg. a suitcase.
Click the grey task or item field.
Type the task or item, for example 'Waterproof jacket' and 'Insect Repellent' and hit the ‘Enter' keyboard key.
Click that new item. If you wish, you can add a due date, for example, the day before your client departs for the trip.
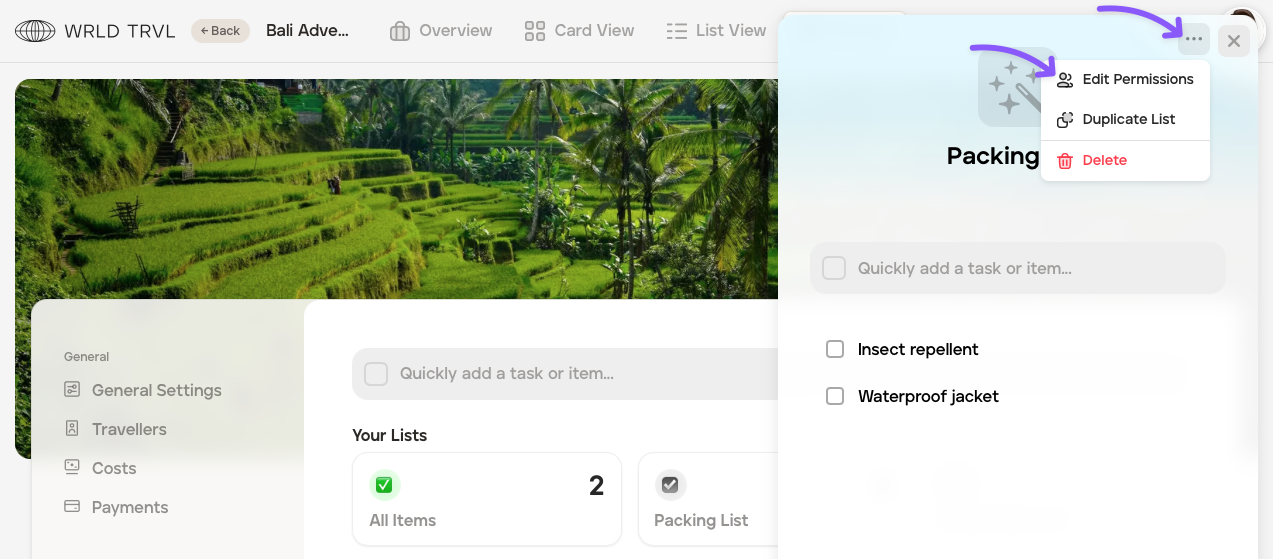
After you've added all list items, click the '...' button and click 'Edit Permissions' to give access to your clients.
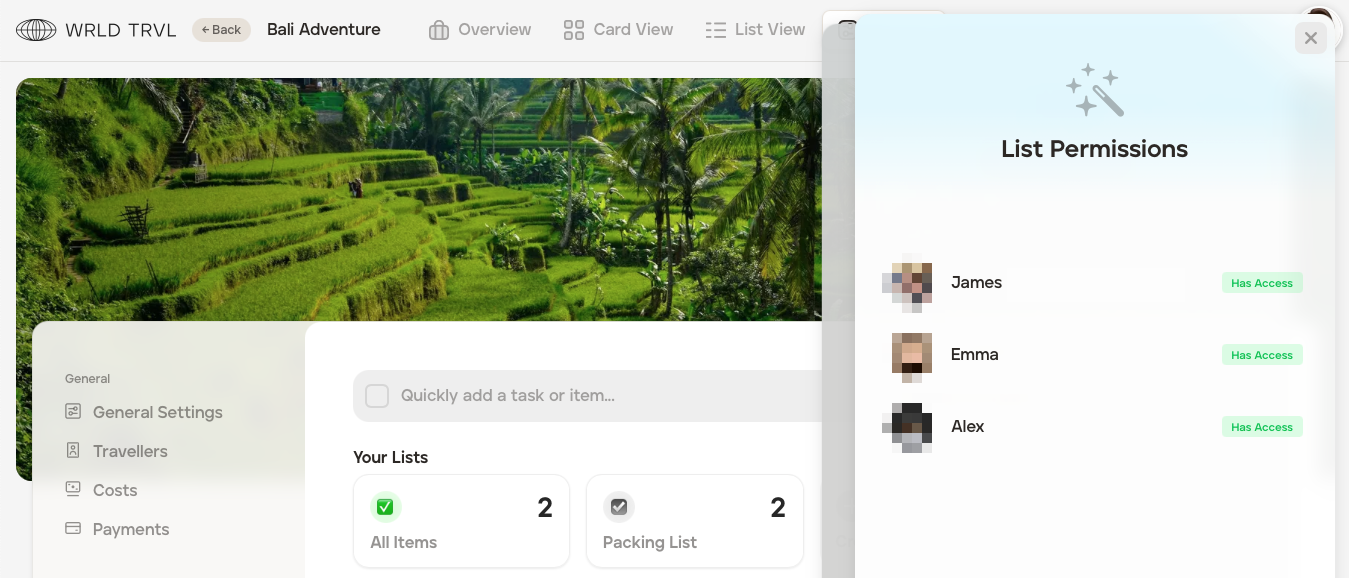
Click the grey 'No access' button to give permission to your client(s) to view and access the list.
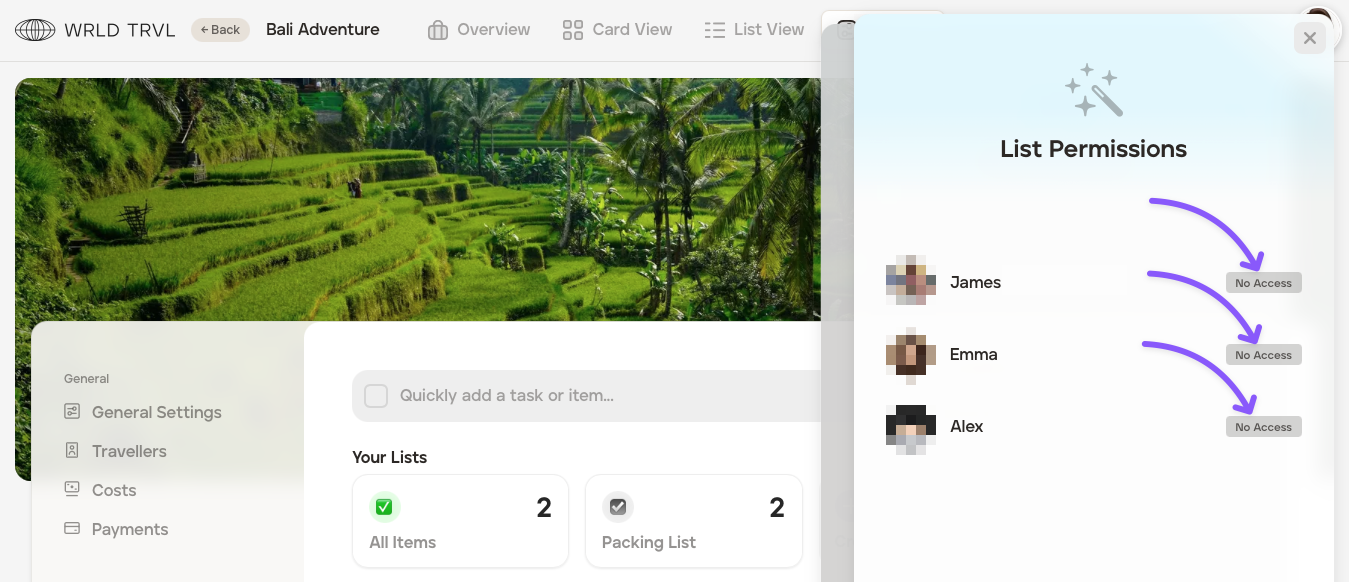
If access is given, the grey button changes to a green 'Has Access' button. You can click again to reverse this.
Create an Intelligent Smart List (assistance from AI)
Alternatively, you can create an intellgent Smart List for your client. A Smart List is a list created with the help of AI. You could use this to help you create a useful packing list, for example, a list of items a traveller may need for their hiking trip.
To create a Smart List for your client, follow the steps below:
Select the applicable 'Upcoming' trip itinerary. The 'Upcoming' itinerary needs to have specific dates in order to set a task for a specific date.
Click 'Manage' and then 'Tasks'.
To create a new list, click 'Create New List'.
A draw will slide in from the right. Give your list a name, for example, 'Hiking Packing List'
Click the wand icon to add a relevant icon eg. a hiking boot.
Click 'Need help creating your list?'.
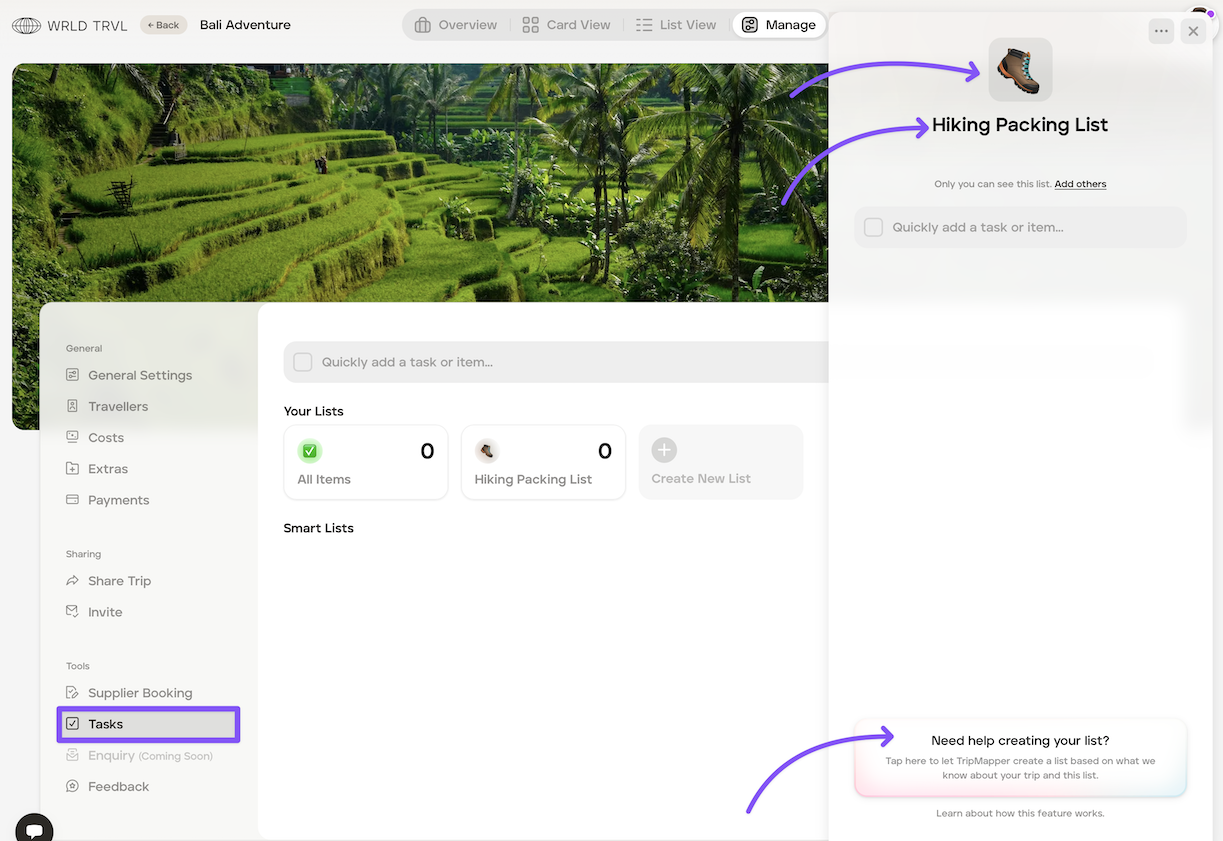
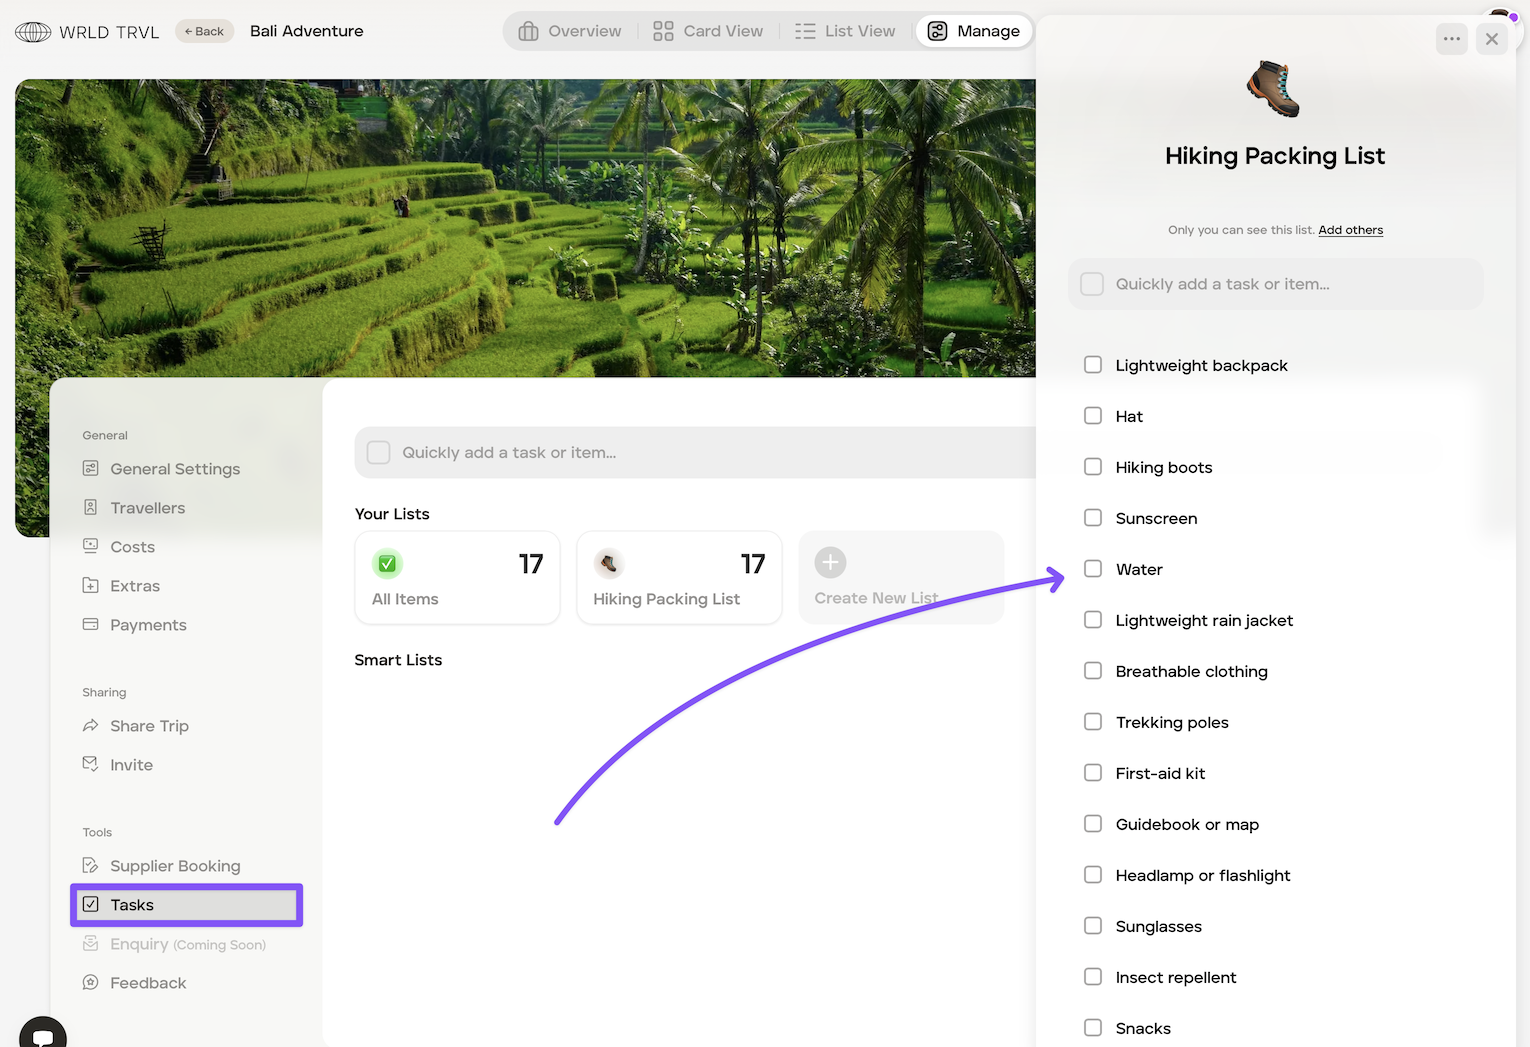
After a second or two, a list will appear giving items to pack for a hiking trip (saving you lots of time!).
By clicking an item you can:
edit the name of the item by clicking the name (optional);
delete the item by clicking the '...';
add a due date by clicking '+add due date' (optional);
add a traveller (optional); and
add notes.
You can also add more items if you wish by clicking 'Quickly add a task or item.'
When you are happy with all list items, click the '...' button and click 'Edit Permissions' to give access to your clients.
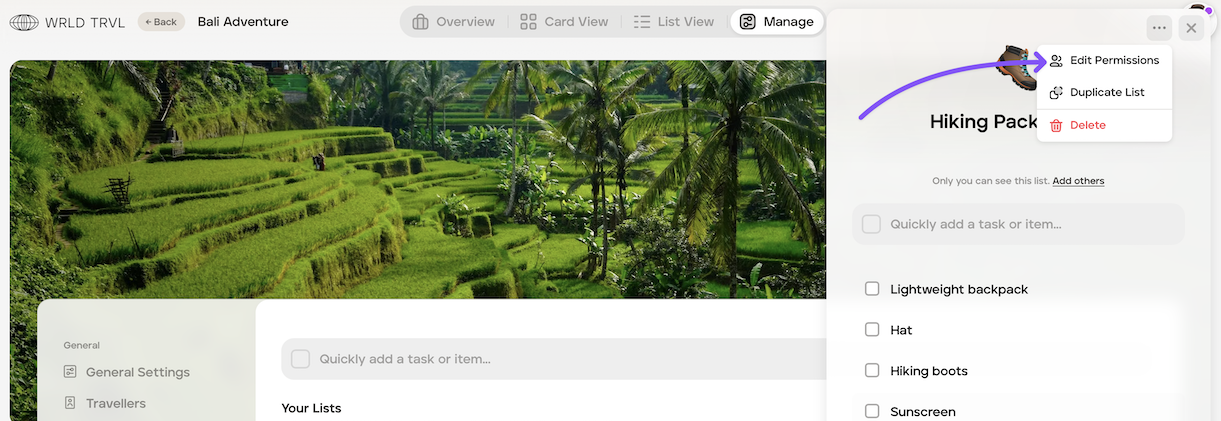
Click the grey 'No access' button to give permission to your client(s) to view and access the list.
If access is given, the grey button changes to a green 'Has Access' button. You can click again to reverse this.
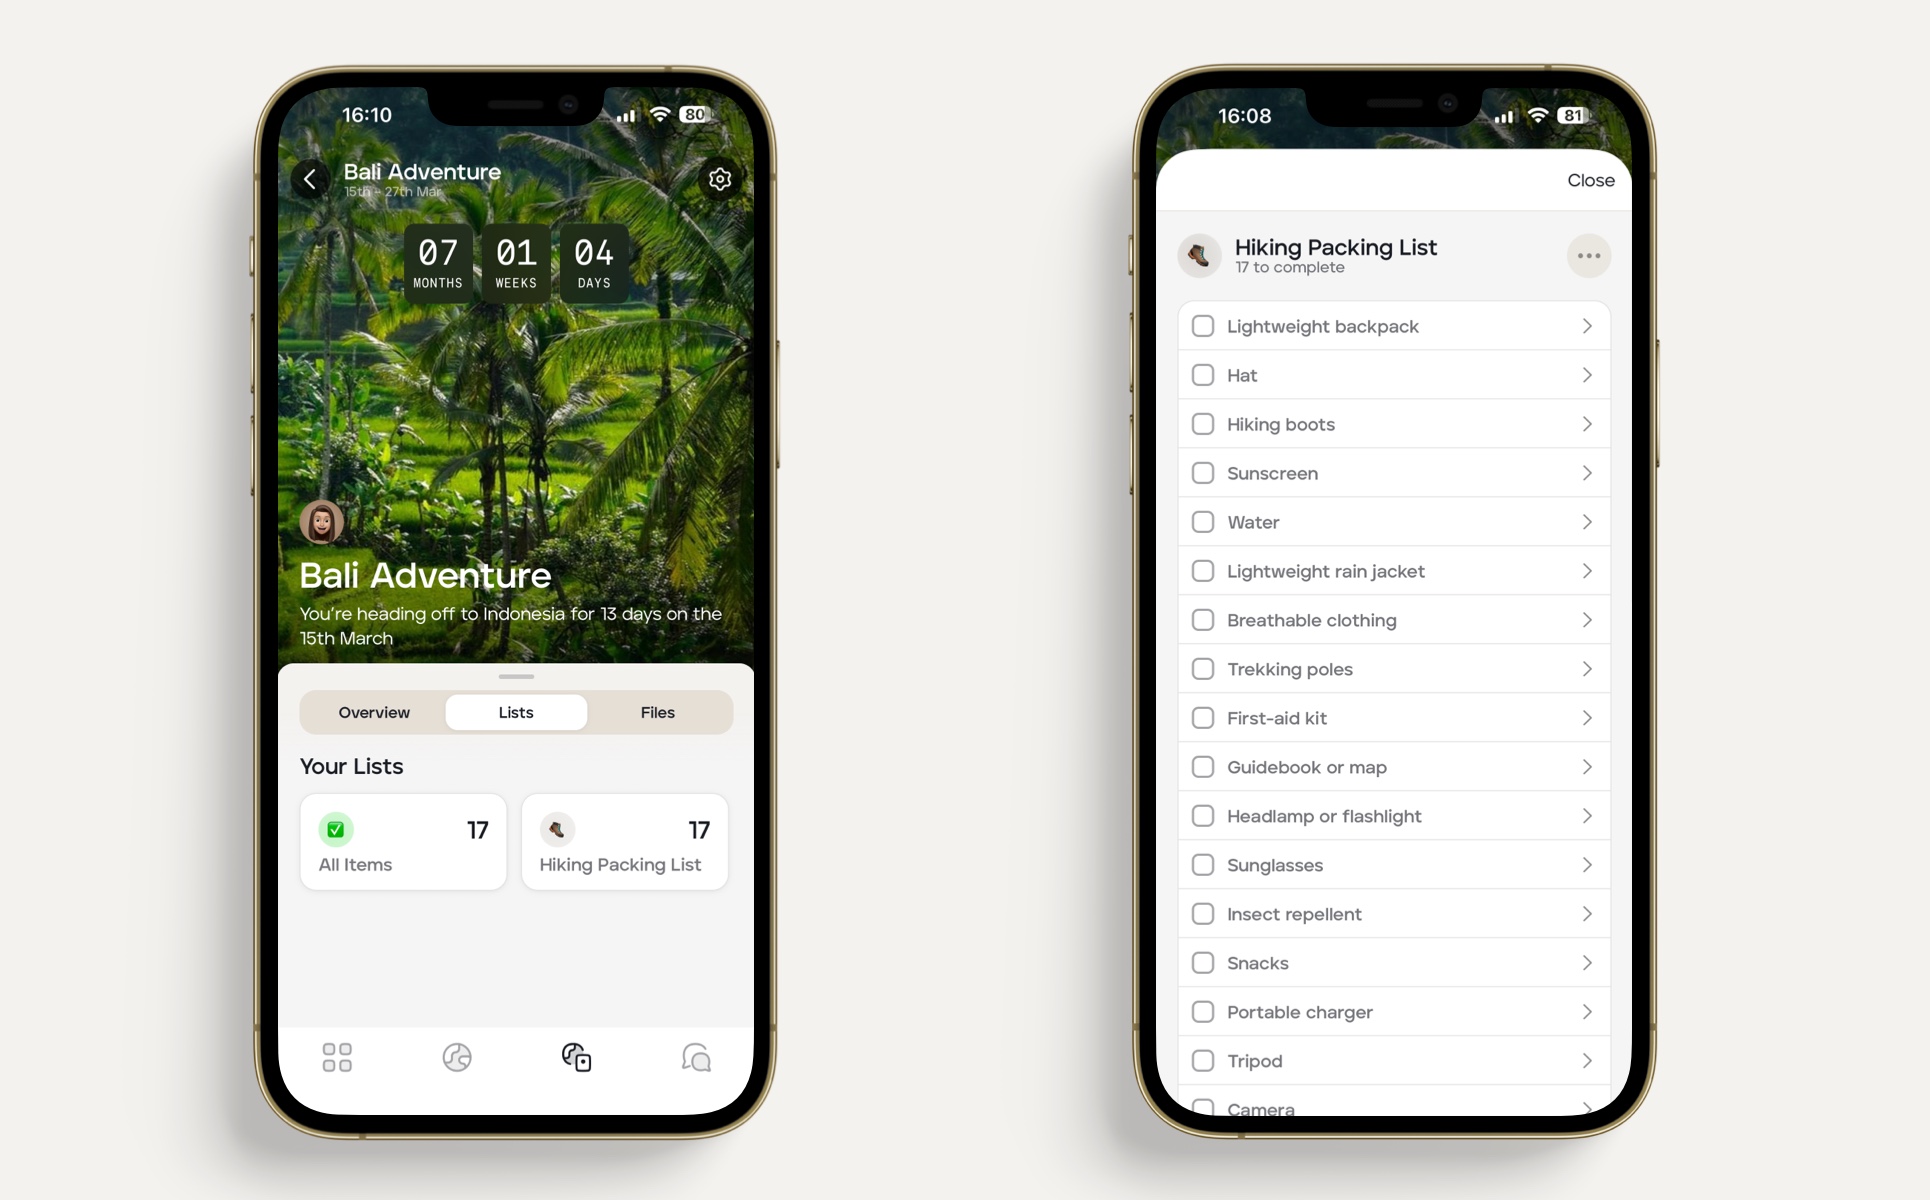
What your client will see in the app if you create a list (or Smart List) for them:
If your client is up and running on the mobile app and you have given them access to the list you have created for them, they will be able to view it on the app (alongside any due dates, if added):