Create a template itinerary
Template itineraries are itineraries you can create, duplicate and tailor for your clients. The primary purpose of template itineraries is to save you time!
There are two ways to create a template itinerary:
From scratch, via the 'Templates' section in the main navigation
From an existing itinerary
Creating a Template from scratch
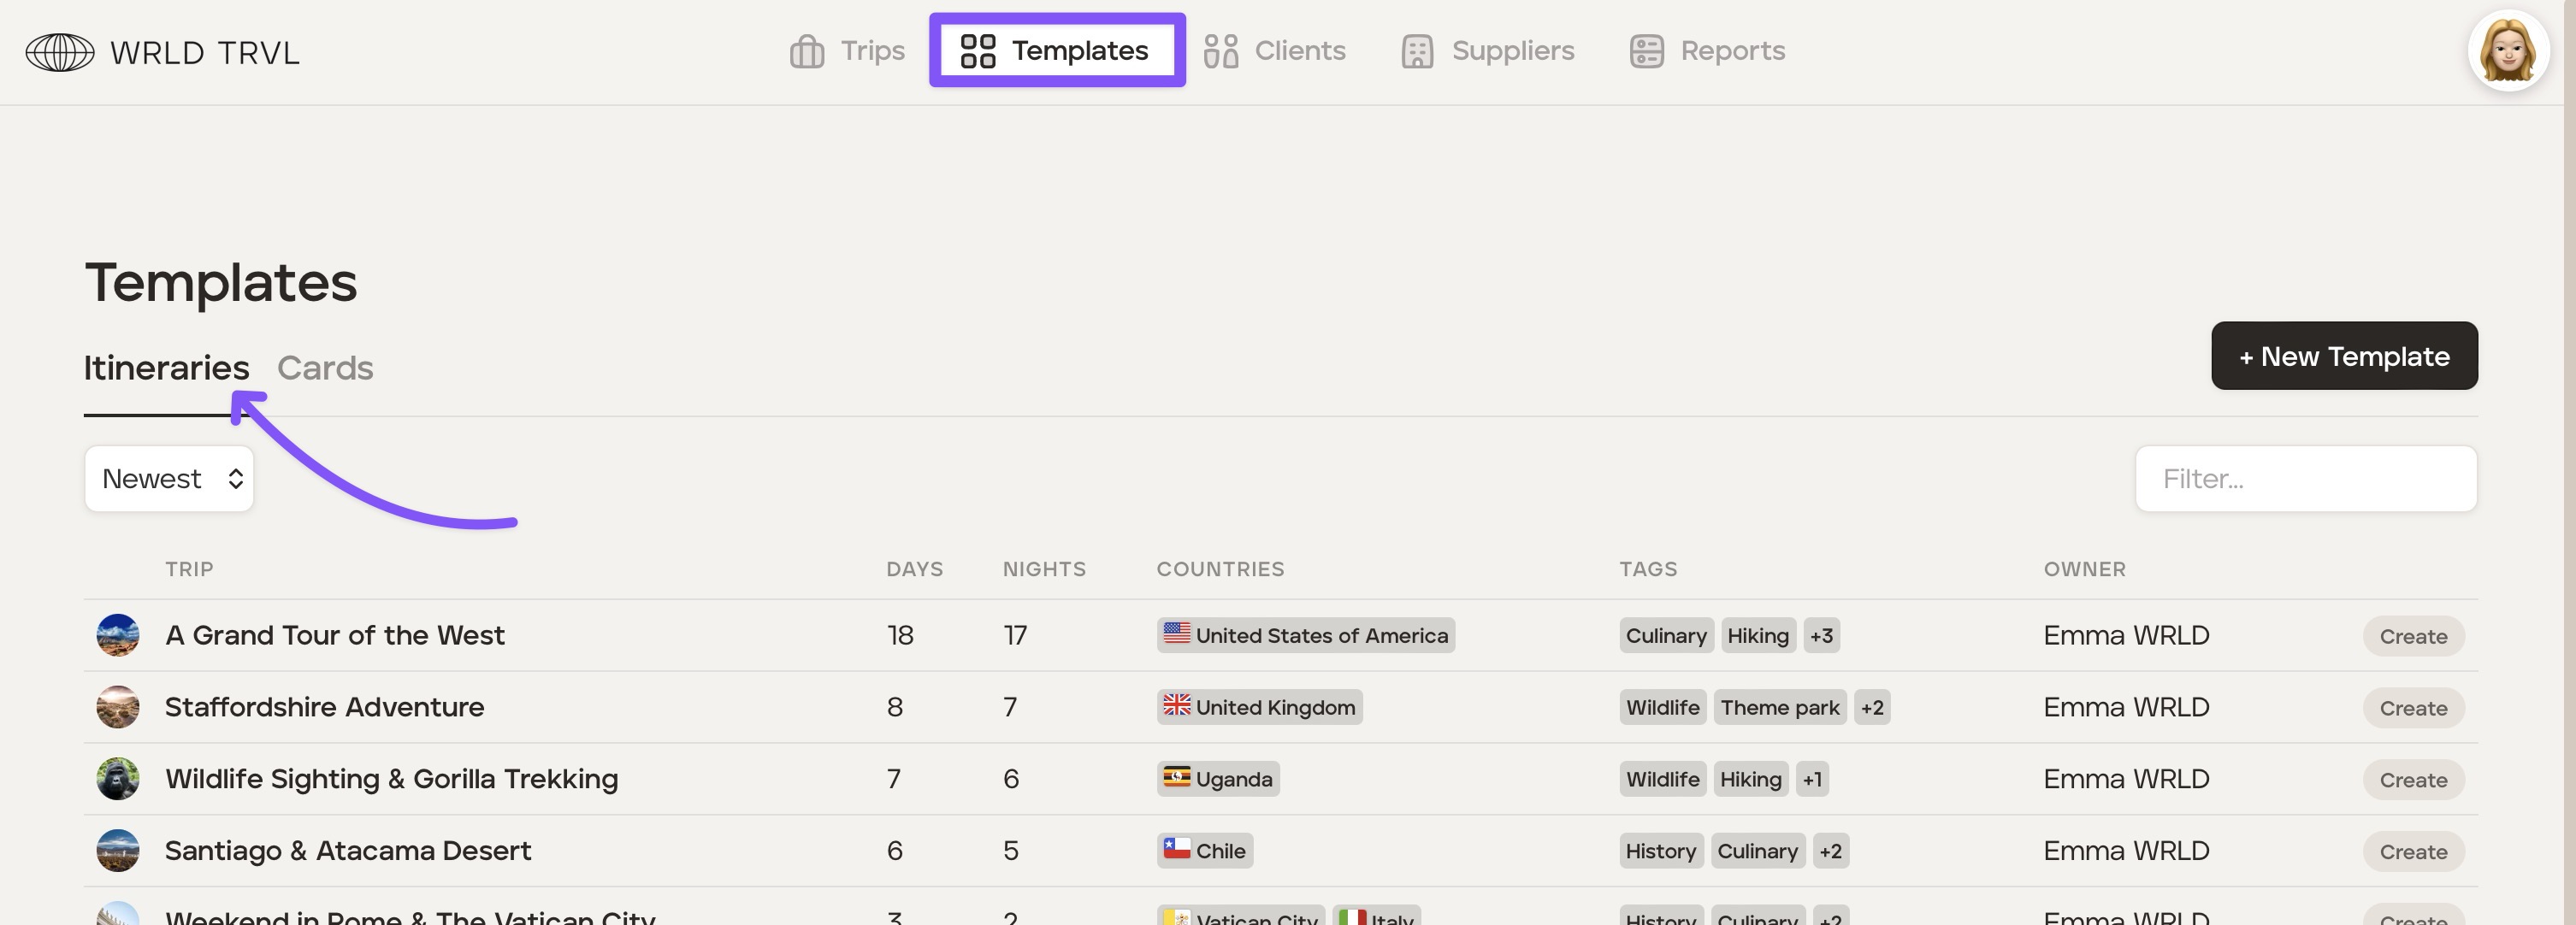
Head to the 'Templates' section and then click the 'Itineraries' tab.
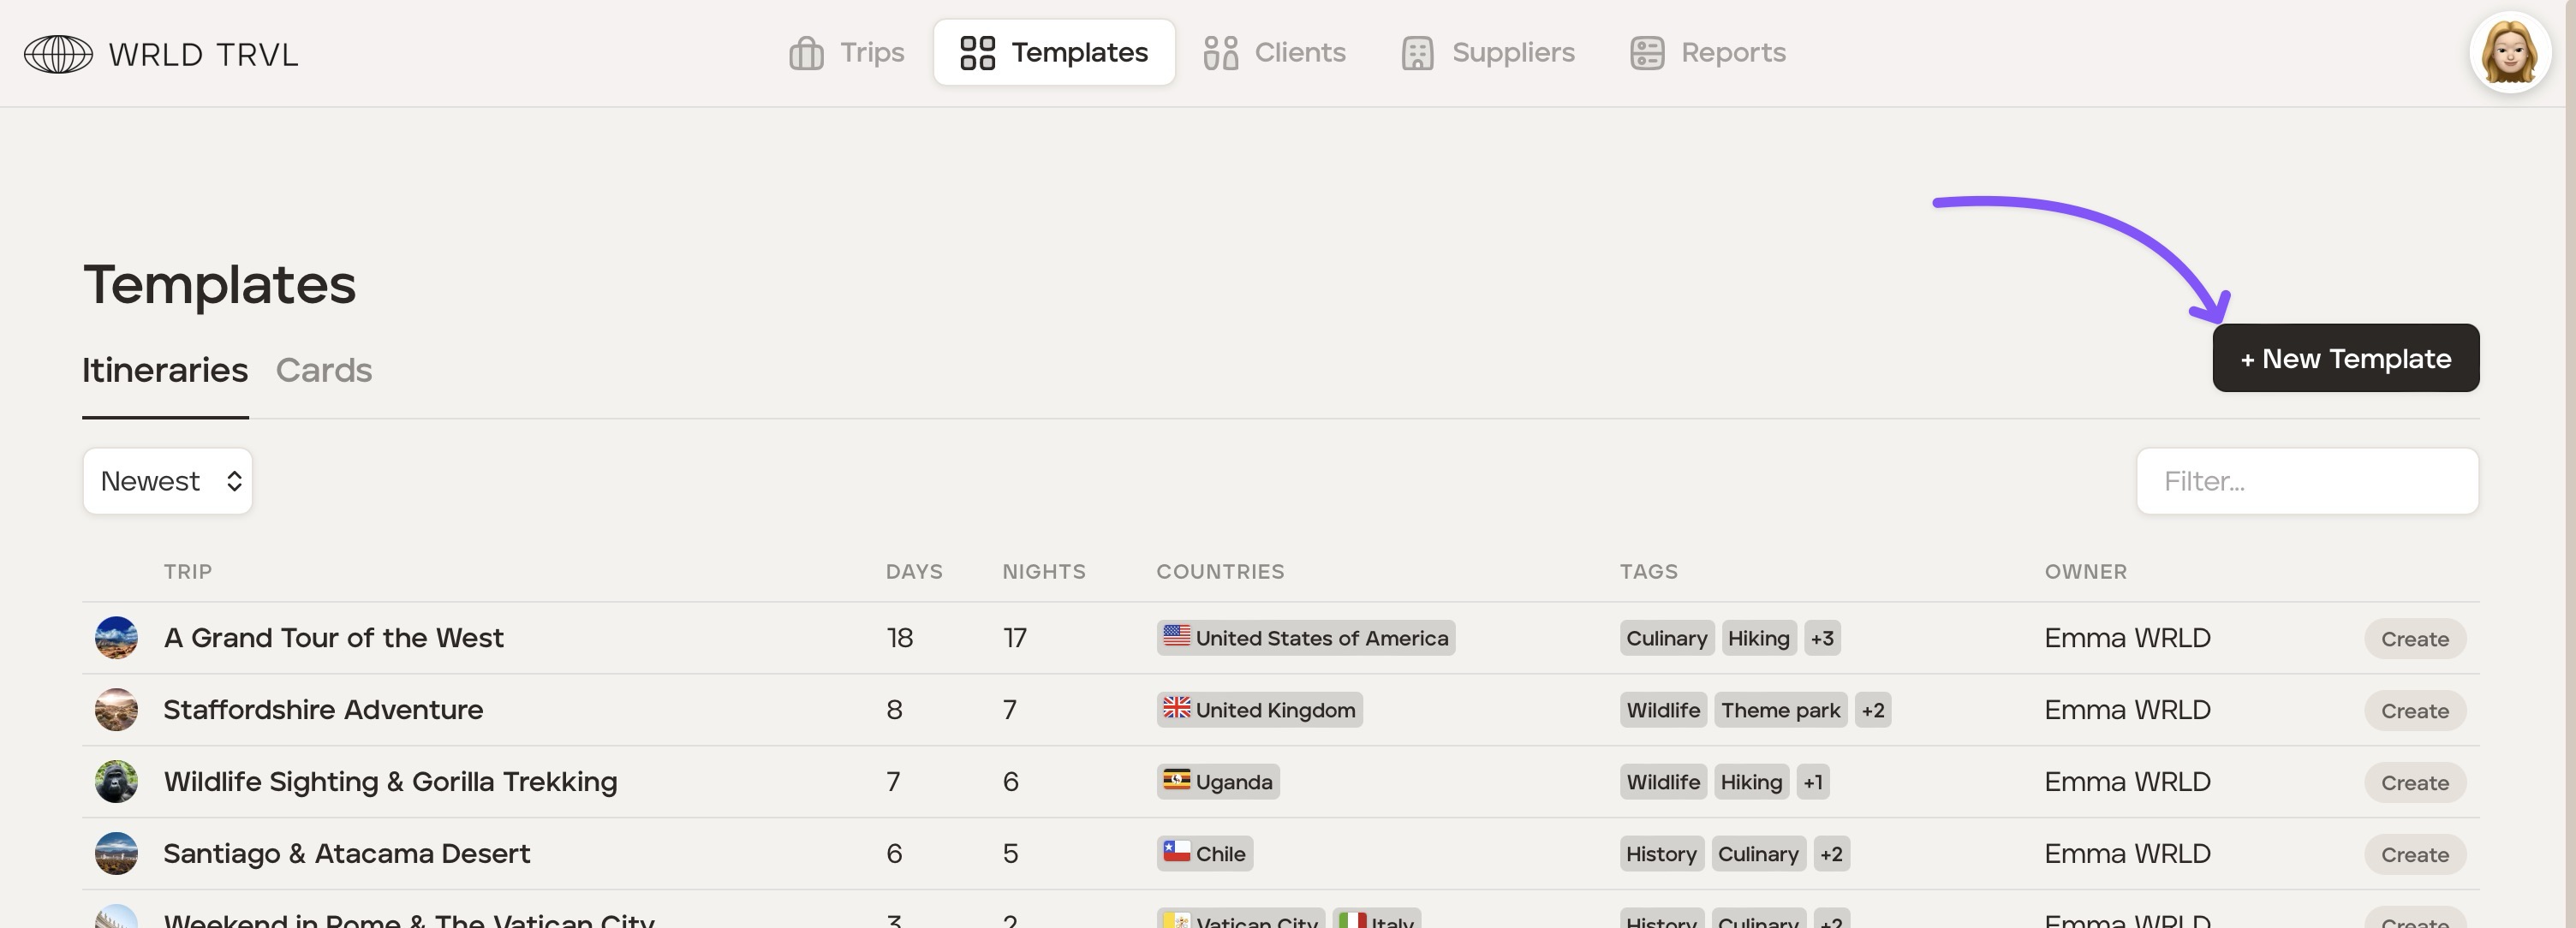
Click the ‘+ New Template’ button.
Fill in the information requested:
Template name
Country(ies) and region
Trip duration
Number of travellers (can be left as 1 as only a template)
Brand, if a partner's branding (logo and colour scheme) is to be used on this particular template
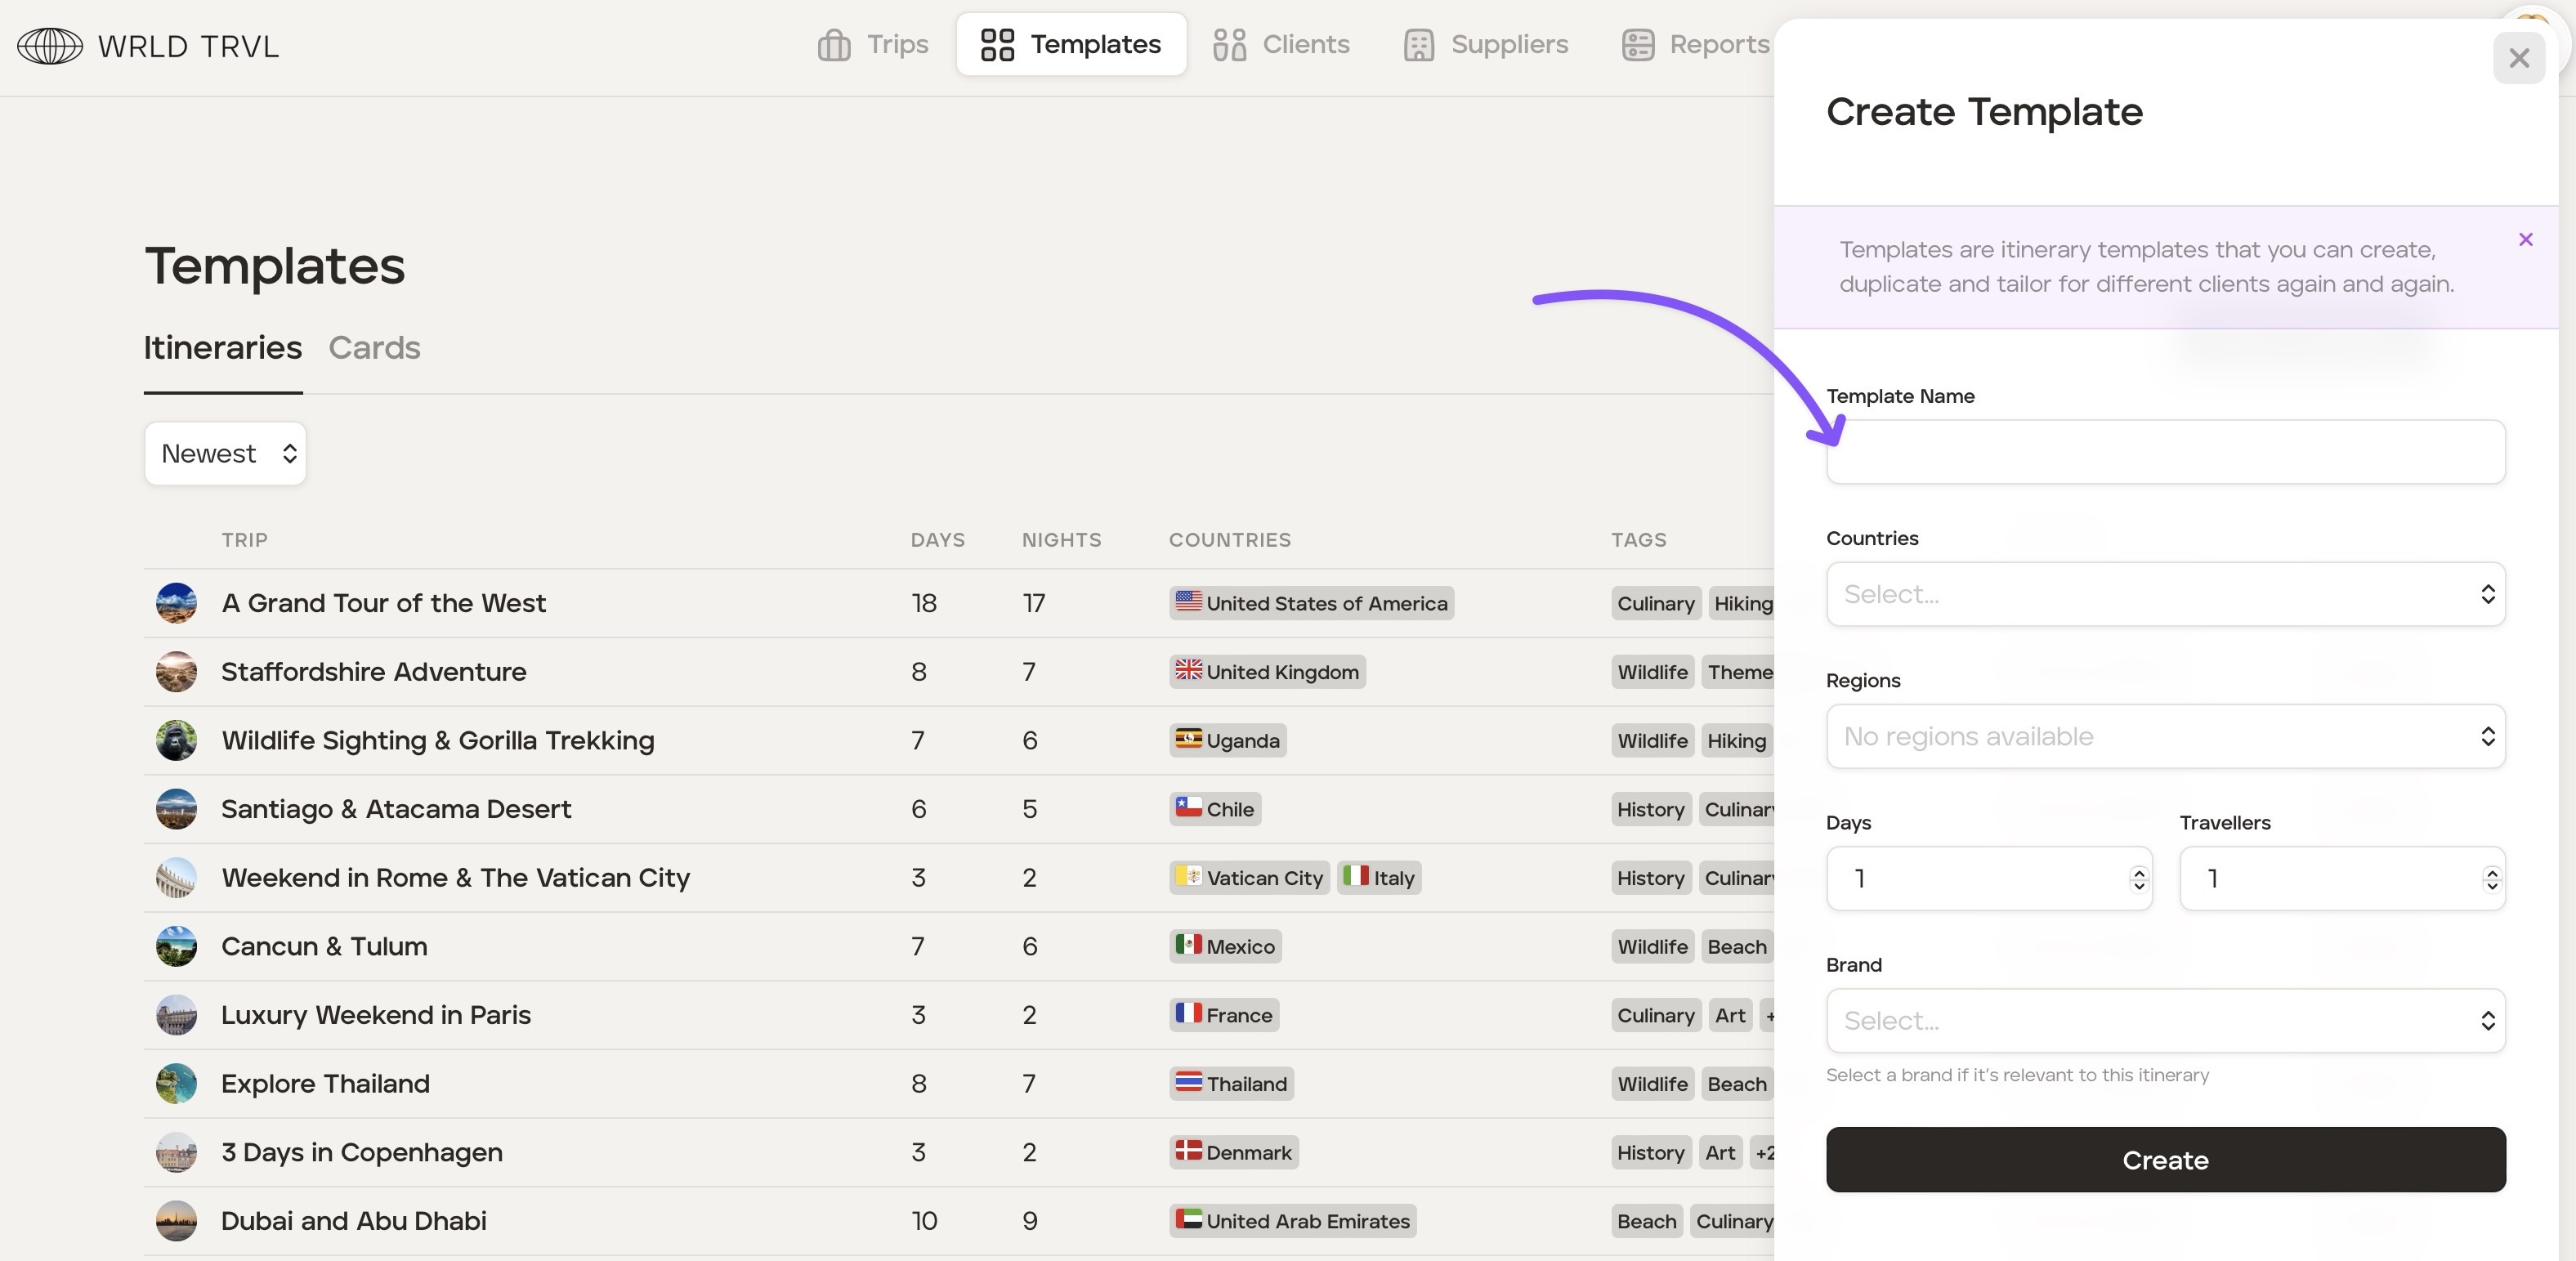
Click ‘Create.’
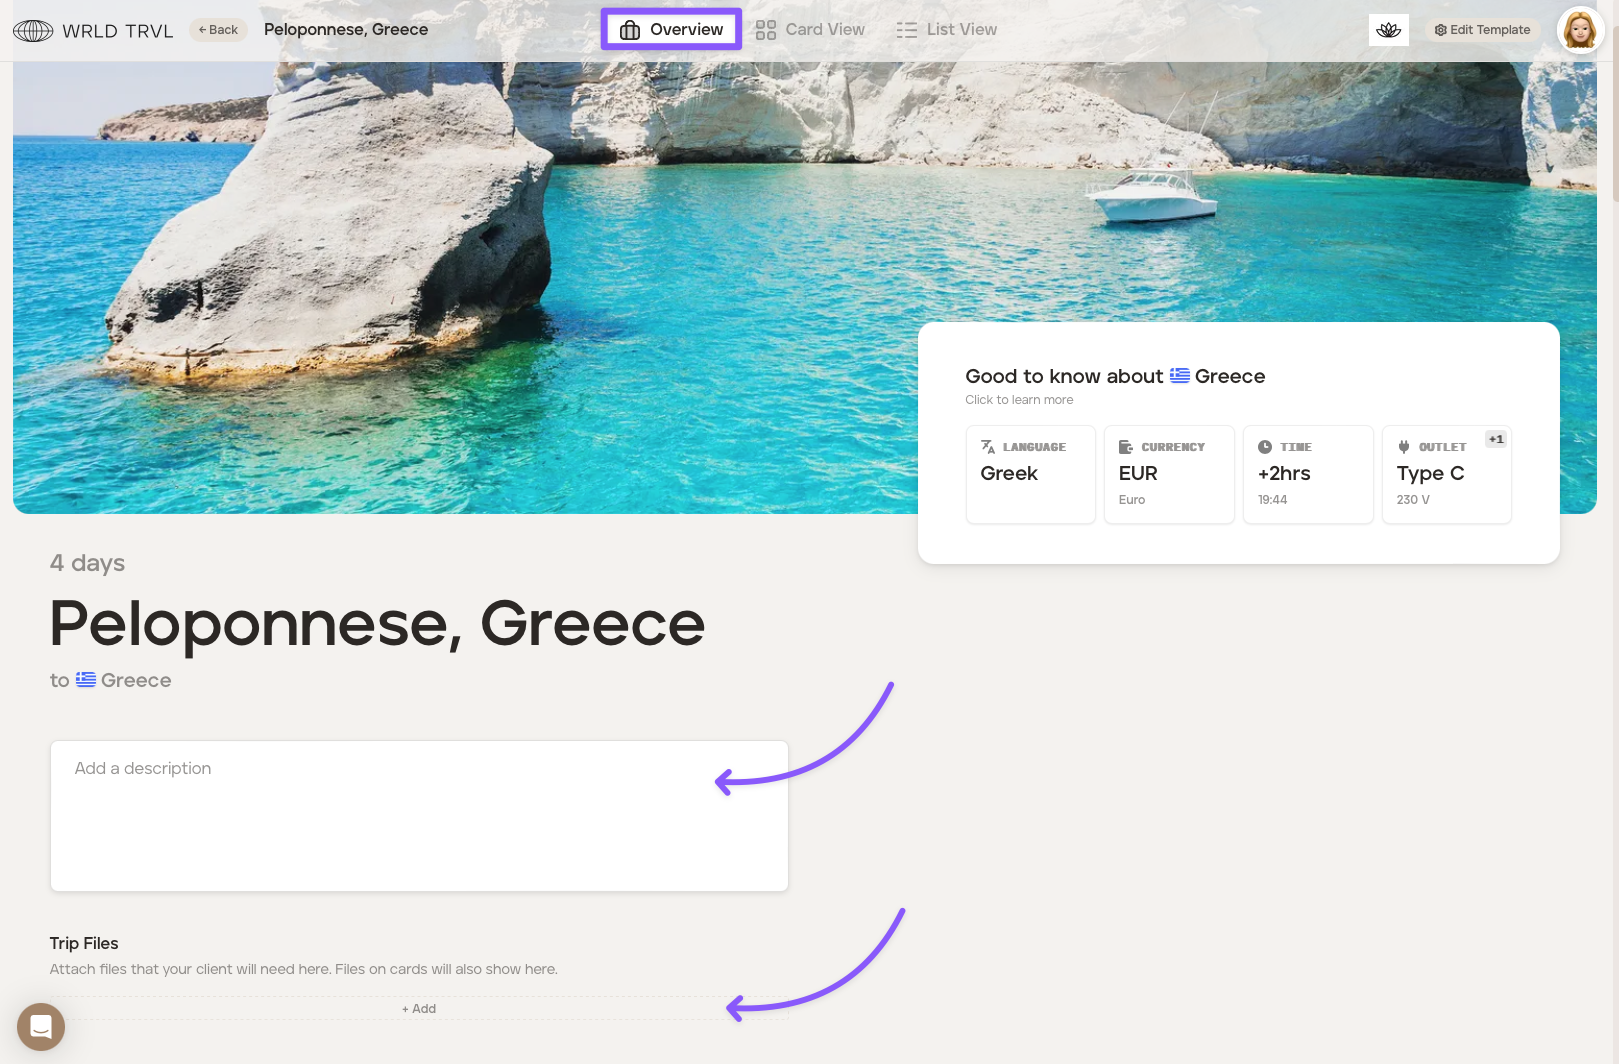
On the template itinerary ‘Overview’ screen you can:
Add a brief description to describe the trip. Markdown is available.
Attach files if you wish (remember this is only a template, not yet a client proposal).
Remain on the Overview page and scroll down slightly. You will see a panel which contains different formatting options for creating your 'travel brochure'. Your 'travel brochure' is a way to really sell the trip to your clients when you later share the 'Proposal'. You can also decide which elements of the travel brochure you want to retain when the trip is an approved 'Upcoming' trip.
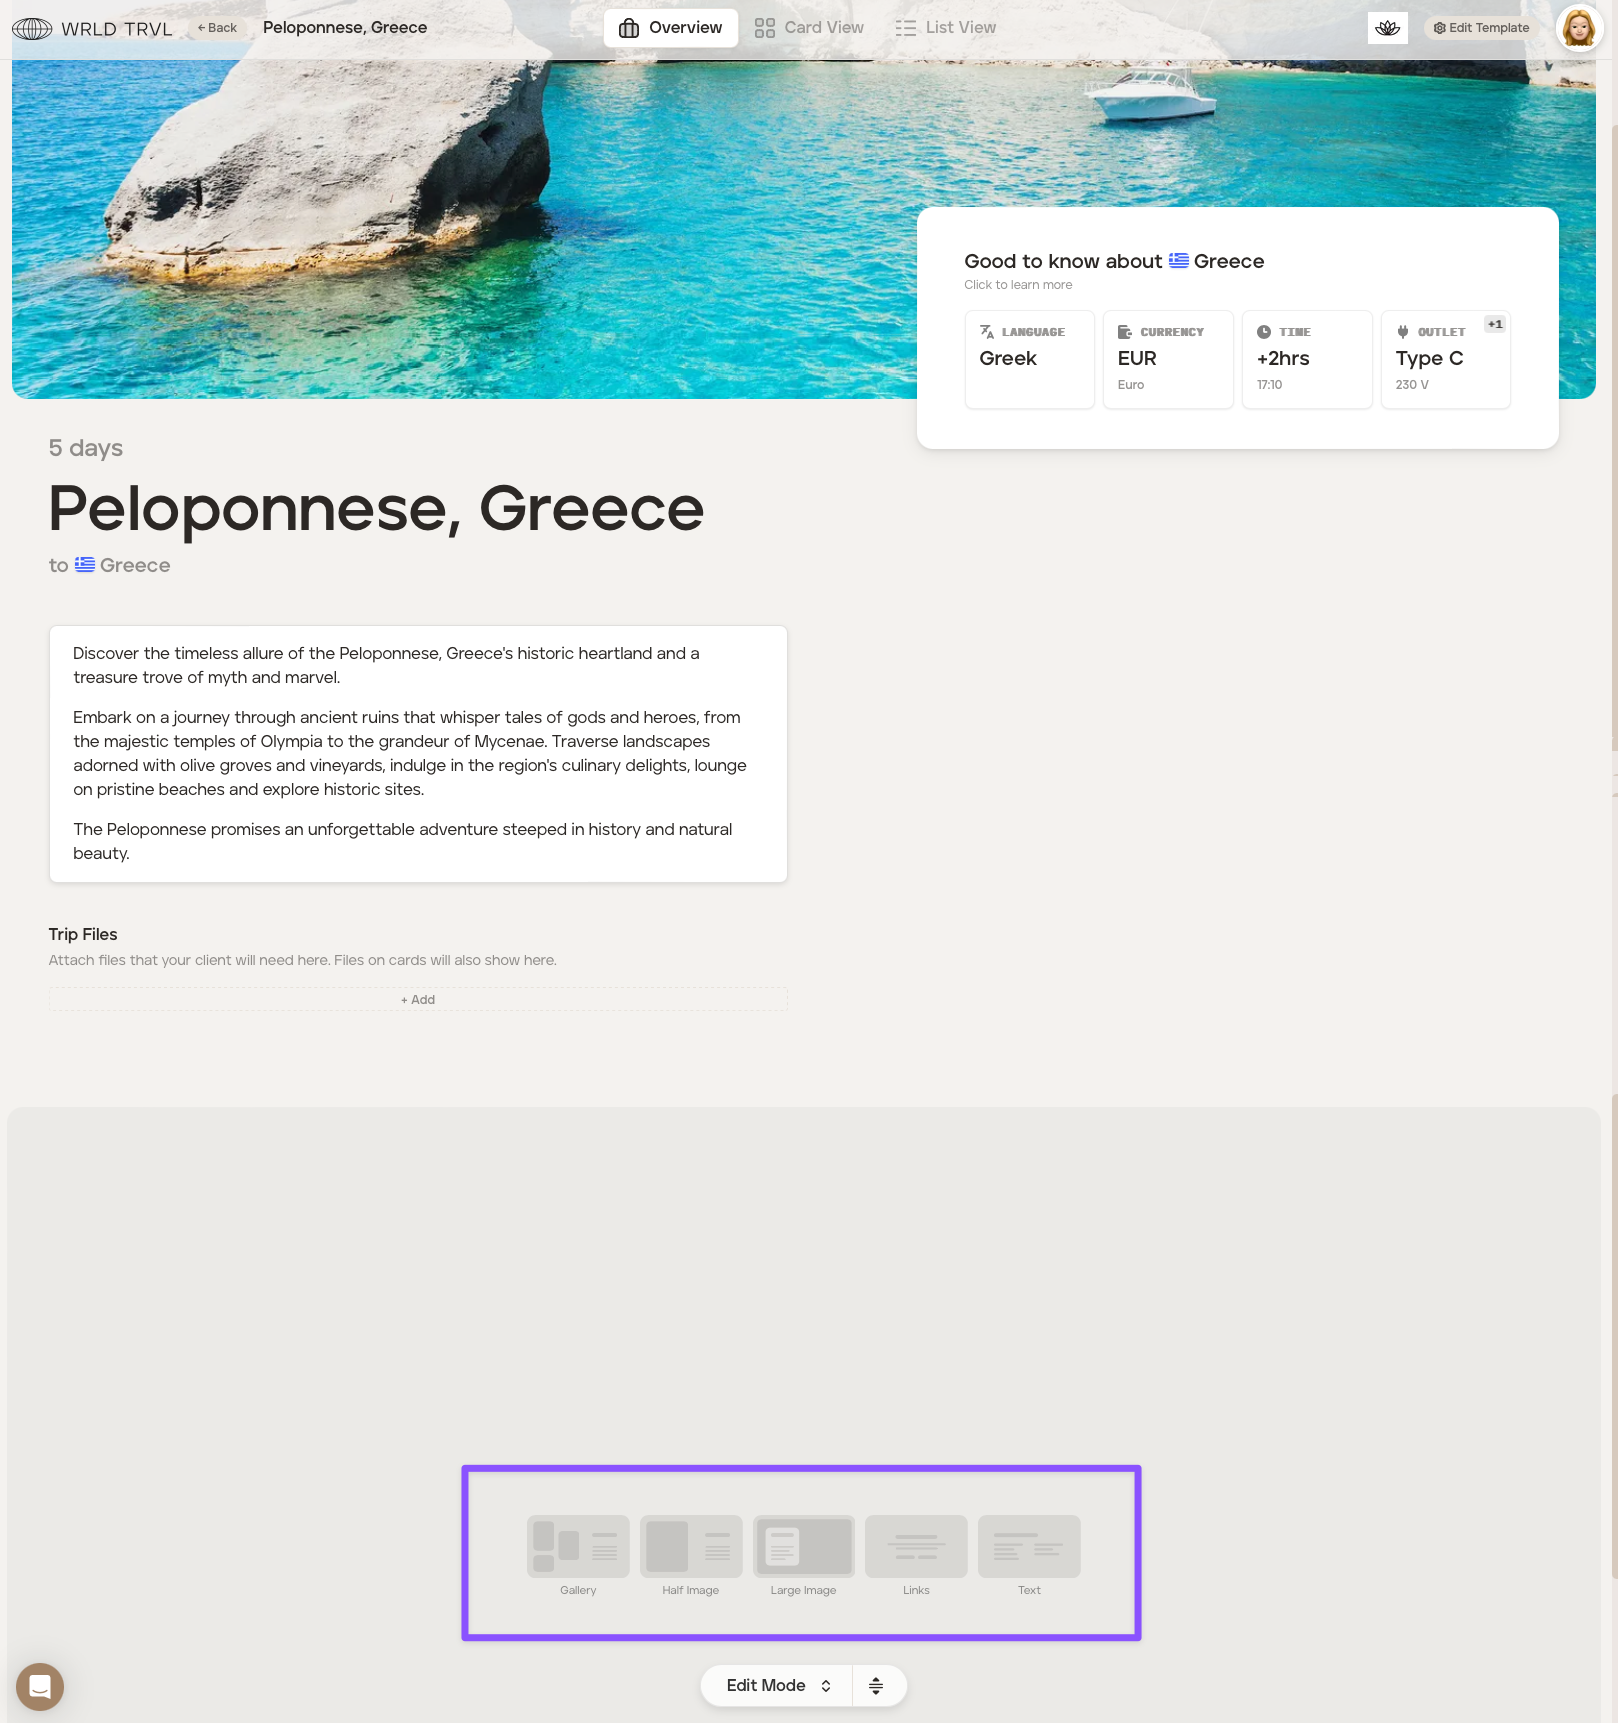

You have a range of formatting 'blocks' to pick from:
Gallery - Three images plus text, aligned to the left or the right. We recommend using high-resolution images.
Half image: An image on one half of the block and text on the other half.
Large image - A large image with or without a text box over the image.
Links - Text and customised buttons e.g. 'View itinerary', "Approval Proposal" or 'Call us".
Text - A text-only block.
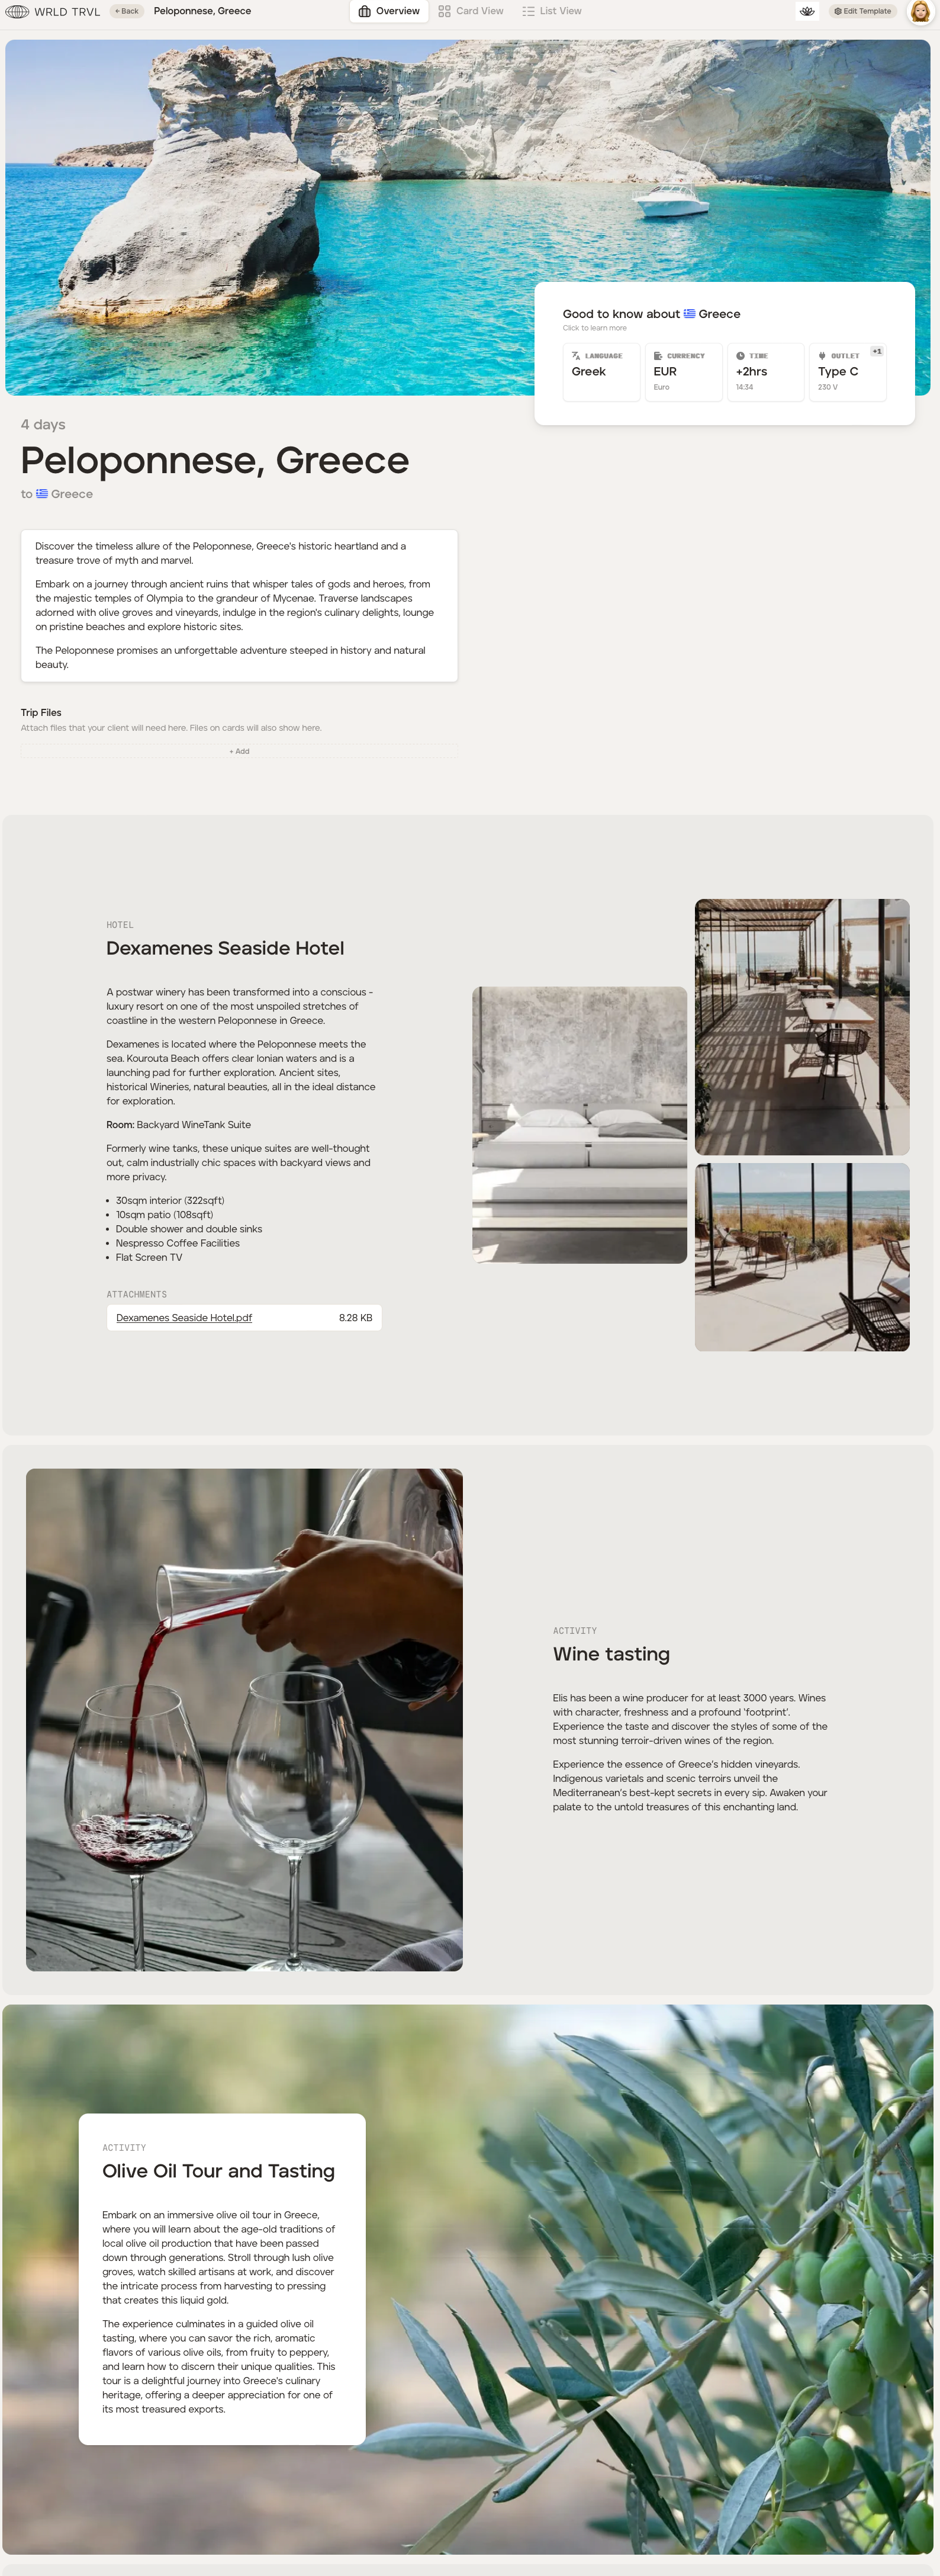
Please read our travel brochure article to learn more about creating a travel brochure like the example below:
Settings
Click the ‘Edit Template’ button in the top right of the screen.
In the 'General' tab you can:
change the template itinerary name, duration and country;
change the large banner image across the top of the ‘Overview’ screen;
create tags of your choice for the template eg. Beach, History, Culinary, Culture. This will help when searching for particular trip types within your template itinerary database; and
enable or disable the ‘Trip Ideas’ column from showing on the Card View.
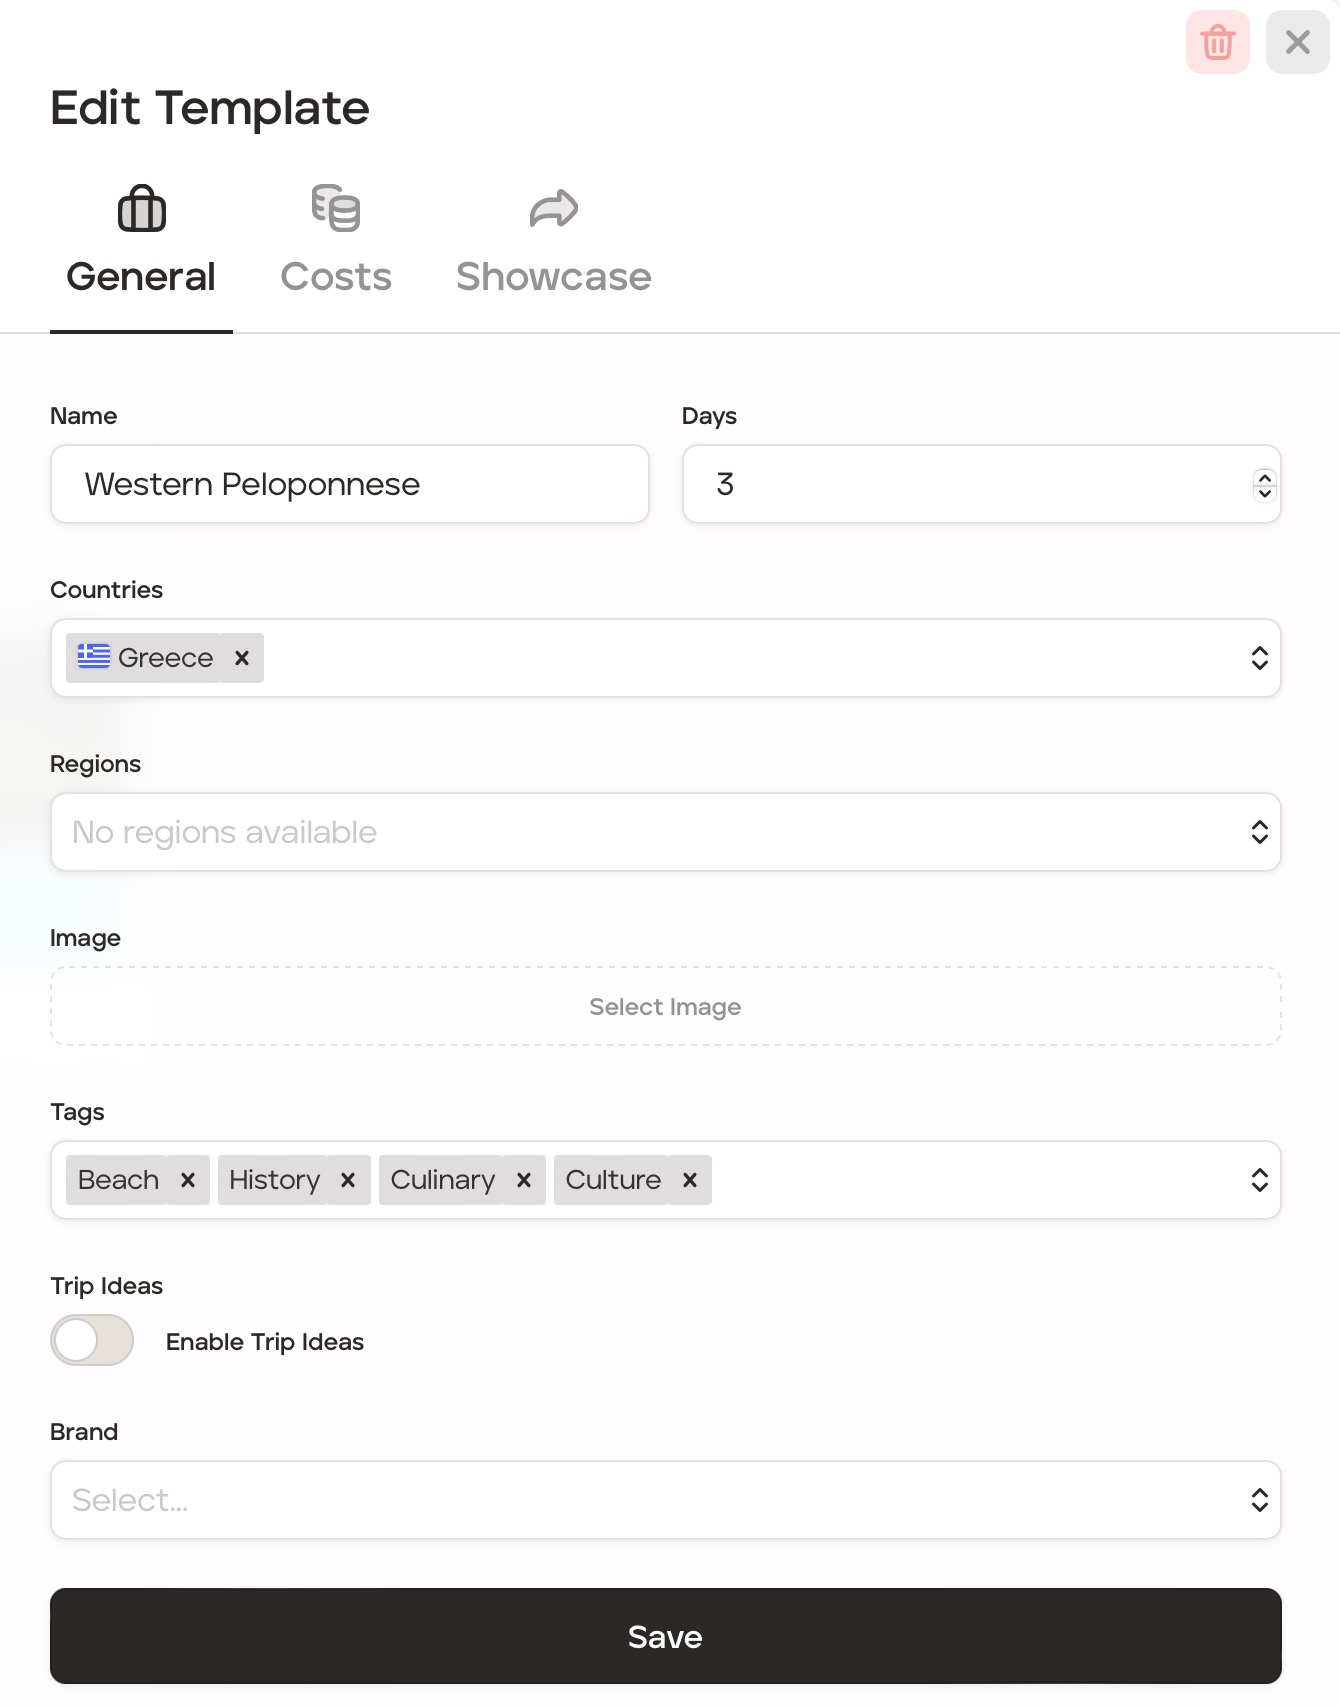
3. Click 'Save' to save any changes.
Itinerary Layout
Now it is time to start creating your template itinerary! There are two layouts you can use to build and view your template itinerary:
Card View - a kanban style layout
List View - a traditional list layout
Add itinerary cards using List View
To add itinerary cards to a template itinerary using list view, follow the steps below.
Click ‘List View’ at the top of the screen.
Hover over the area where you want to add a card until you see the purple bar.
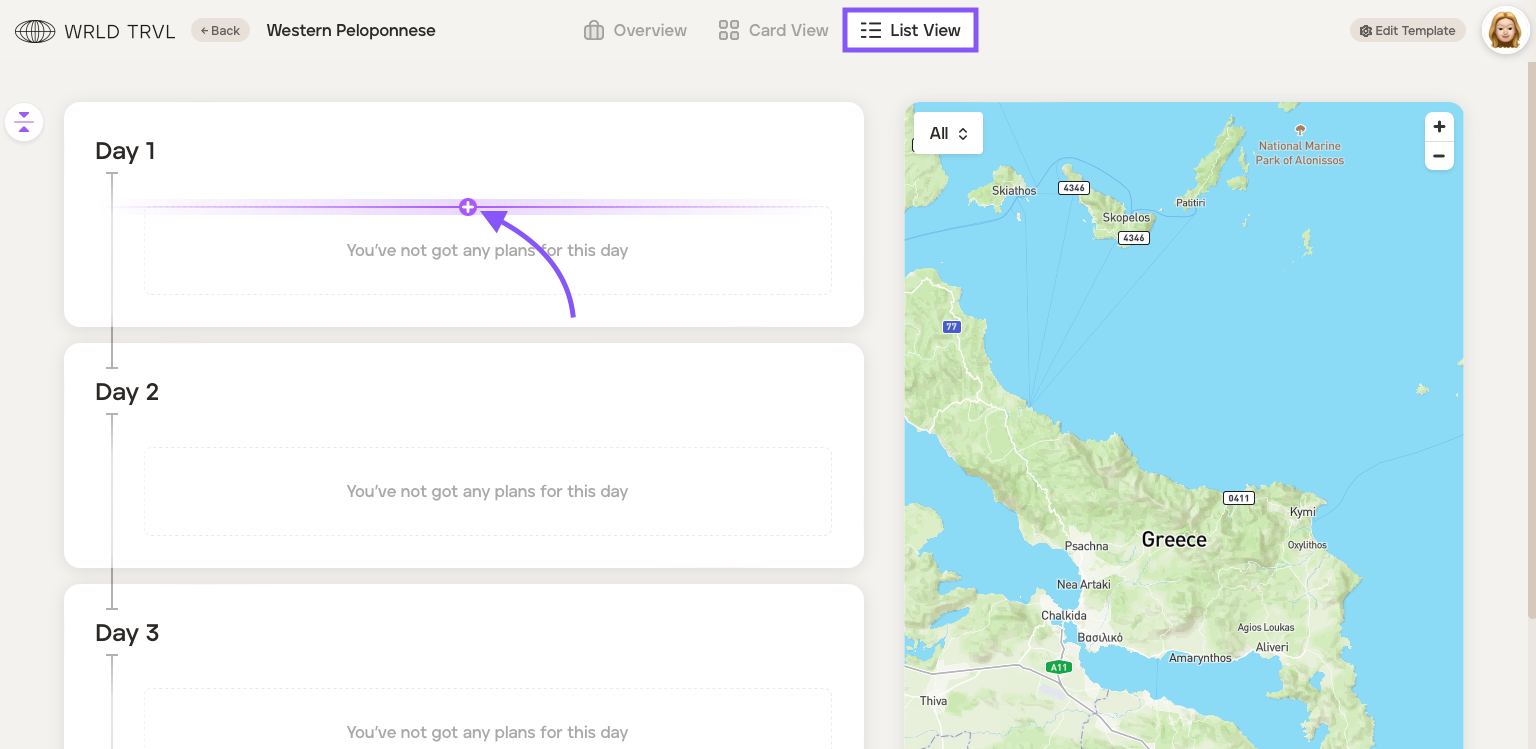
Click the purple bar which will bring up the launcher.
Click the relevant card category icon in the launcher ('Accommodation', 'Activity', 'Food', 'Travel' or 'Other').
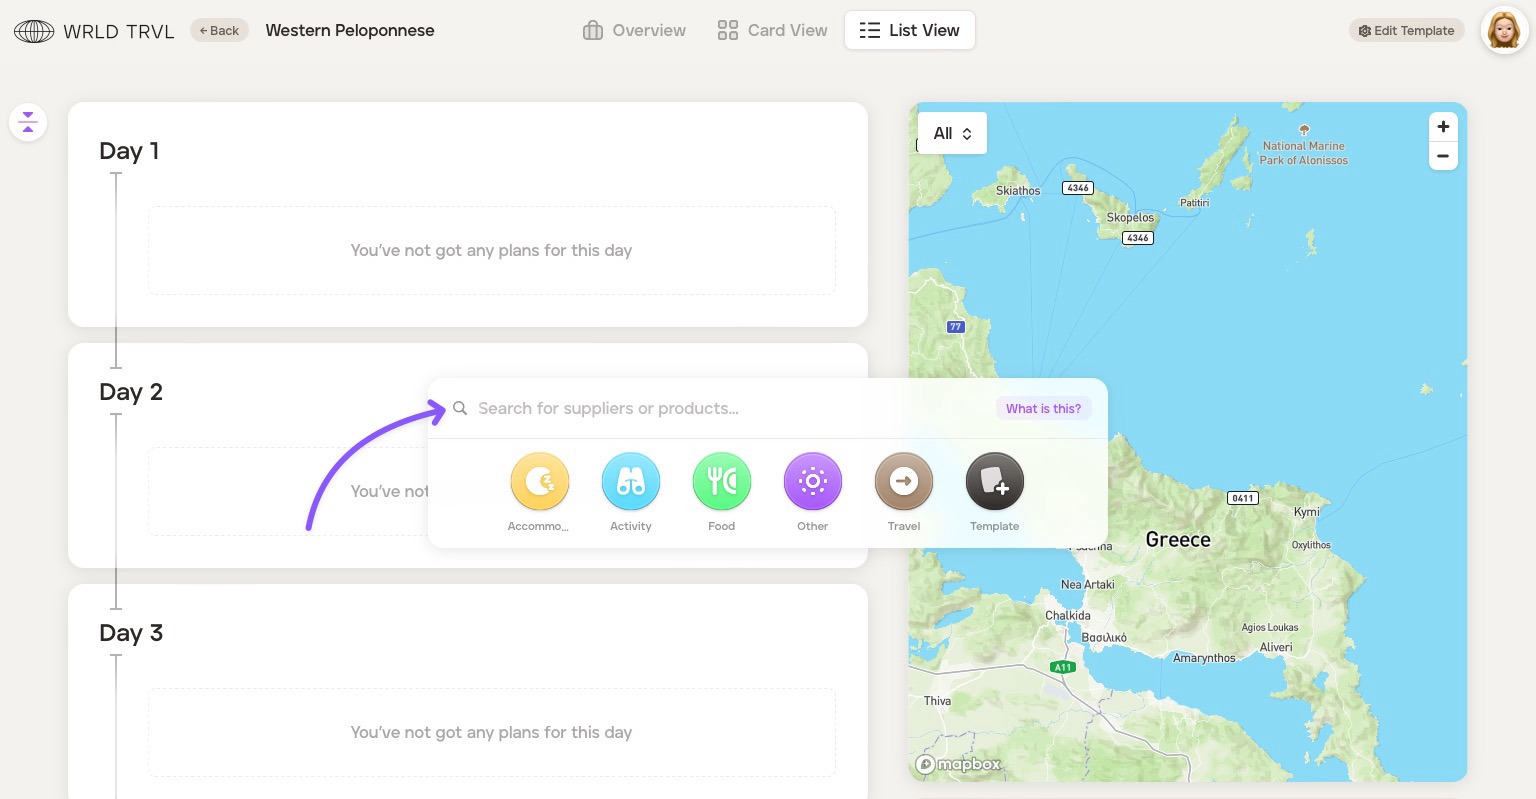
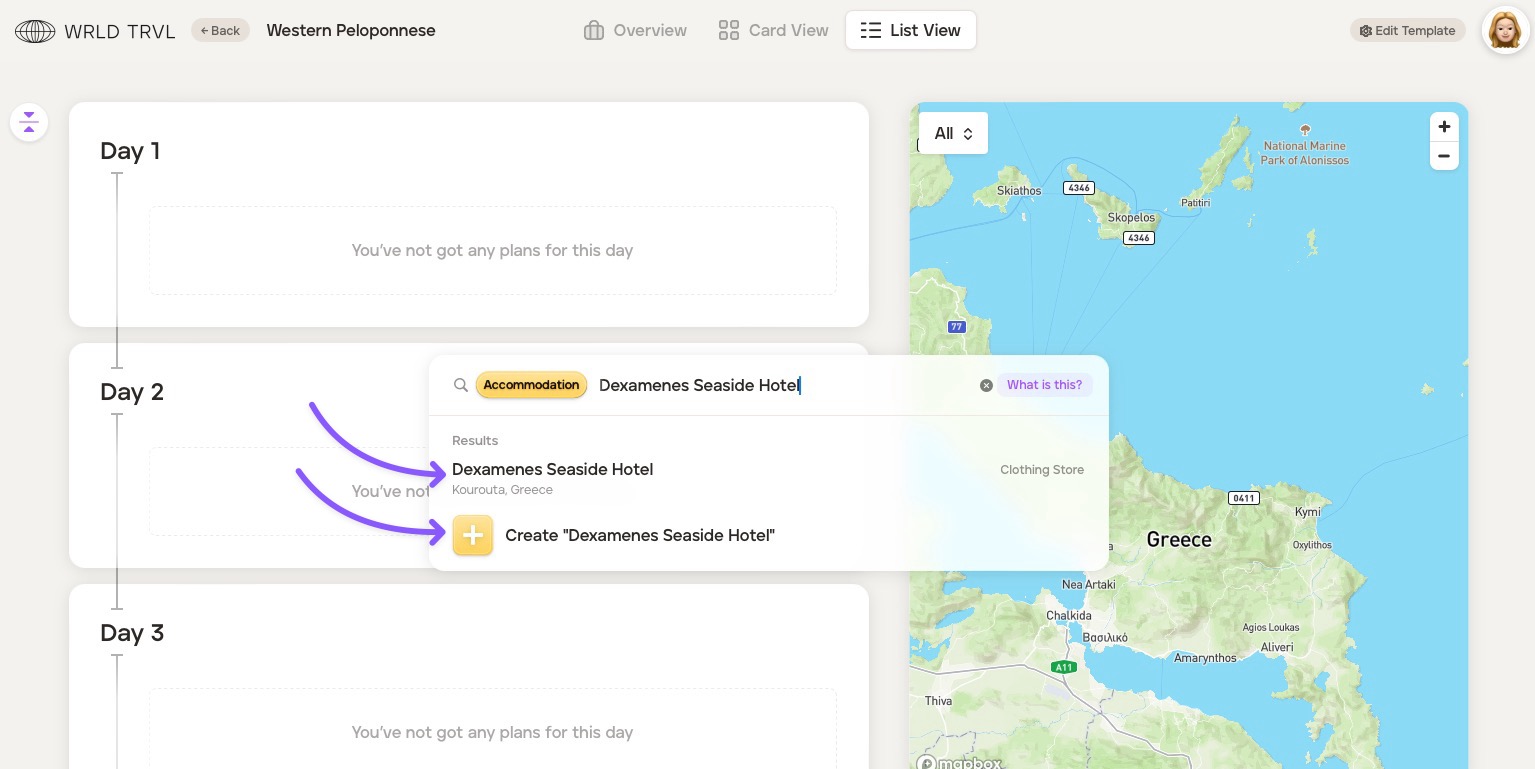
The search bar will show the card category chosen. Search for the location or add a card title. This will display:
Google location results; AND
the ability to simply create a card with the title typed in the search bar.
Click either:
the relevant Google location result (which will add the name of the result as the card title and add accompanying location and business data to the card); OR
'+ Create ''xxxx" which will add the card with the title typed in the search bar only.
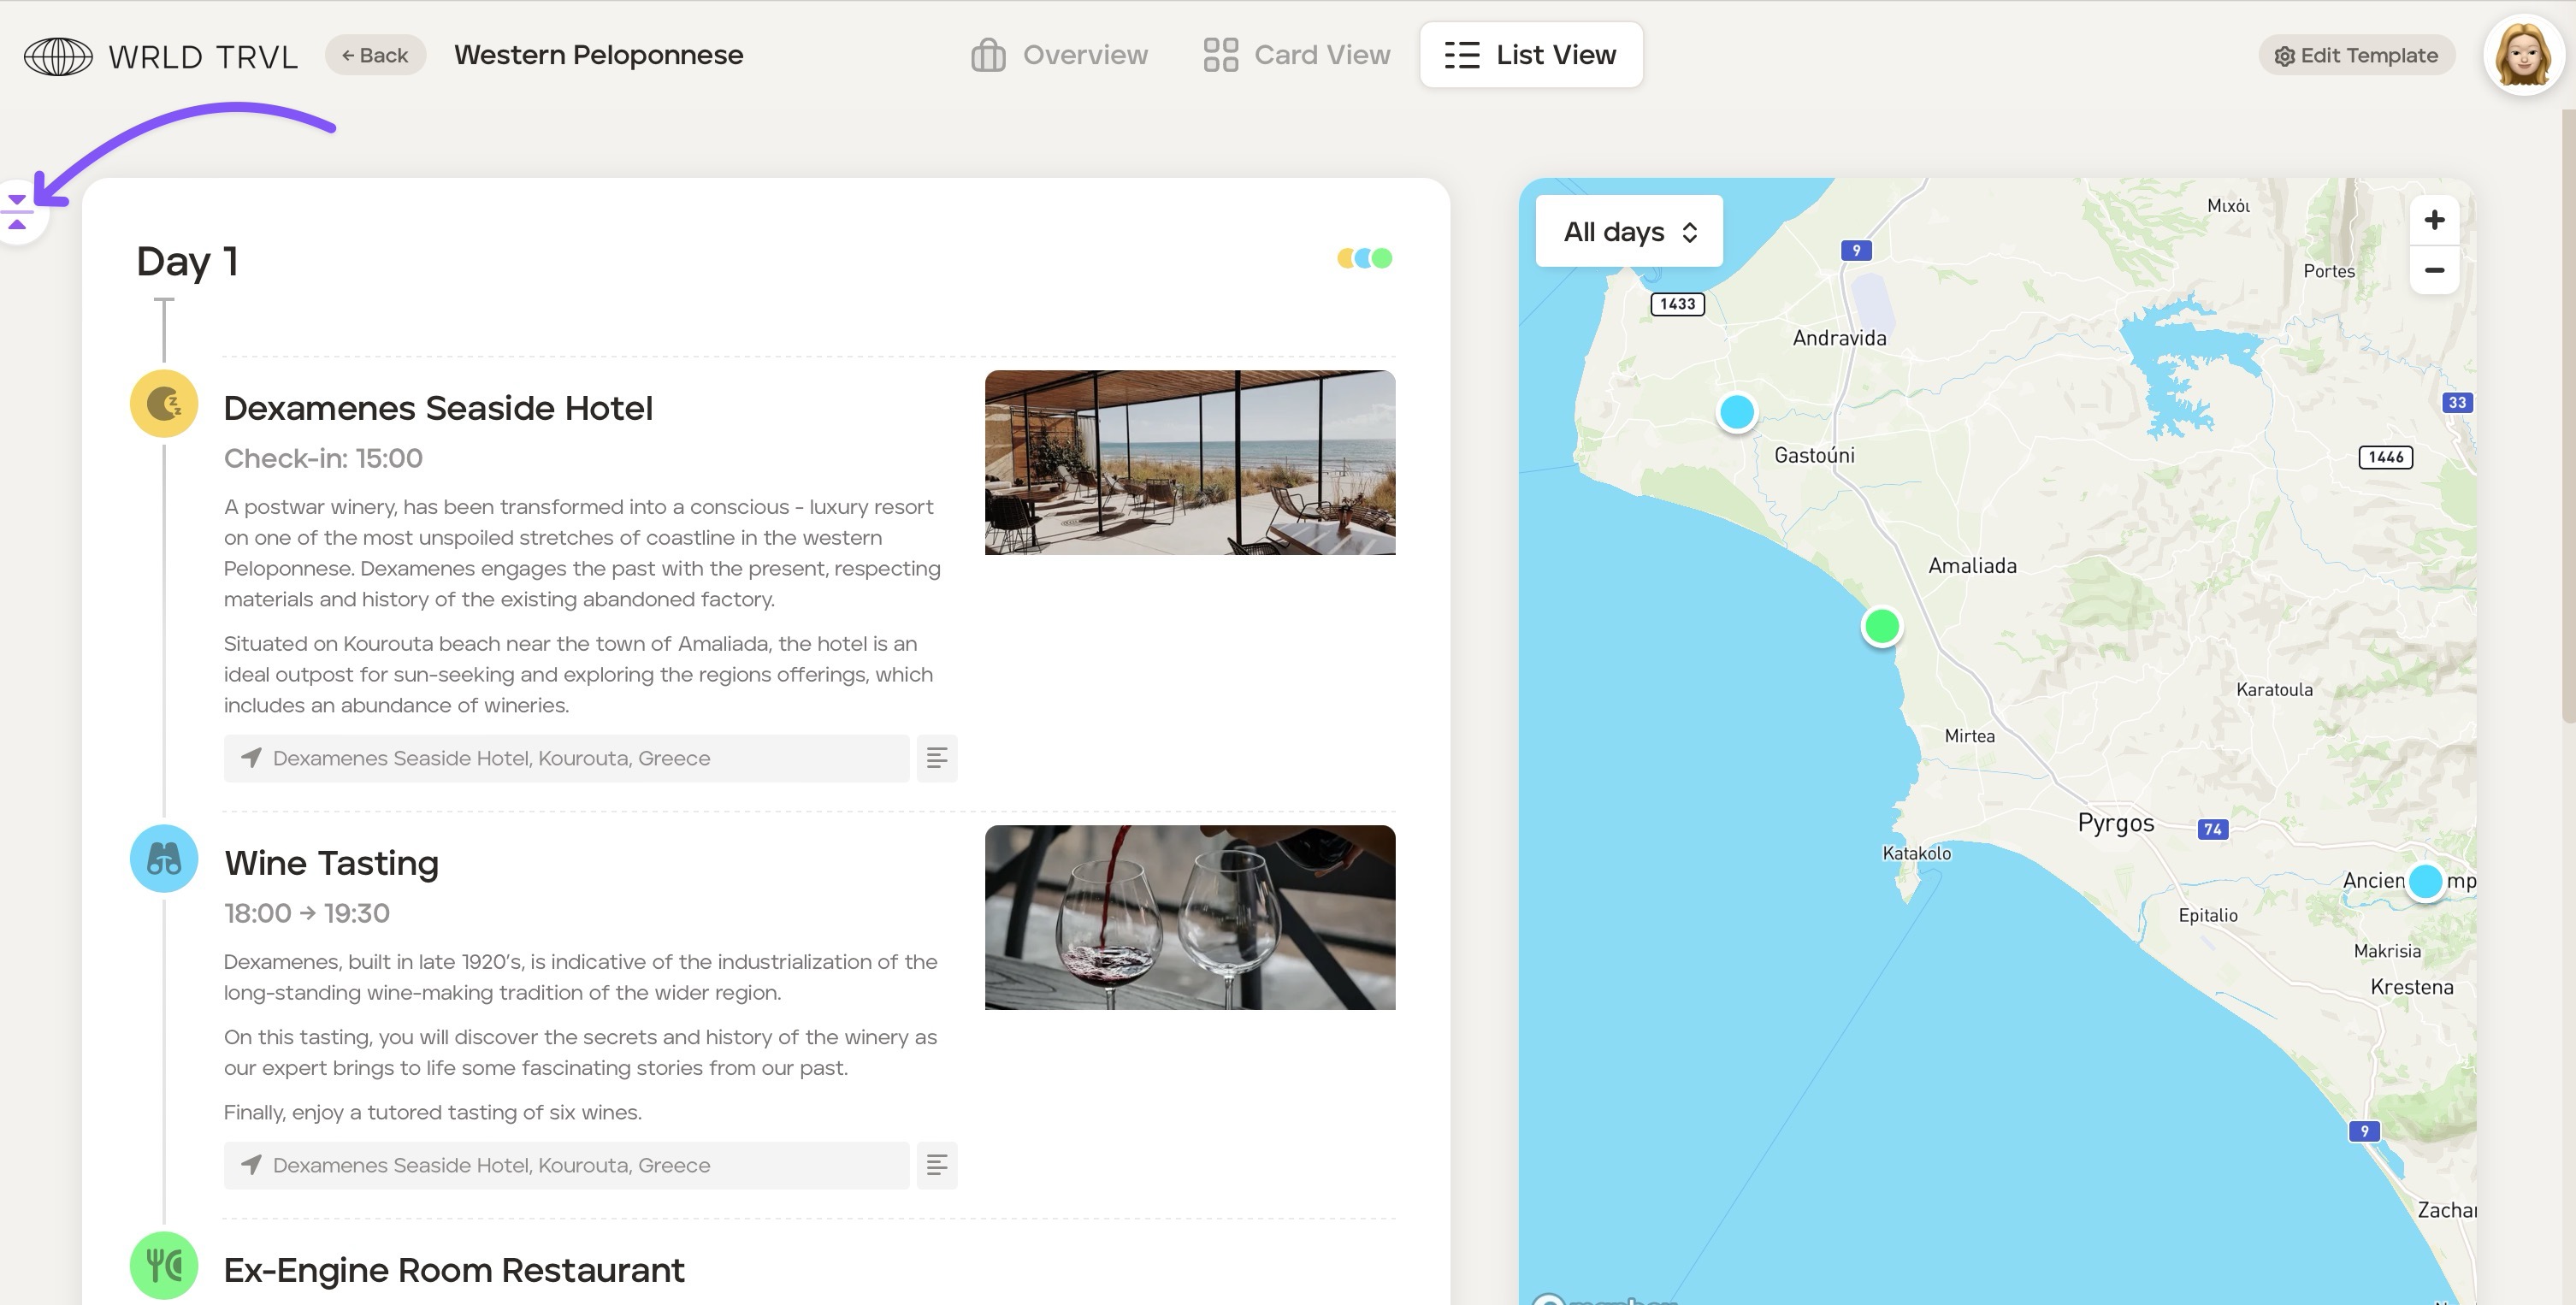
The card will then slide in from the right.
Add any additional information you wish to the card. Fill in as much, or as little, information as you wish on the card (remember this is a template only which you will later duplicate and tailor for your clients). Scroll down the card to reveal all the inputs which are slightly different depending on the card type ('Accommodation', 'Activity', 'Food', 'Travel' or 'Other').
Once you have input your information, close the card by clicking ‘Close’ on the top right of the card (or click anywhere on the screen outside the card).
To add images to your cards, please read this article.
Continue to build your template itinerary by repeating this process of adding cards. Drag- and-drop functionality allows for easy building! All cards are colour-coded to easily differentiate between the cards and to make the itinerary visual for you and your clients. To change the default card colours to match your brand, please read this article.
Once you have created your template itinerary, click ‘Back’ on the top left of the screen to return to the ‘Templates’ database, where it will now be located. You can go back into your template itinerary at any time to make changes.
Expand and collapse functionality
To show or hide any notes added to cards in List View, click the expand/ collapse icon.
PDF template itinerary
Download the template itinerary in PDF by clicking ‘Download Itinerary’ in List View.

Add itinerary cards using Card View
To add itinerary cards to a template itinerary using card view, follow the steps below.
Click ‘Card View’ at the top of the screen.
Click the '+New Card' button, which will bring up the launcher.
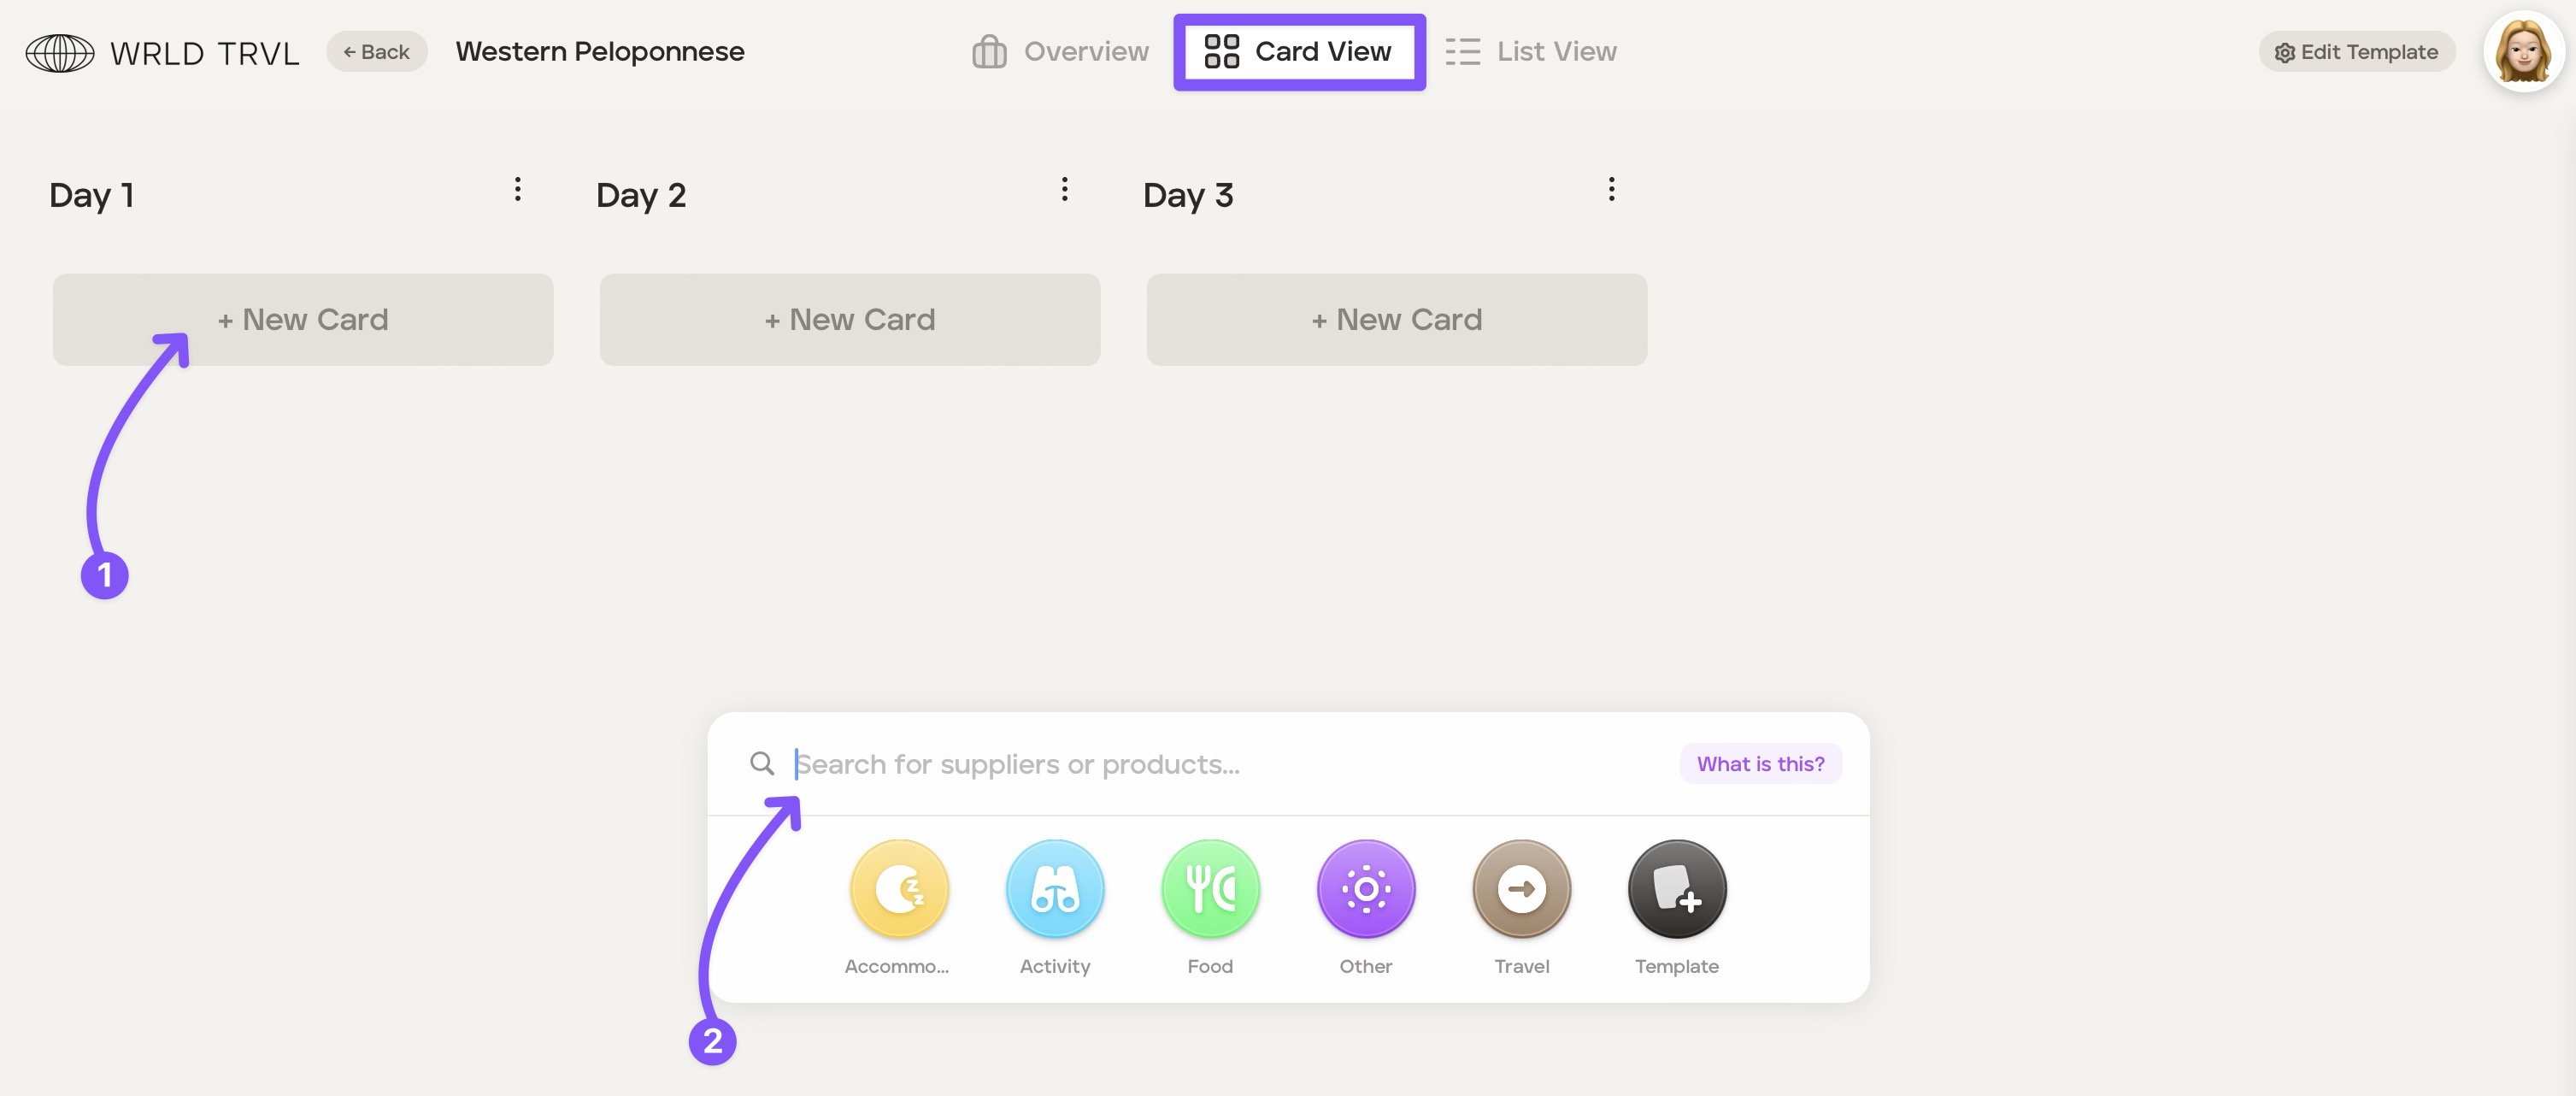
Click the relevant card category icon in the launcher ('Accommodation', 'Activity', 'Food', 'Travel' or 'Other').
The search bar will show the card category chosen. Search for the location or add a card title. This will display:
Google location results; AND
the ability to simply create a card with the title typed in the search bar.
Click either:
the relevant Google location result (which will add the name of the result as the card title and add accompanying location and business data to the card); OR
'+ Create ''xxxx" which will add the card with the title typed in the search bar only.
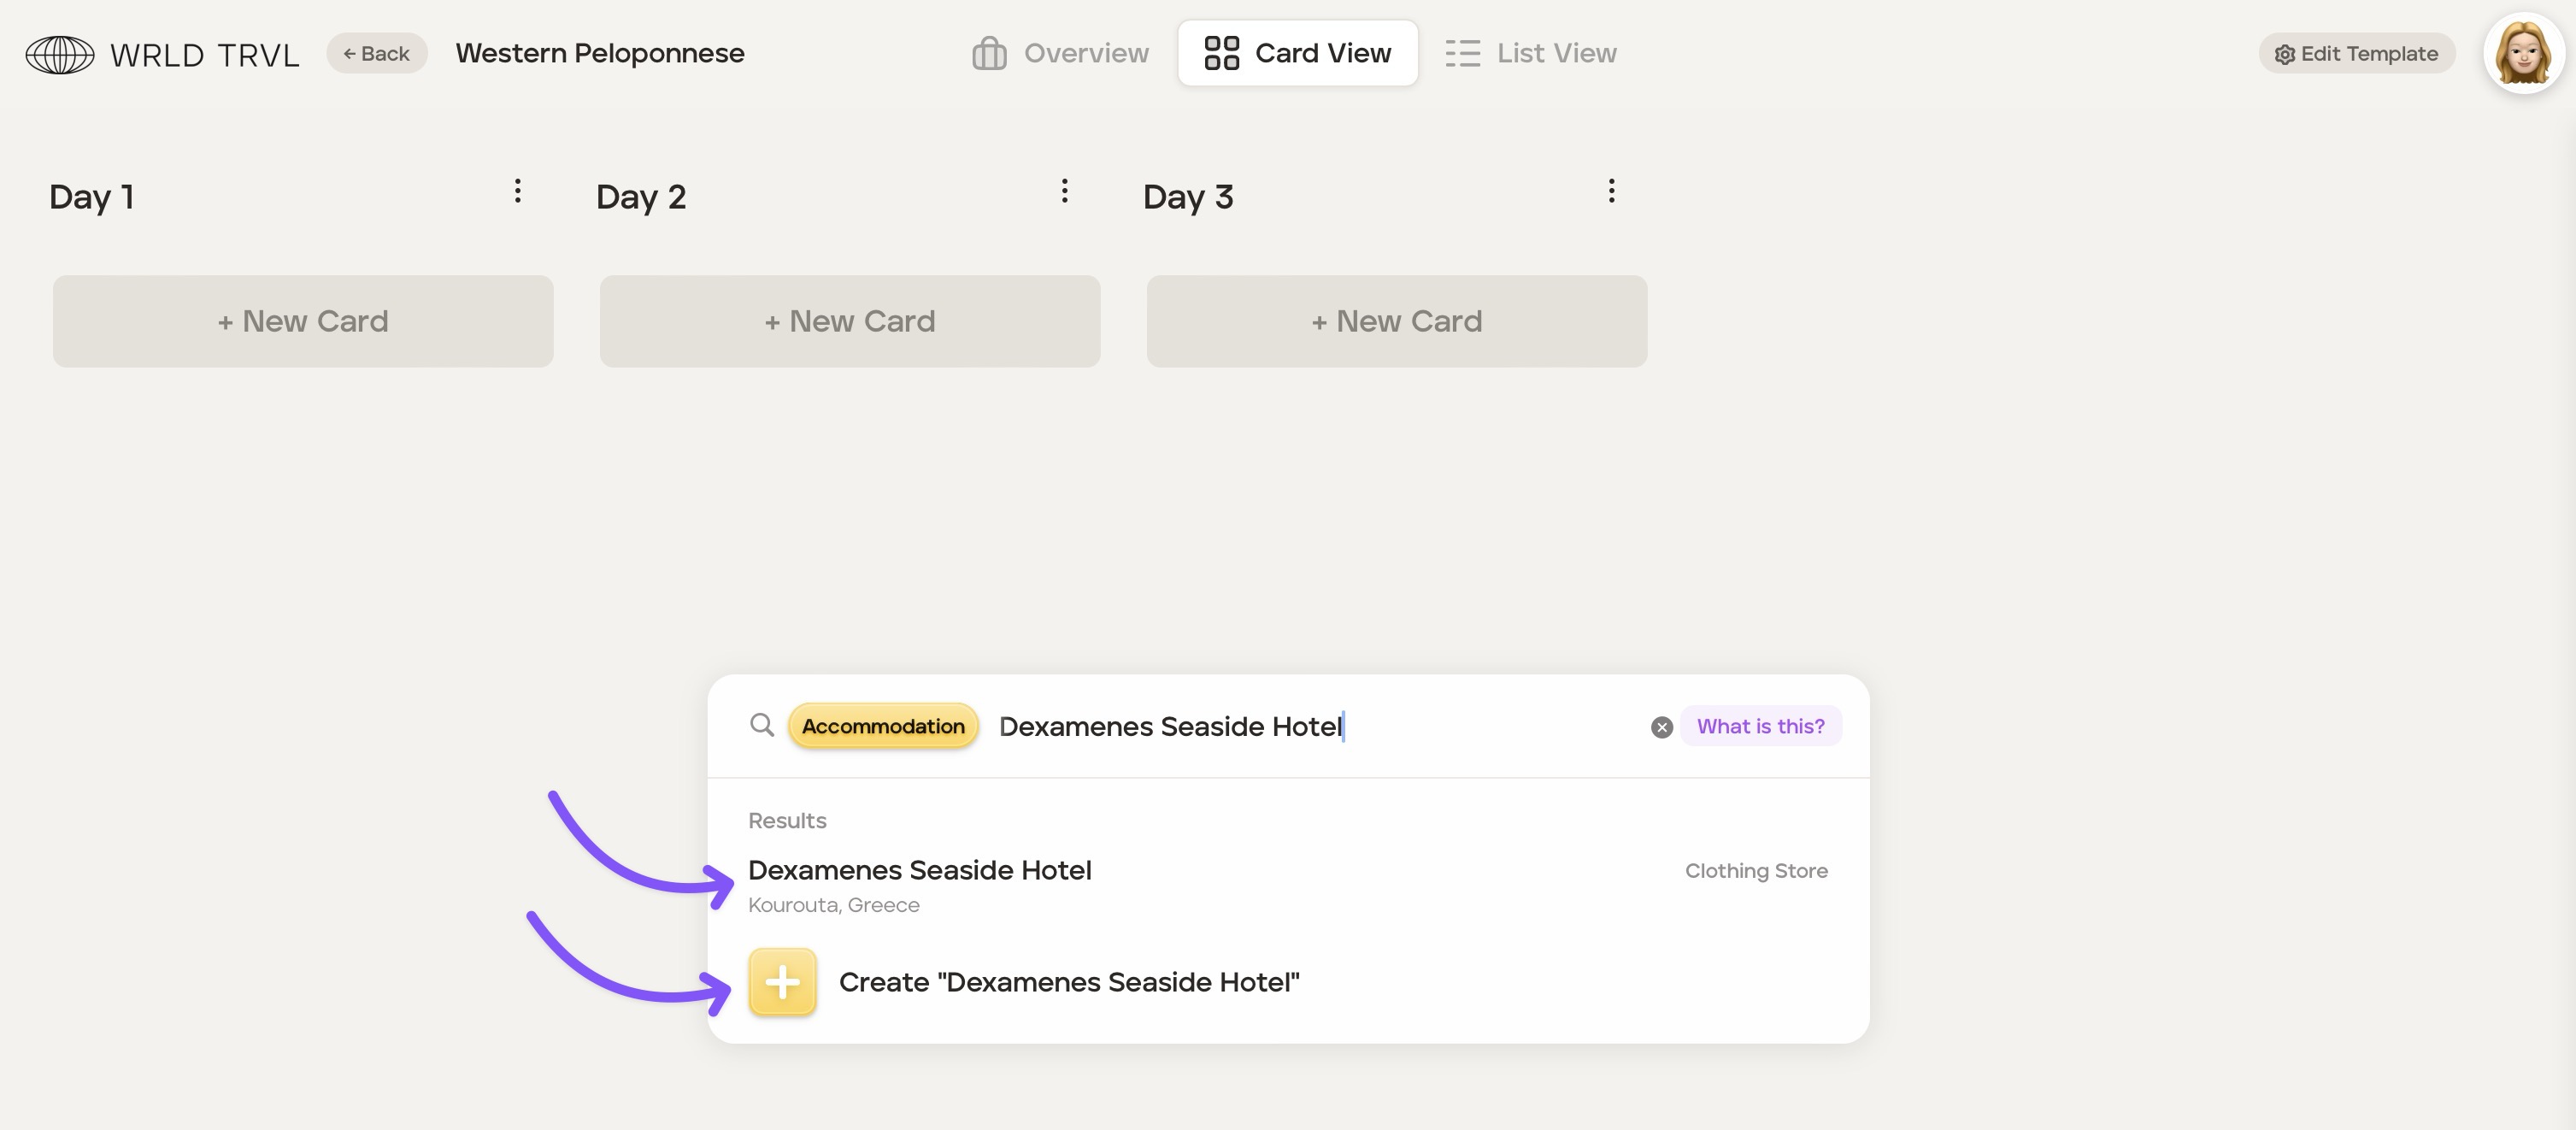
The card will then slide in from the right.
Add any additional information you wish to the card. Fill in as much, or as little, information as you wish on the card (remember this is a template only which you will later duplicate and tailor for your clients). Scroll down the card to reveal all the inputs which are slightly different depending on the card type ('Accommodation', 'Activity', 'Food', 'Travel' or 'Other').
Once you have input your information, close the card by clicking ‘Close’ on the top right of the card (or click anywhere on the screen outside the card).
To add images to your cards, please read this article.
Continue to build your template itinerary by repeating this process of adding cards. Drag- and-drop functionality allows for easy building! All cards are colour-coded to easily differentiate between the cards and to make the itinerary visual for you and your clients. To change the default card colours to match your brand, please read this article.
Once you have created your template itinerary click ‘Back’ on the top left of the screen to return to the ‘Templates’ database, where it will now be located. You can go back into your template itinerary at any time to make changes.
Trip ideas column
If you have some itinerary ideas which you do not want to place within the template itinerary itself, you can follow the same process of adding cards in the ‘Trip Ideas’ column on the left-hand side of the screen.
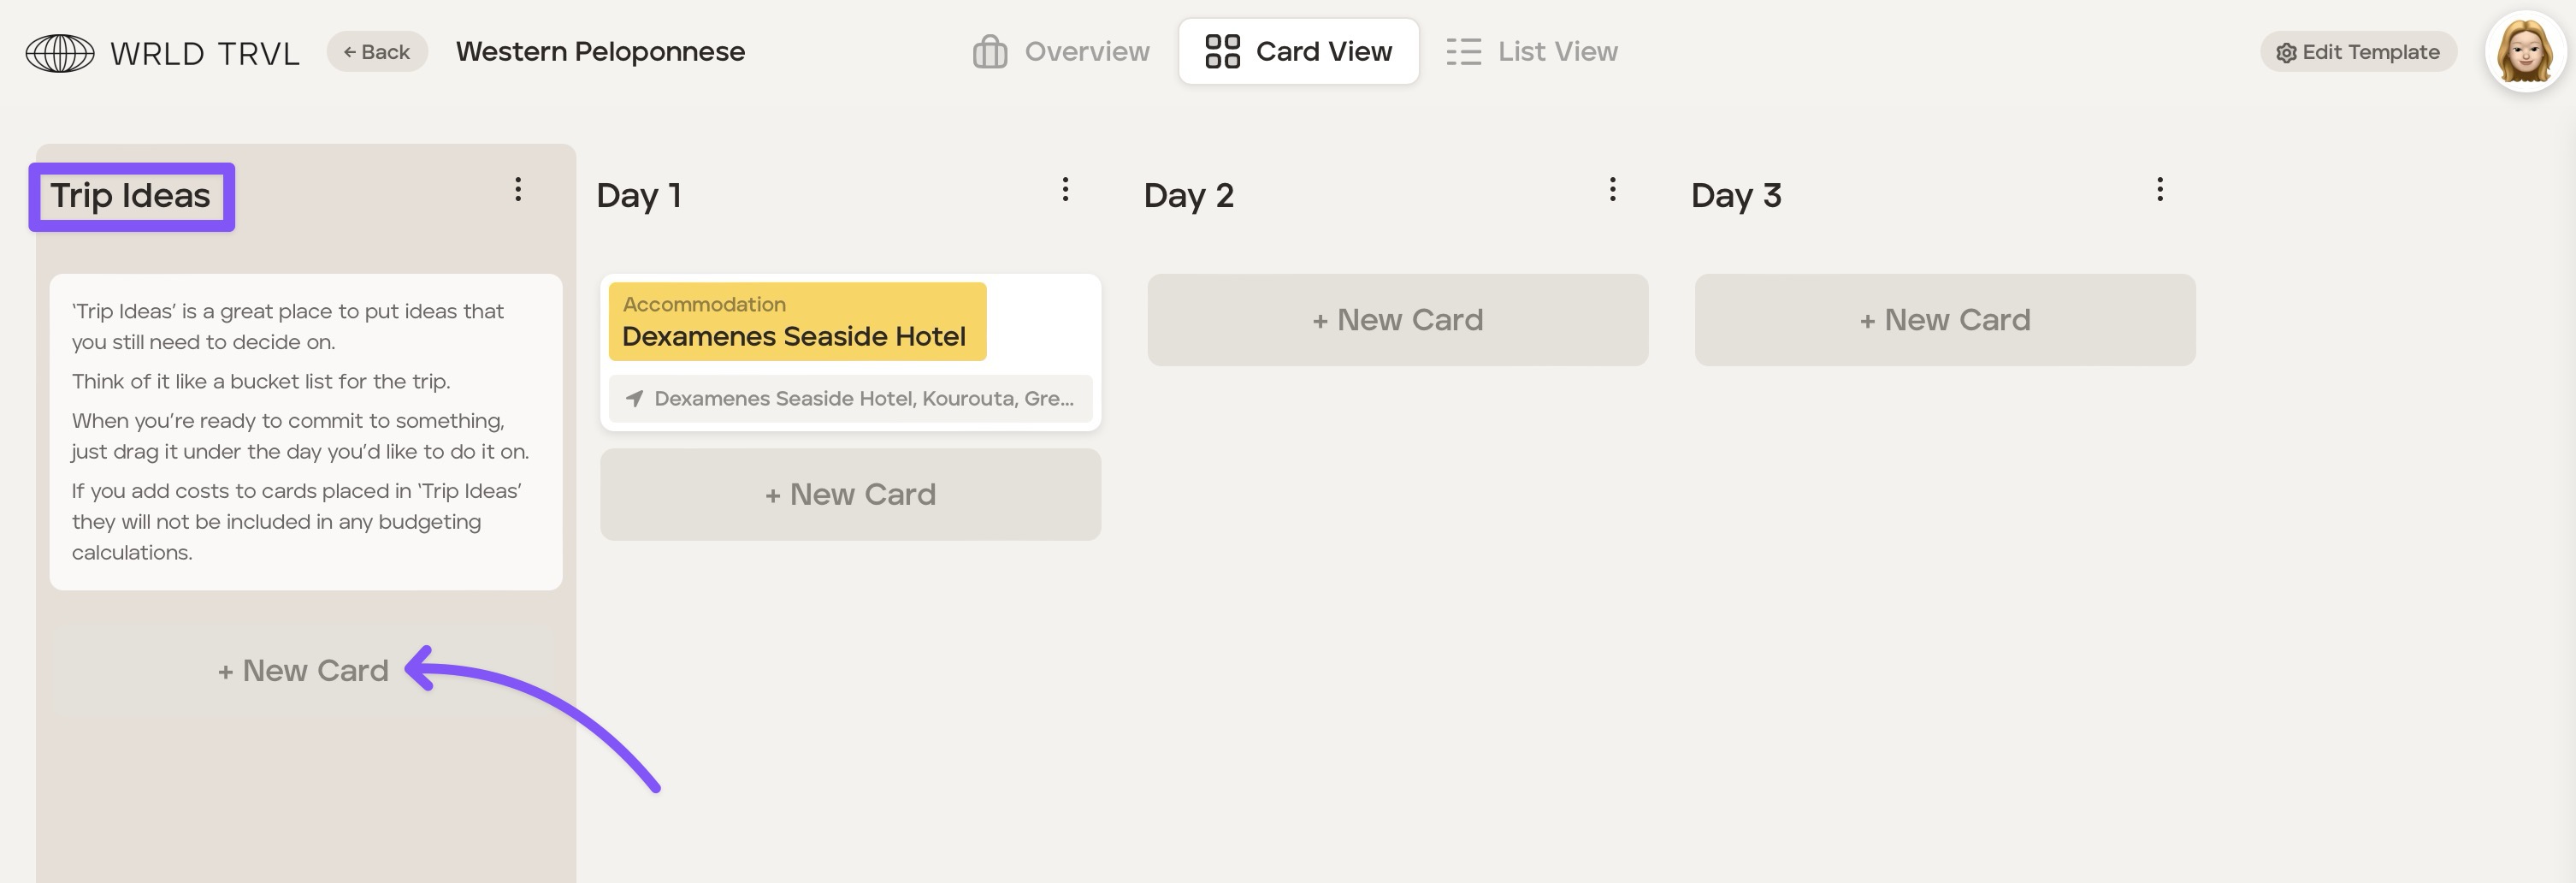
You can choose whether or not to have the 'Trip Ideas' column by clicking ‘Edit Template’ in the top right of the screen, selecting the 'General' tab and disabling the feature using the 'Trip Ideas' switch.
Creating a template from an existing itinerary
To create a template from an itinerary, you can do so via the table view in the Trips section. On the right-hand side of the row, you will find an ellipsis (three dots); click that to reveal an option menu.
Click the Make Template option to create a template from the selected itinerary. Please note that when the template is created, we remove all traveller information and attachments from the newly created template. We will, however, preserve notes, so ensure you've cleared any client data in there before using the template for someone else.