New Quickbase Record to TripMapper Trip
In this Zap, we take the New Record Quickbase event and pass the resulting data to TripMapper via the Create or Update Trip action. Finally, we take the identifier for the trip by TripMapper and save it back to the QuickBase record so that you can make further updates to the trip as required through supplementary Zaps.
This Zap is great if your data originates in another platform, but you need it to sync to TripMapper so you can continue with the itinerary-building process there.
The Trigger
Let's start by creating a new Zap and selecting Quickbase as your Trigger app.
If it's not already connected, make sure your Quickbase account is linked to your Zapier account so you can use it in your Zaps.
Once you've selected Quickbase, pick New Record from the dropdown labelled Event.
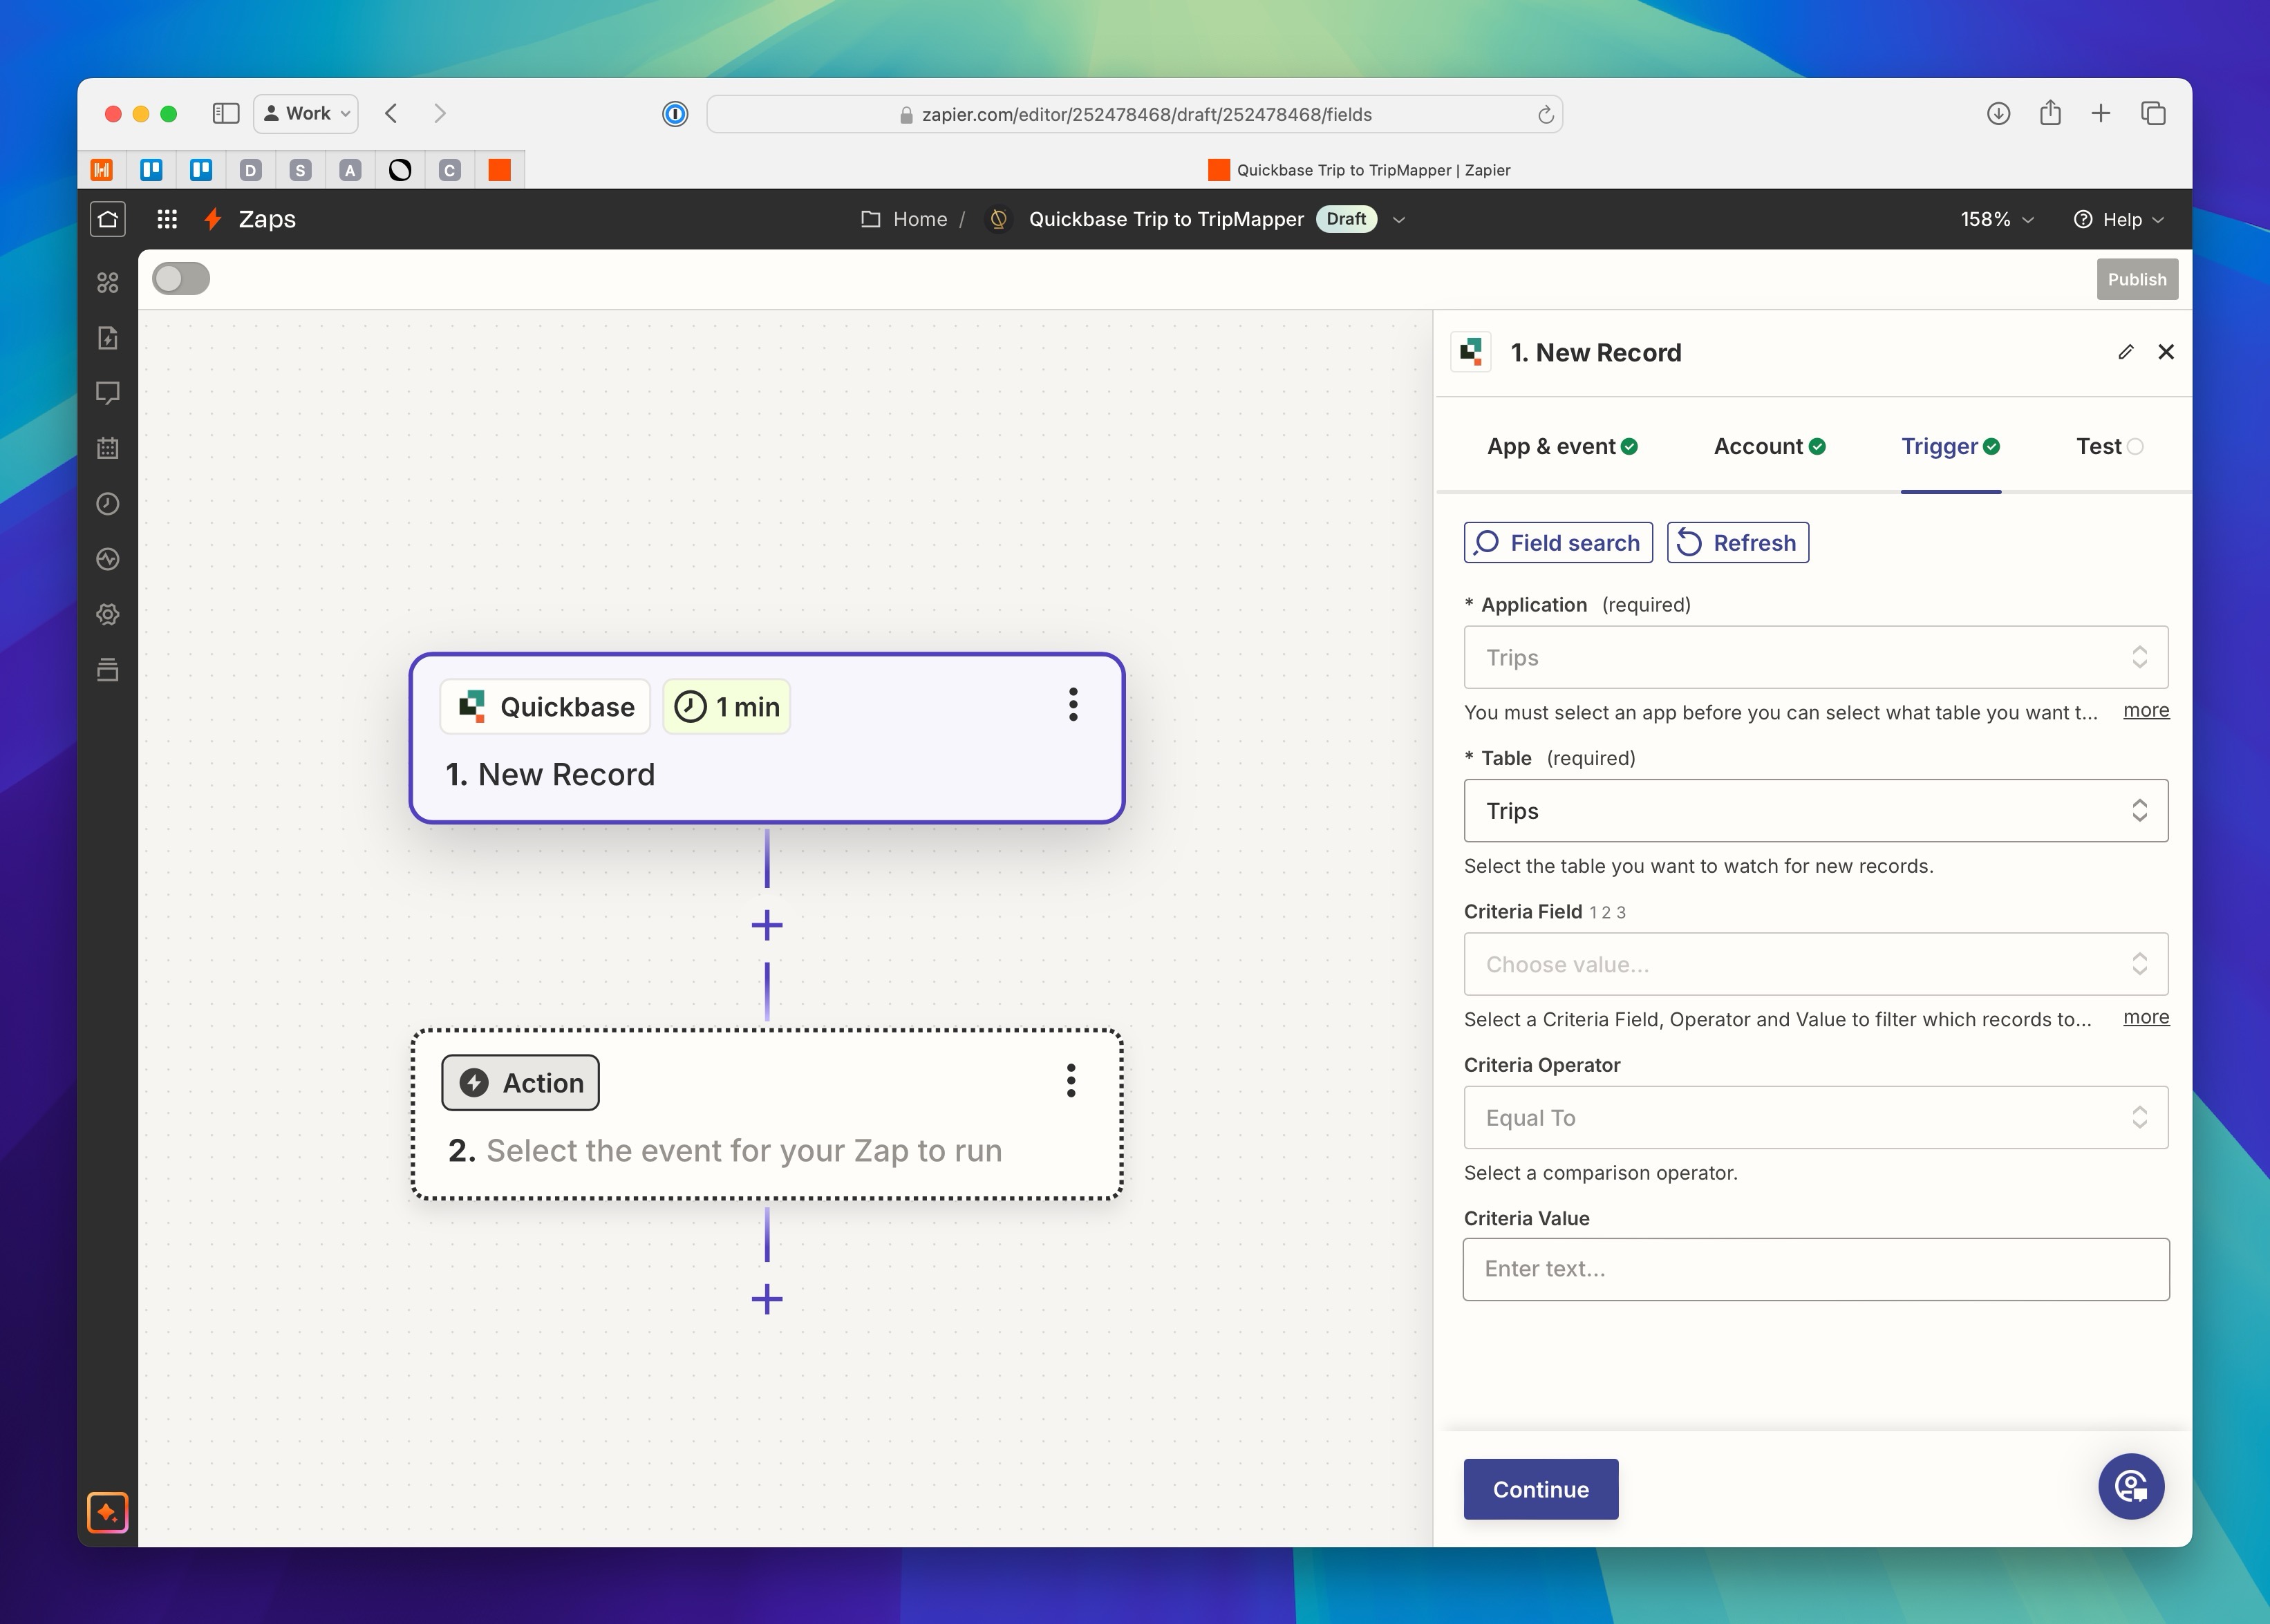
Click Continue through to the next screen where you can configure the connection to Quickbase.
In the
Applicationinput, select the application in Quickbase that stores your Trips dataIn the
Tableinput, again select the table that contains a row for each of your tripsIn the
Criteria Fieldfield specify the column you would like to create a matching rule against. If you want to sync all records, you can leave this blank.In the
Criteria Operatorfield, used in conjunction with theCriteria Fieldfield, specify the type of matching you want to do. Again, leave this blank if you intend to sync all records.Finally, the
Criteria Valuefield should specify the criteria value to match to continue the Zap. You can also leave this blank if you are not utilising the other criteria fields.
On the Test step, fetch the latest records, so you have sample data to use for the action steps.
The Action
Add a new step to your Zap and search for TripMapper as the app to connect.
Assuming you've already connected your TripMapper account to your Zapier account, start by selecting the Create or Update Trip action event. Click continue to move to the configuration stage.
Below, we'll detail the different fields you can map on this action:
Trip ID: Since you're creating a new trip, you will leave this blank.
Name: This should be mapped to whatever you're calling the Trip in Quickbase. It doesn't need to be a unique value.
Is Template: It's possible to create templates through the integration, however, if this is a client trip, set this to
FalseStart Date: This should be the start date of the trip. You can leave this blank if the trip doesn't have a start date yet.
End Date: This should be the end date of the trip. You can leave this blank if the trip doesn't have dates yet.
Days: You can specify the duration of the trip in days expressed as a whole number. If you haven't specified dates, we recommend adding a 'days' duration so the trip has a structure, although it's not required.
Countries: You can map a list of countries to this field. TripMapper only accepts countries as two-character ISO codes to ensure consistency across languages. For example, the United Kingdom would be
GB. If you don't hold ISO country codes, consider setting up a mapping table to convert your country data. Read more here.Currency: The currency field accepts a single ISO currency value. For example,
GBPfor the British Pound.Client ID: The client ID value lets you link your trip to a client. We recommend syncing your clients between TripMapper and QuickBase. If you don't want to do that, you can also add a
Find Clientsearch step, which allows you to find a client by their email address.Description: The description is an optional rich-text field that accepts markdown formatting.
Owner ID: The owner ID is the identifier for the TripMapper for Business user for whom you would like to be responsible for the trip. This value is assigned automatically to the logged-in user when creating a trip in TripMapper.
Brand ID: If the trip requires a white-label brand, you can assign it here by ID. If you want to use this field, you'll need to either have the ID in your trip data in Quickbase or create a mapping table to pass the ID in this field.
Cover Image: The cover image field accepts an image URL. The URL will be uploaded to TripMapper and set as the main image associated with the Trip.
Travellers: The travellers field allows you to specify a list of client IDs. Like the client ID field, you'll need to have clients synced between platforms so that you can use them during this process.
Fixed Price: If you define your trip costs outside of TripMapper, rather than using our card-based cost calculations, then you can specify an overall total cost for the trip here. The value should be a numeric value of no more than two decimal places.
Valid Until: Here, you can specify the date the proposal expires and is no longer possible to accept.
Number of Travellers Override: If you don't want to specify precise traveller names in the Zap, you can still define the number of travellers through this field. It accepts whole numbers representing the number of people travelling.
Once you have mapped the fields, you can click continue to test the Zap.
Sync the TripMapper ID back to Quickbase
Whenever you push data from one system to another and intend to keep it up-to-date, it's recommended that you share an immutable identifier. In this case, we recommend syncing the TripMapper trip ID back to Quickbase so that any future edits in Quickbase can be sent to the correct trip in TripMapper.
To do this, create a third step in the Zap. Search for Quickbase and select the Action Event Update Record.
On the configure step, ensure that it is connected to the correct Application and Table. Then, in the Record ID field, select the record ID from the first step.
Scroll to the field in the list where you plan to store the TripMapper ID and click the + icon. In the dropdown, select the TripMapper step Create or Update Trip and then the field ID.
With that done, you can now click Continue and test the step. If everything works as intended, you can continue to publish the Zap.
When a trip is created in the designated Quickbase application table, a new corresponding trip will be created in TripMapper.
What Next?
To close the loop and account for updating the trip in Quickbase, we recommend creating another Zap that is triggered when a record is updated in Quickbase. Additionally, if you would like to be able to edit the trip in TripMapper and have it sync to QuickBase, you should create a Zap with the trigger Updated Trip.