Create a proposal from scratch
To create a proposal from scratch, follow the steps below:
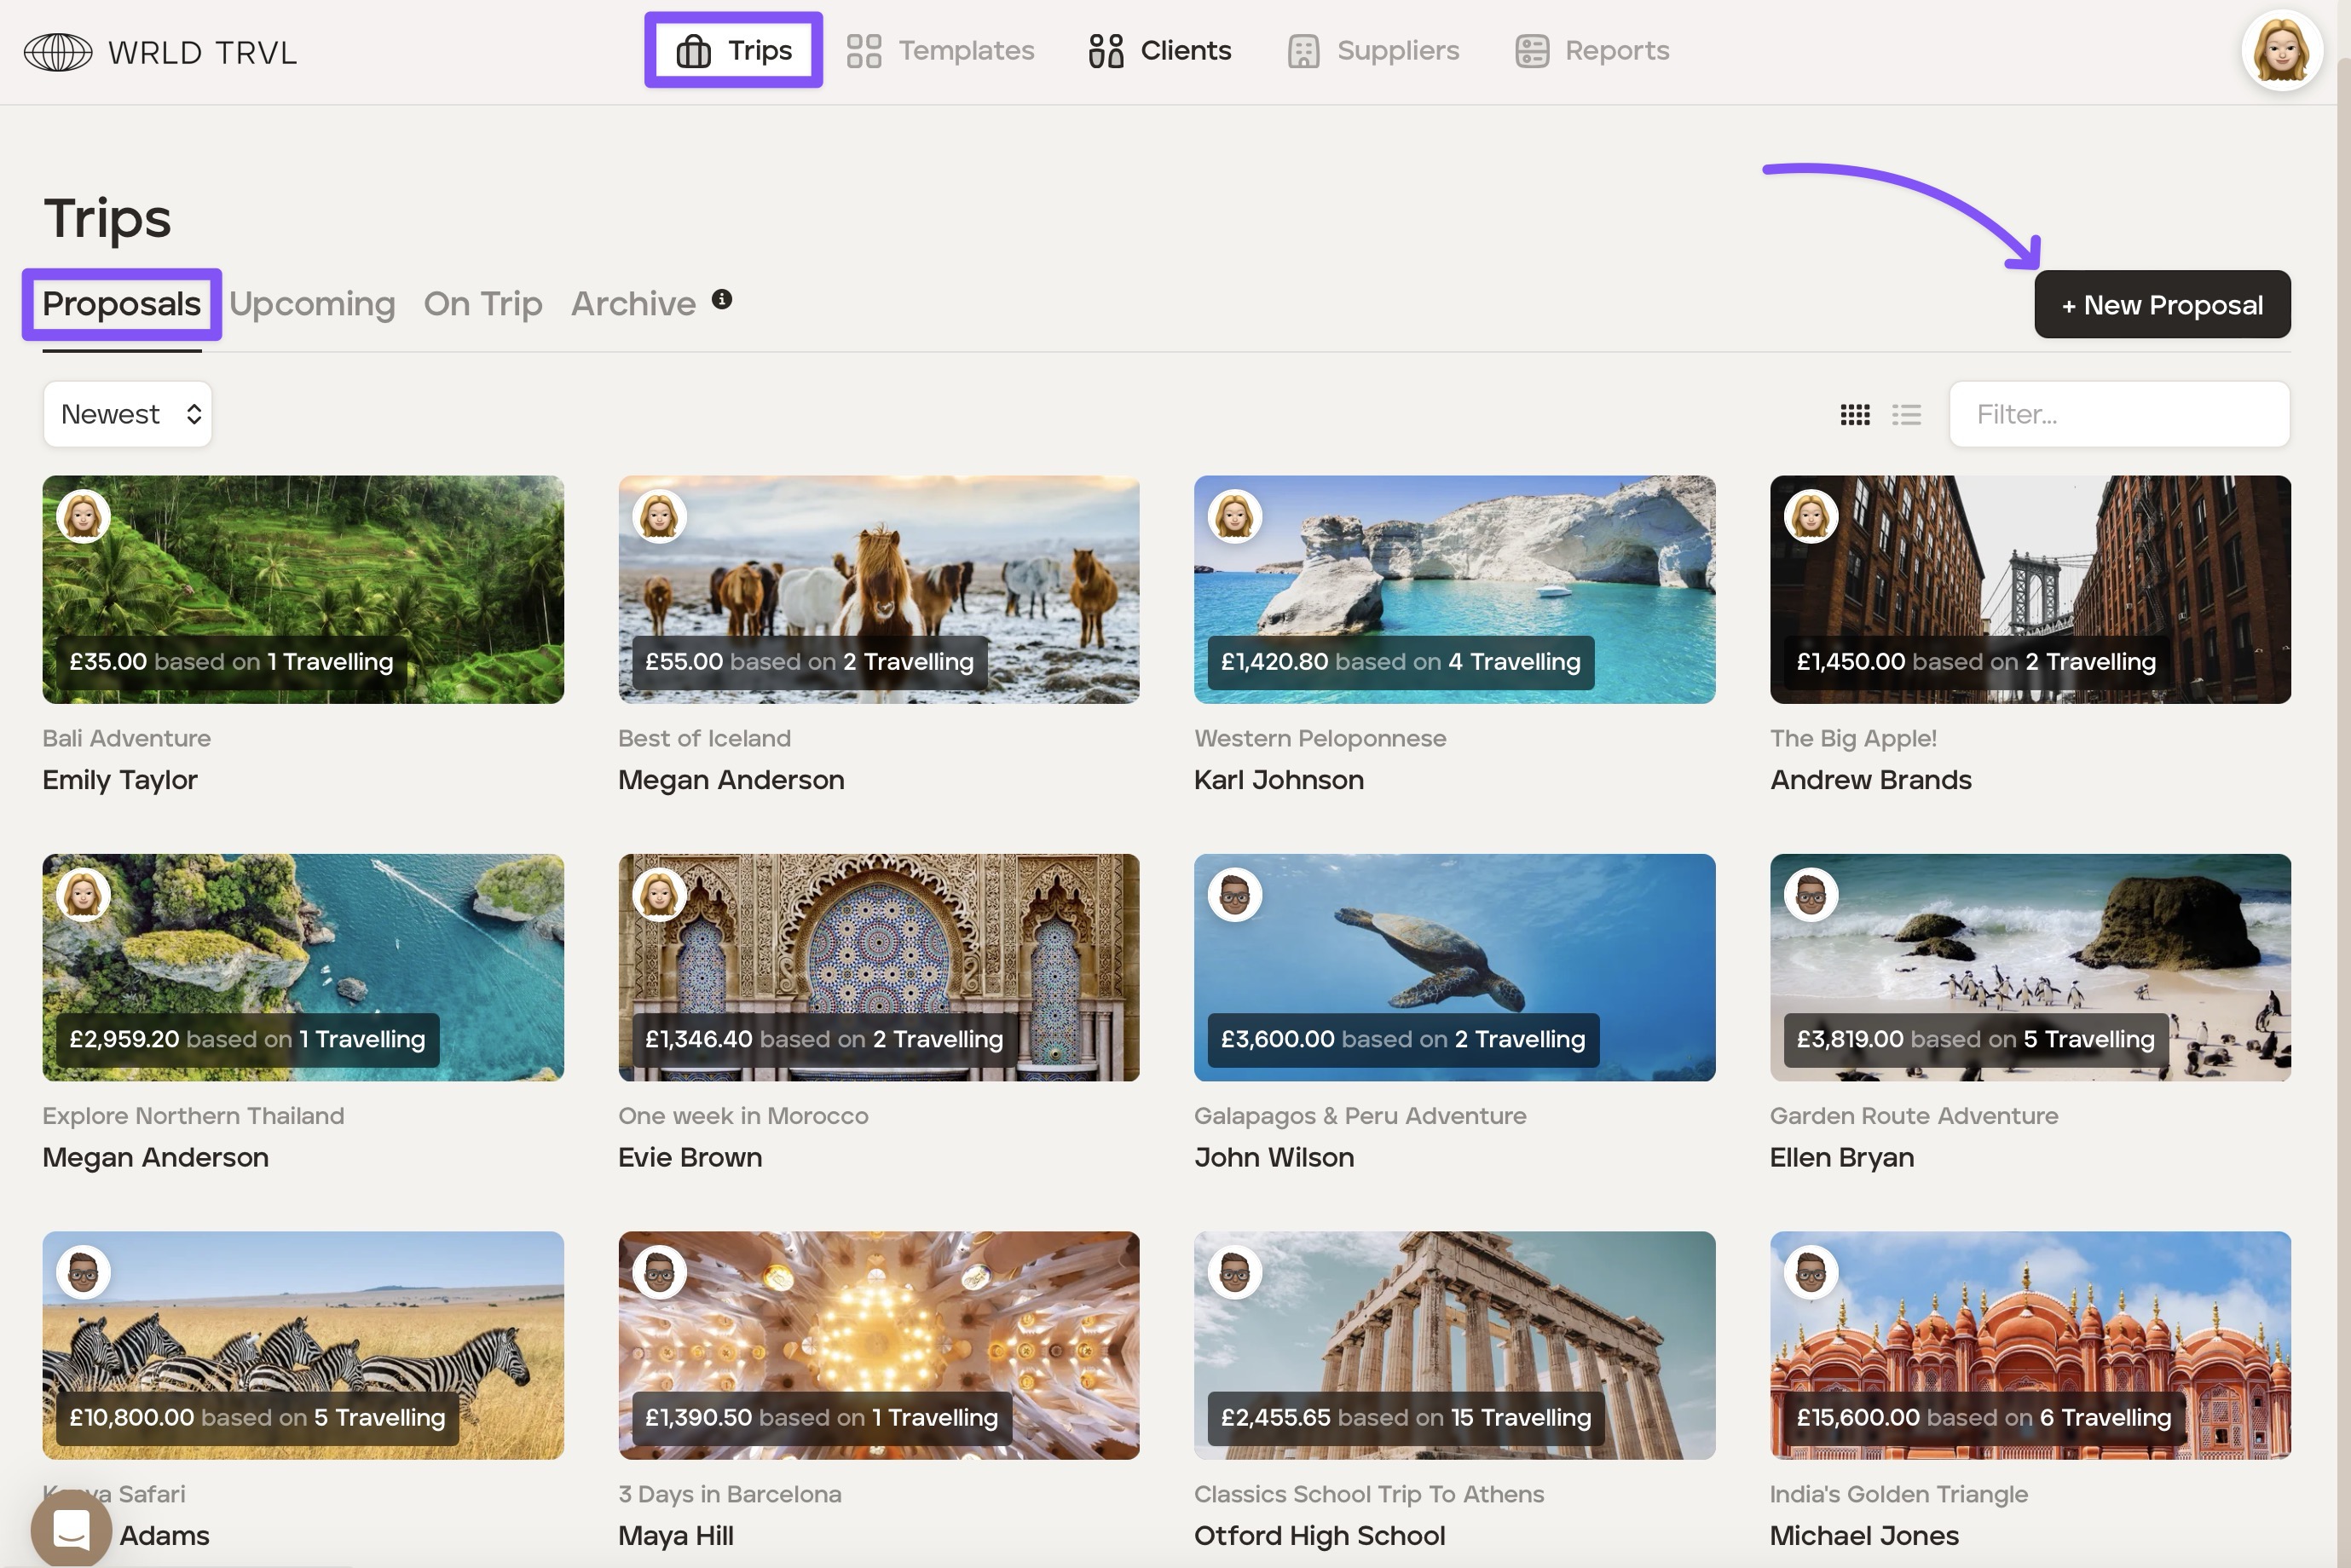
Go into the ‘Trips’ section.
Click the ‘+ New Proposal’ button.
Click the 'From Scratch' tab.
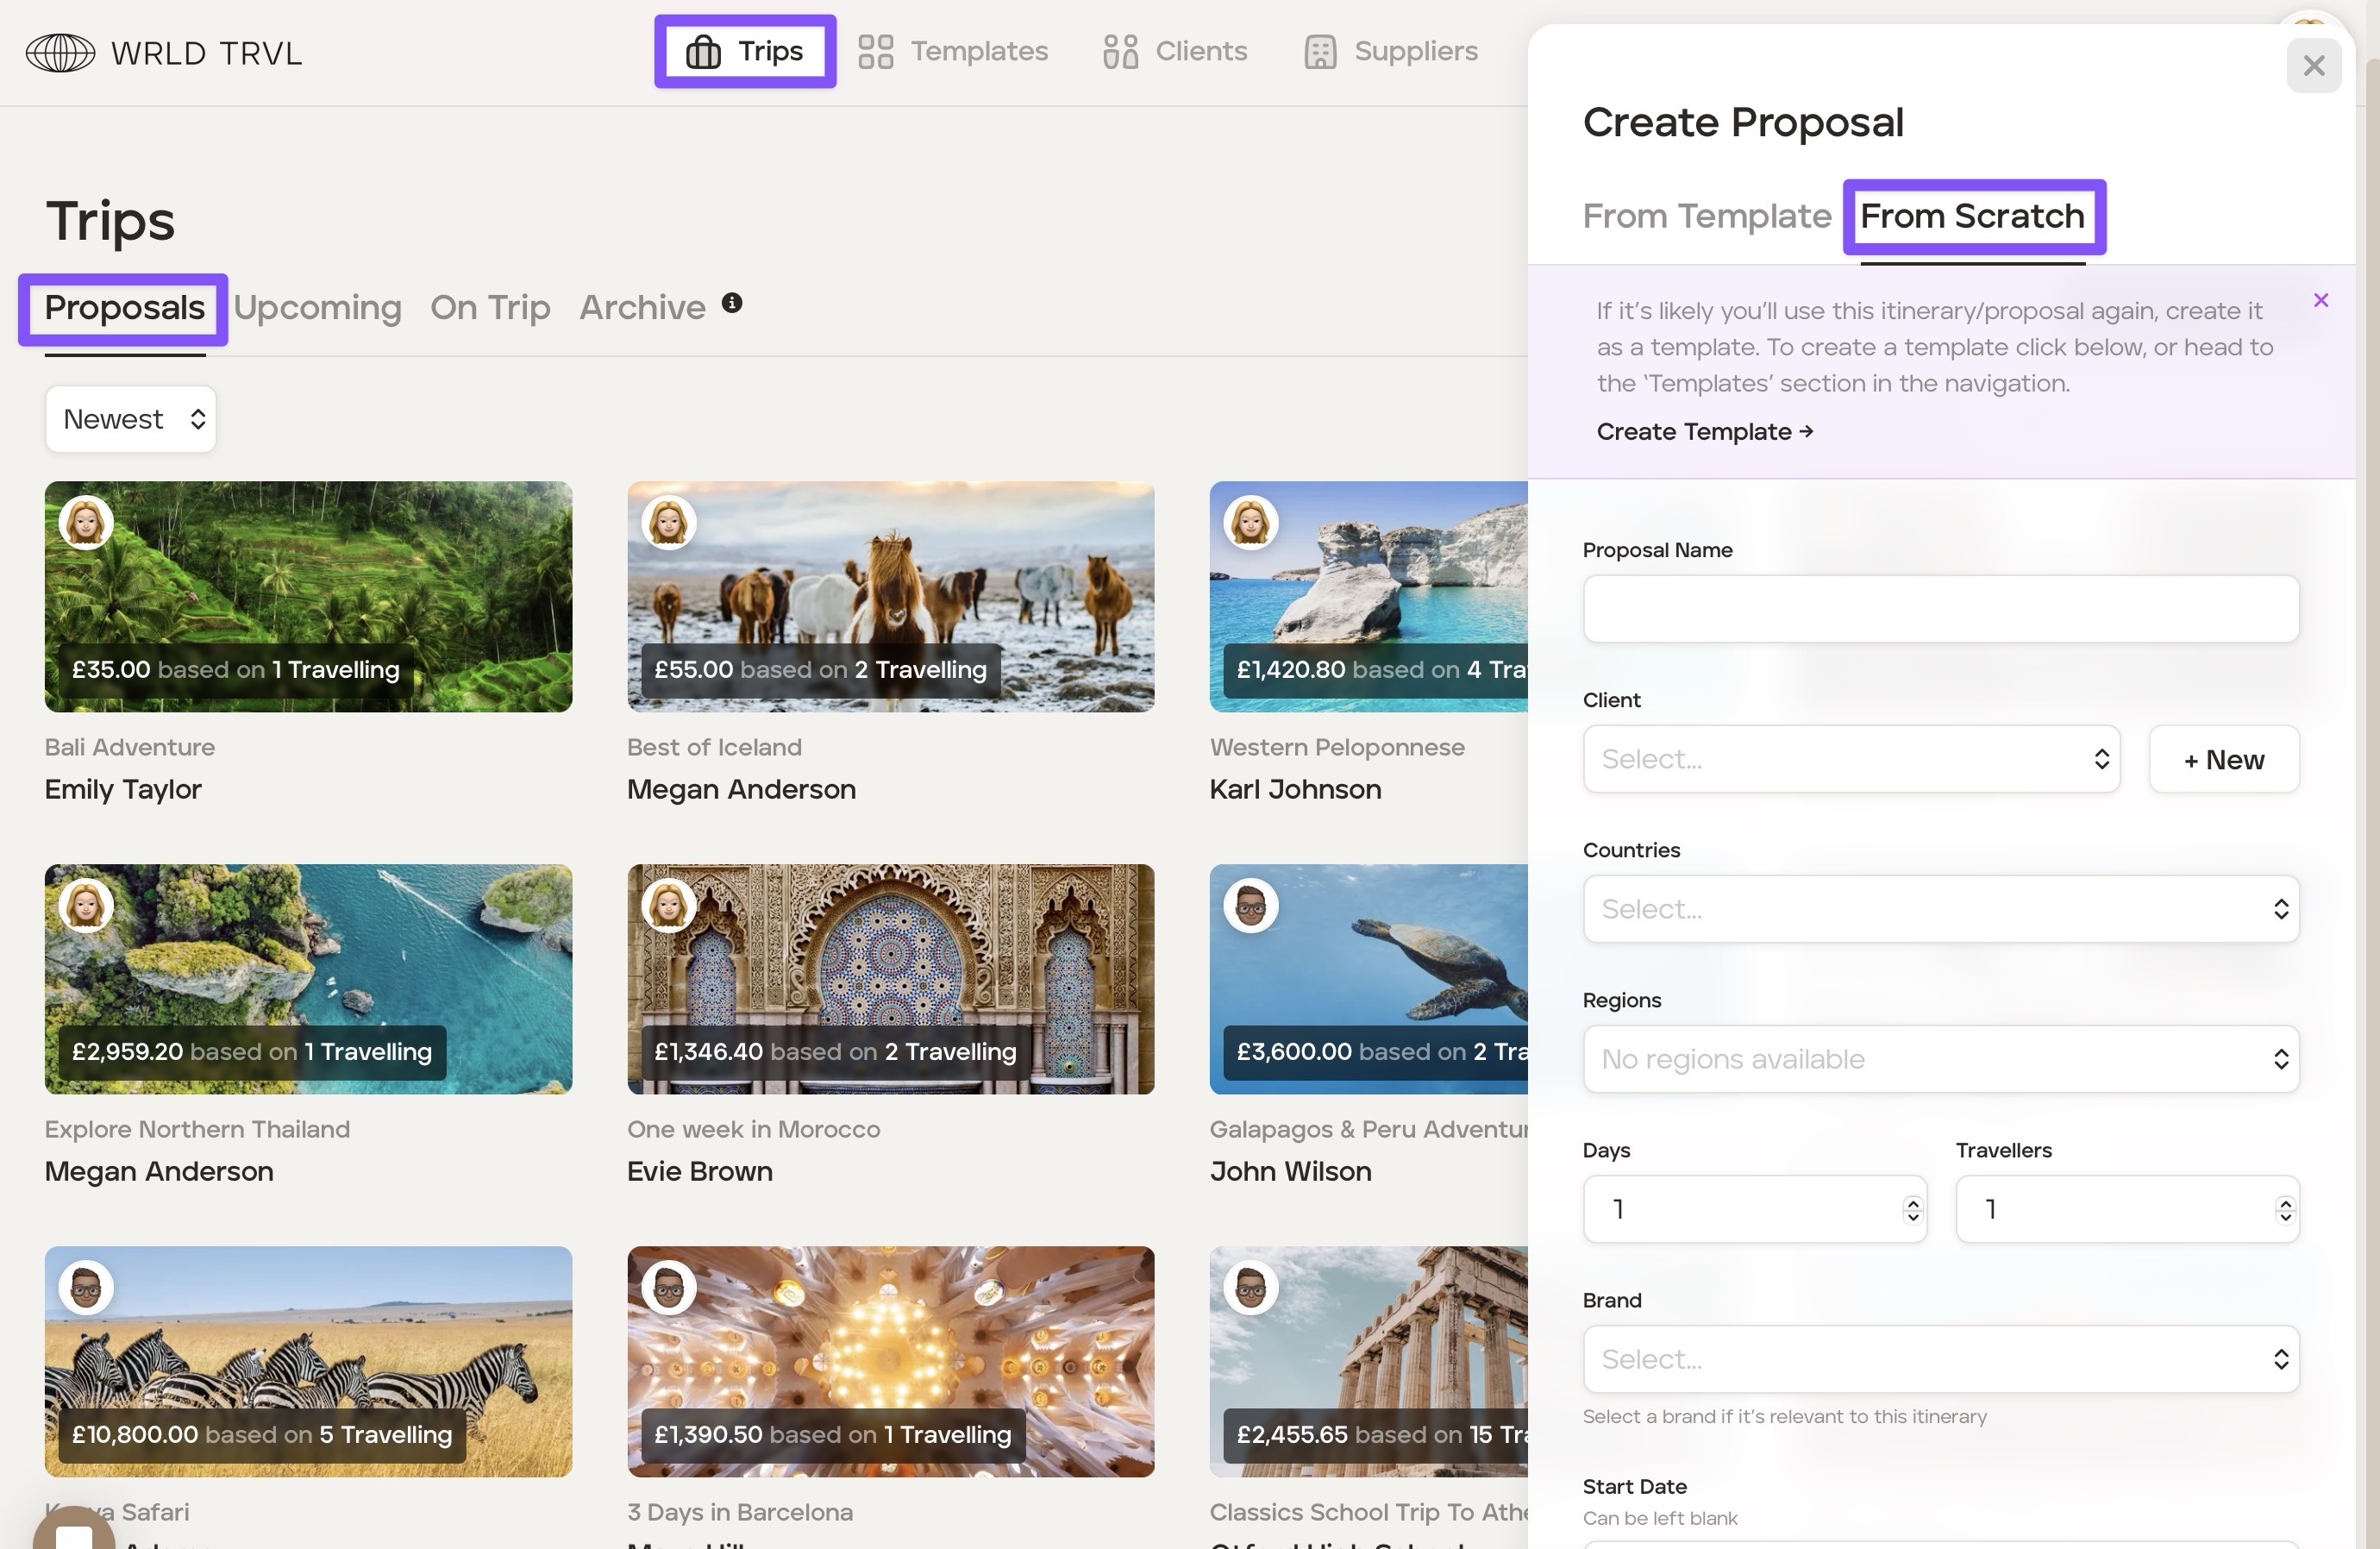
Give your proposal a name.
Select either an existing client from the drop-down menu or create a new client by clicking ‘+ New.’
Select the country or countries.
Select the trip duration.
Select the number of travellers.
If you'd like the proposal to be branded with one of your partner brands (see 'Adding your business partner's branding in your settings' article), select your brand from the drop-down menu.
Select the start date if you have one; otherwise, leave it blank.
Click ‘Create from Scratch.’
You will now see the proposal ‘Overview’ screen and can start to build your itinerary from scratch.
Itinerary Layout
Now it is time to start creating your proposal! There are two layouts you can use to build and view your proposal:
Card View - a kanban style layout
List View - a traditional list layout
Add items to the proposal using Card View
To add items to the proposal in Card View, follow the steps below.
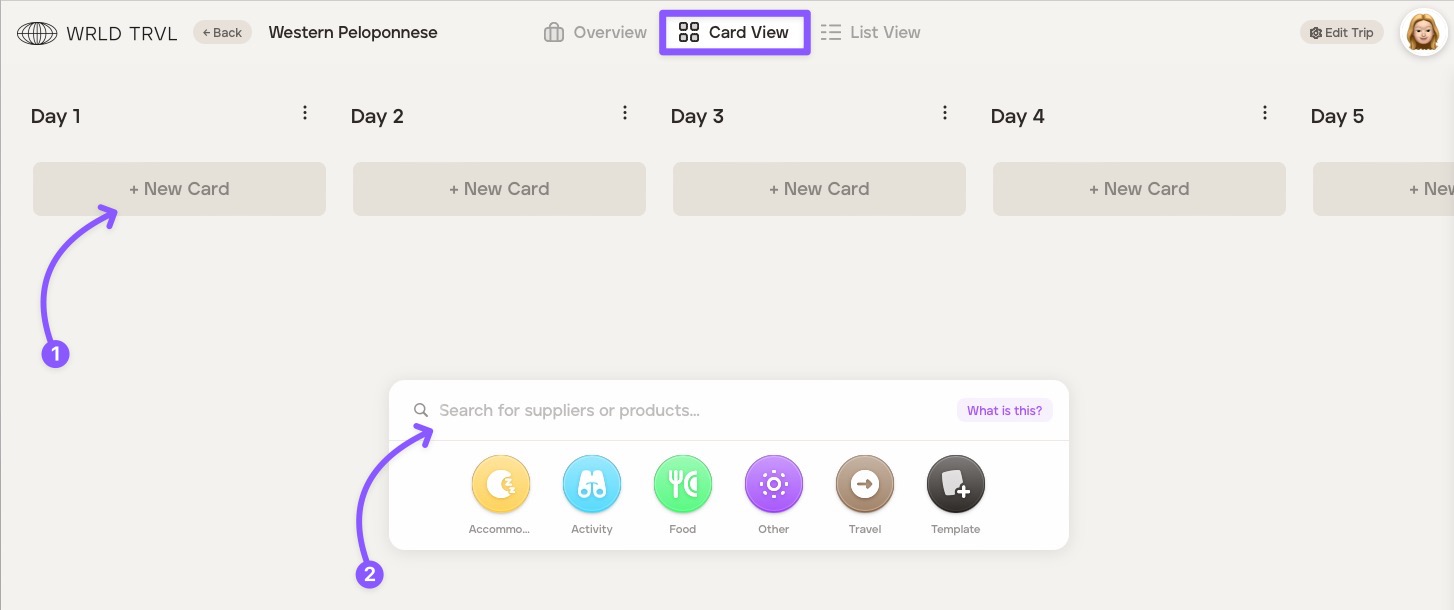
Click ‘Card View’ at the top of the screen.
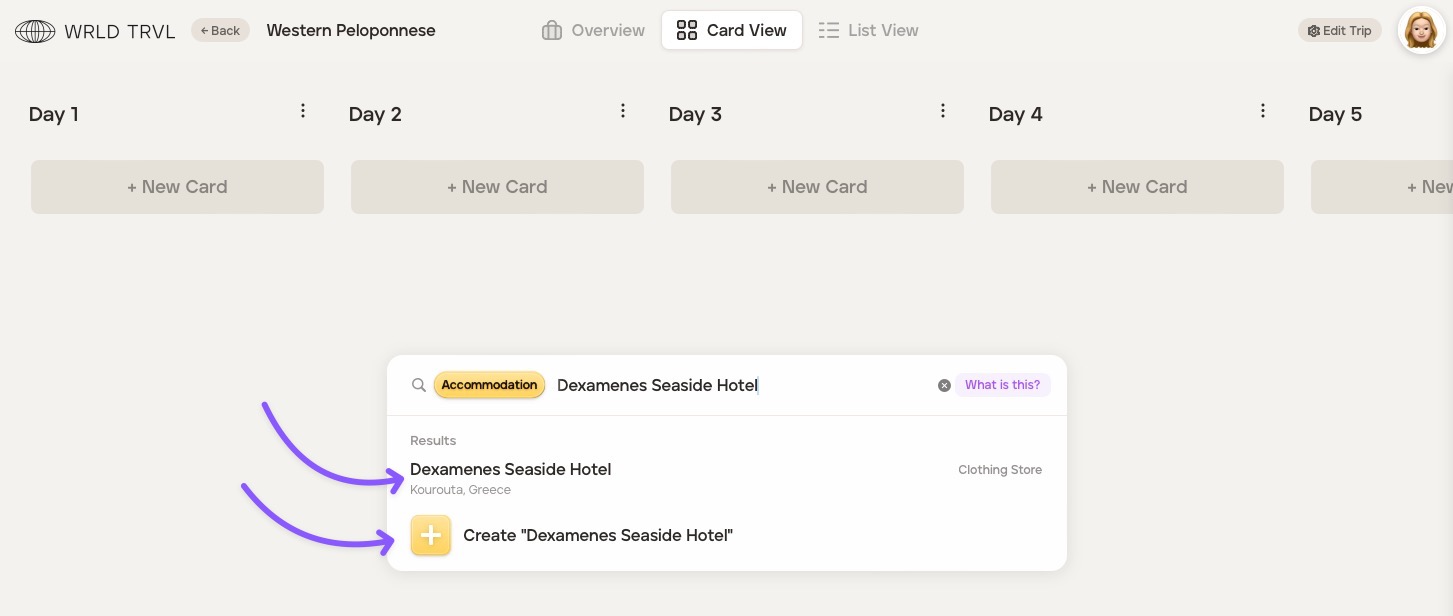
Click the '+New Card' button, which will bring up the launcher.
Click the relevant card category icon in the launcher ('Accommodation', 'Activity', 'Travel', 'Food' or 'Other').
The search bar will show the card category chosen. Search for the location or add a card title. This will display:
Google location results; AND
the ability to simply create a card with the title typed in the search bar.
Click either:
the relevant Google location result (which will add the name of the result as the card title and add accompanying location and business data to the card); OR
'+ Create ''xxxx" which will add the card with the title typed in the search bar only.
The card will then slide in from the right.
Add any additional information you wish to the card. Fill in as much, or as little, information as you wish on the card. Scroll down the card to reveal all the fields which are slightly different depending on the card type ('Accommodation', 'Activity', 'Travel', 'Food' or 'Other').
Once you have input your information, close the card by clicking ‘Close’ on the top right of the card (or click anywhere on the screen outside the card).
To add images to your cards, please read this article.
Continue to build your proposal by repeating this process of adding cards. Drag- and-drop functionality allows for quick and easy building and editing. All cards are colour-coded to easily differentiate between the cards and to make the itinerary visual for you and your clients. To change the default card colours to match your brand, please read this article.
Once you have created your proposal click ‘Back’ on the top left of the screen to return to the ‘Proposals’ database, where it will now be located. You can go back into your proposal at any time to make changes.
Trip ideas column in card view
If you have some itinerary ideas which you do not want to place within the proposal itself, you can follow the same process of adding cards in the ‘Trip Ideas’ column on the left-hand side of the screen.
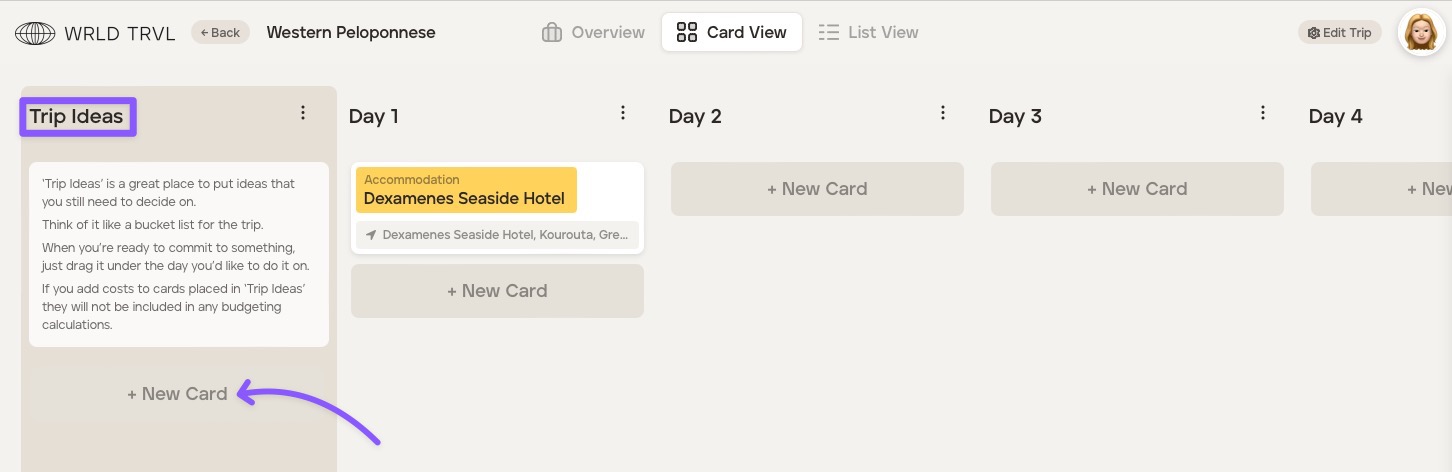
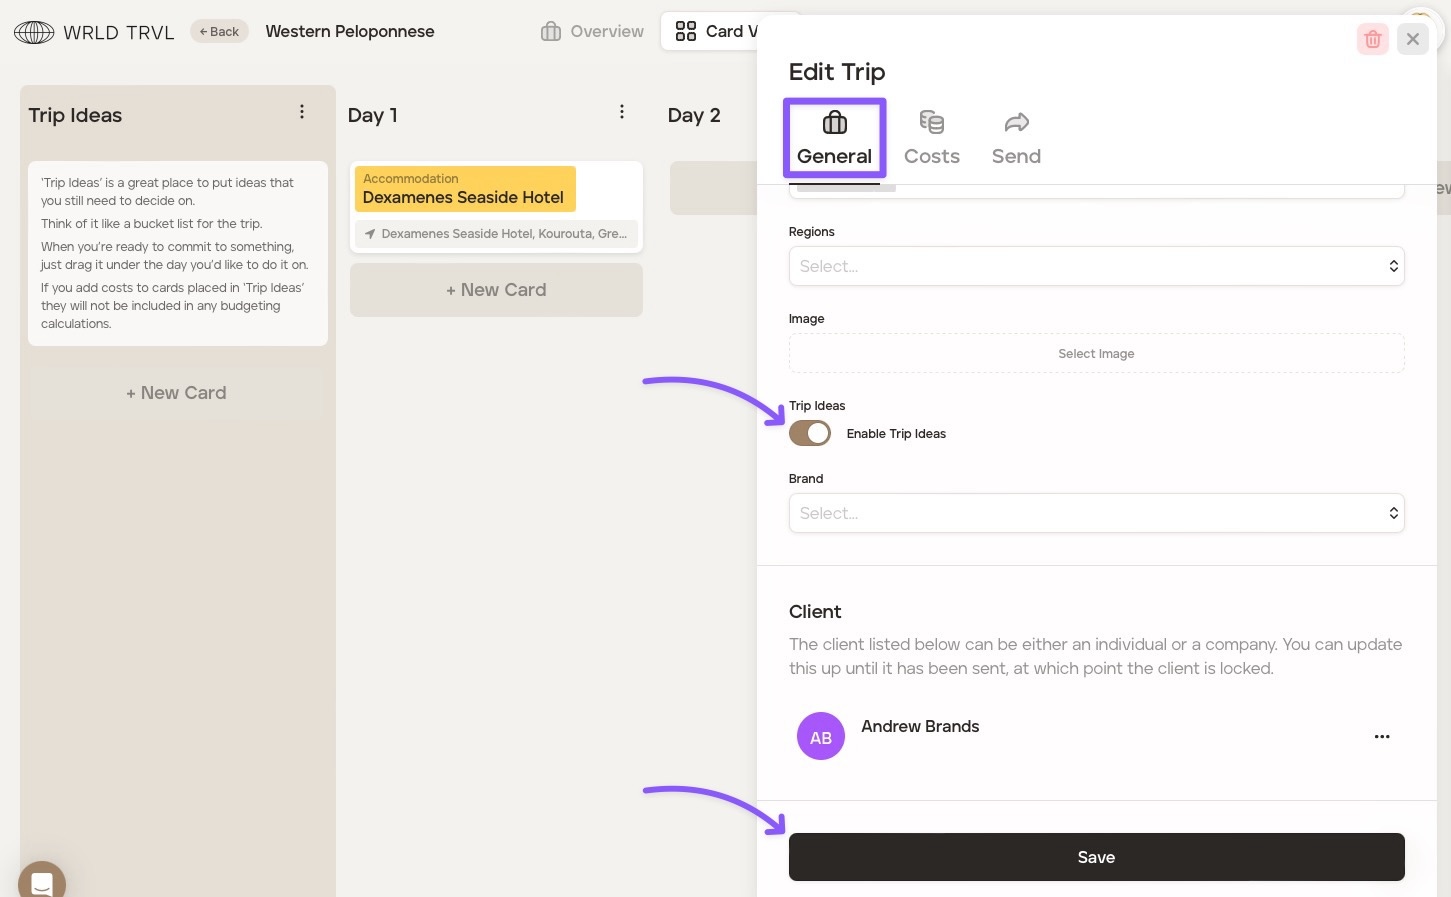
You can choose whether or not to have the 'Trip Ideas' column in card view by clicking ‘Edit Trip’ in the top right of the screen, selecting the 'General' tab and disabling the feature using the 'Trip Ideas' switch. Remember to click the 'Save' button.
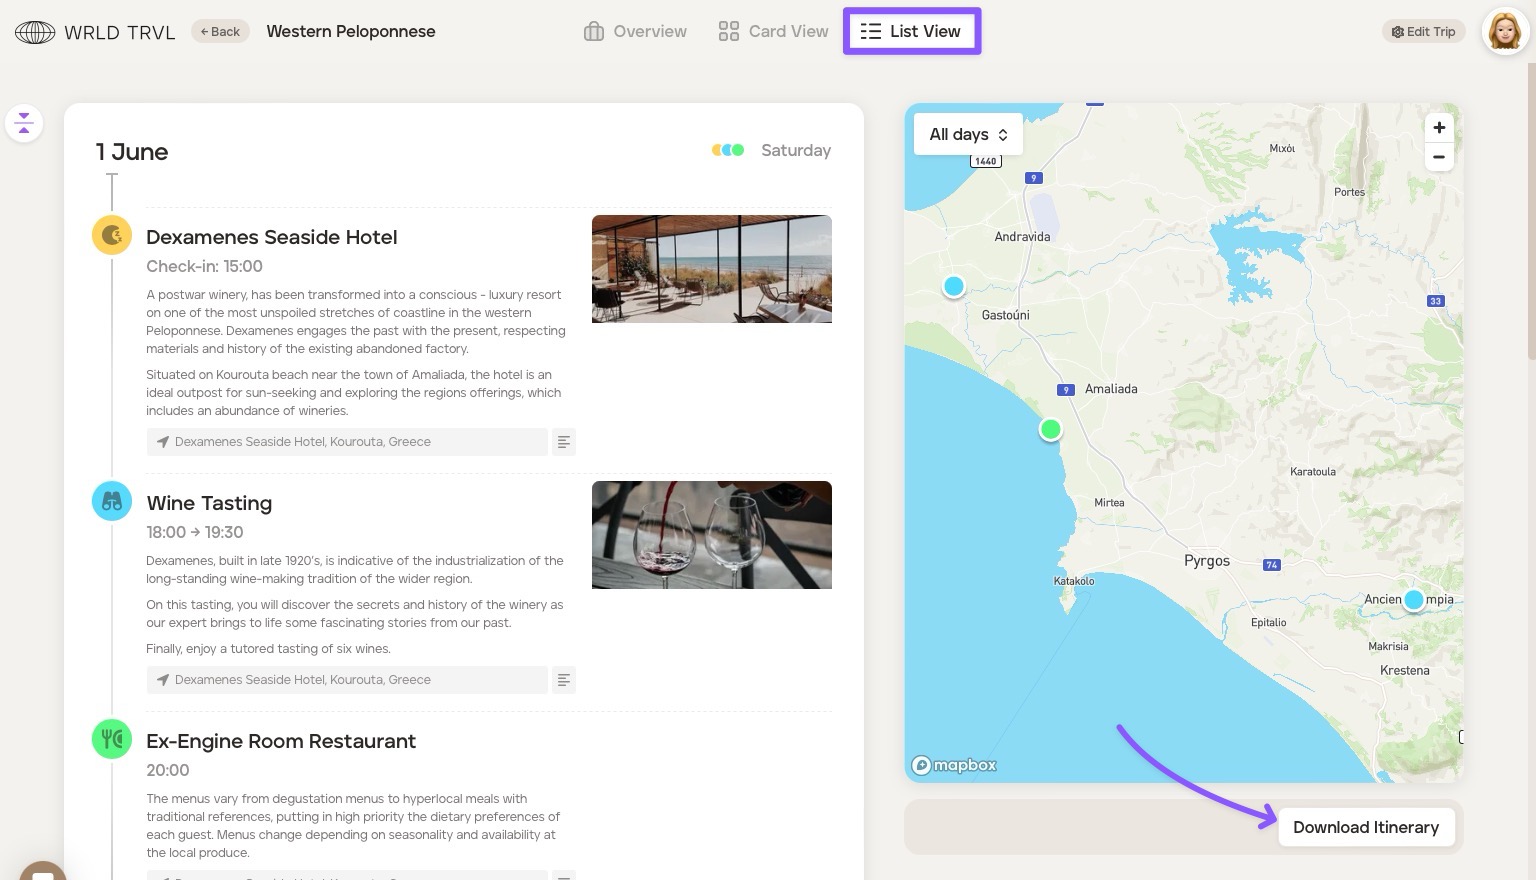
Add items to the proposal using List View
To add items to the proposal in List View, follow the steps below.
Click ‘List View’ at the top of the screen.
Hover over the area where you want to add a card until you see the purple bar.
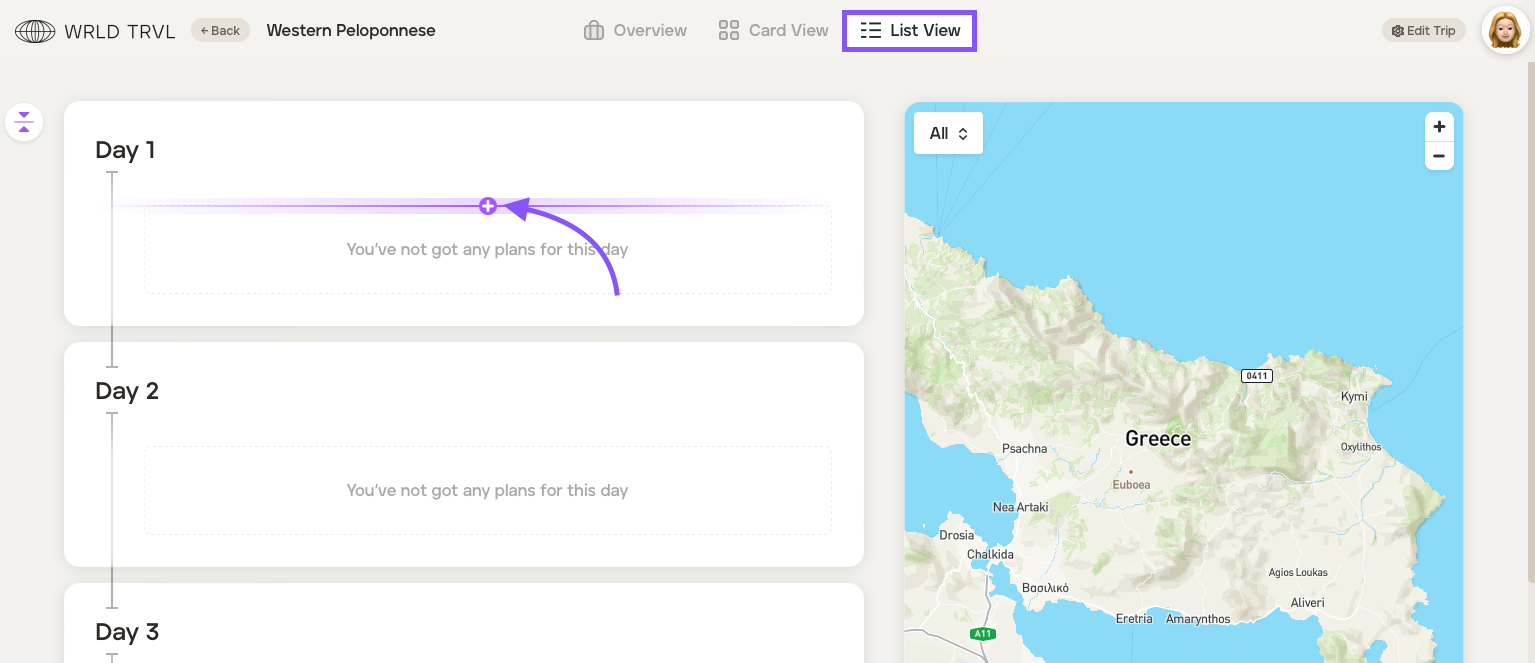
Click the purple bar which will bring up the launcher.
Click the relevant card category icon in the launcher ('Accommodation', 'Activity', 'Travel', 'Food' or 'Other').
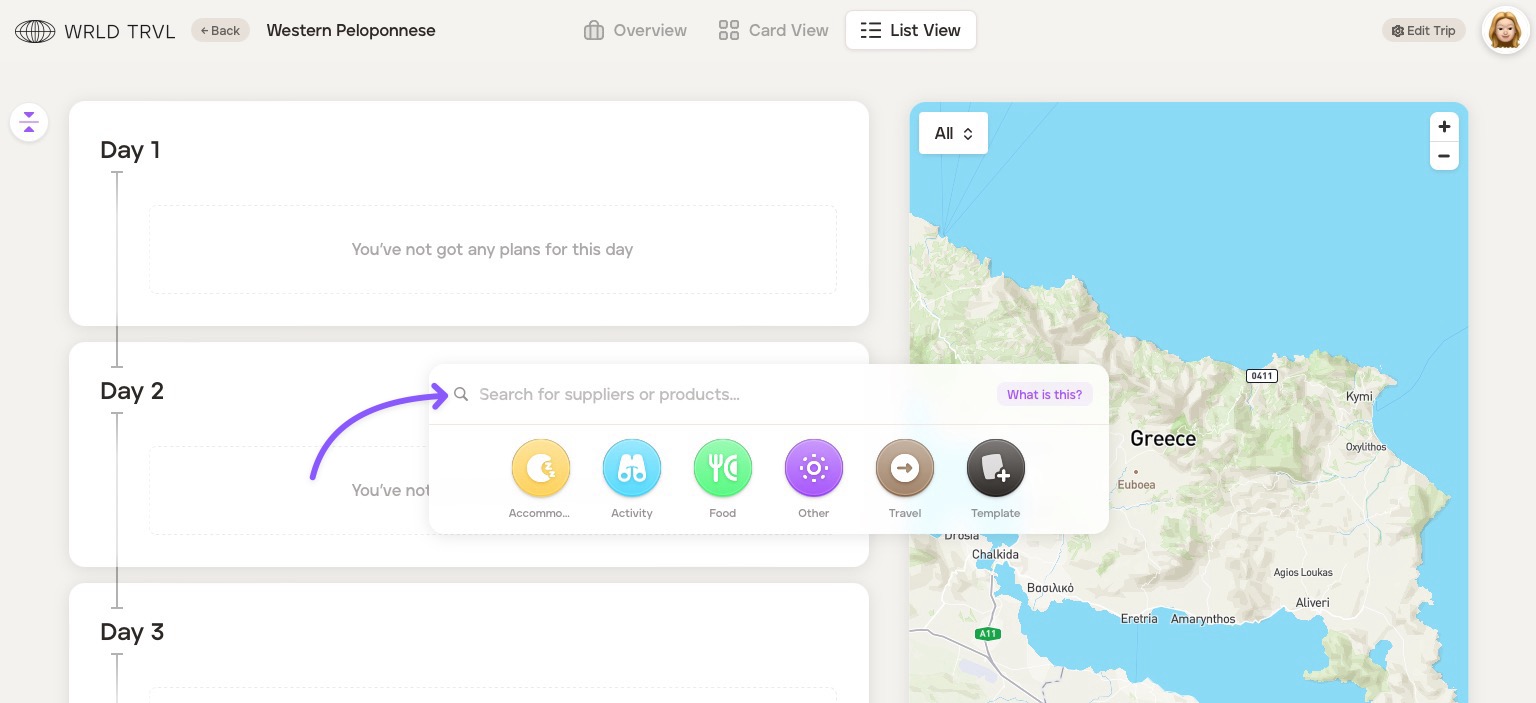
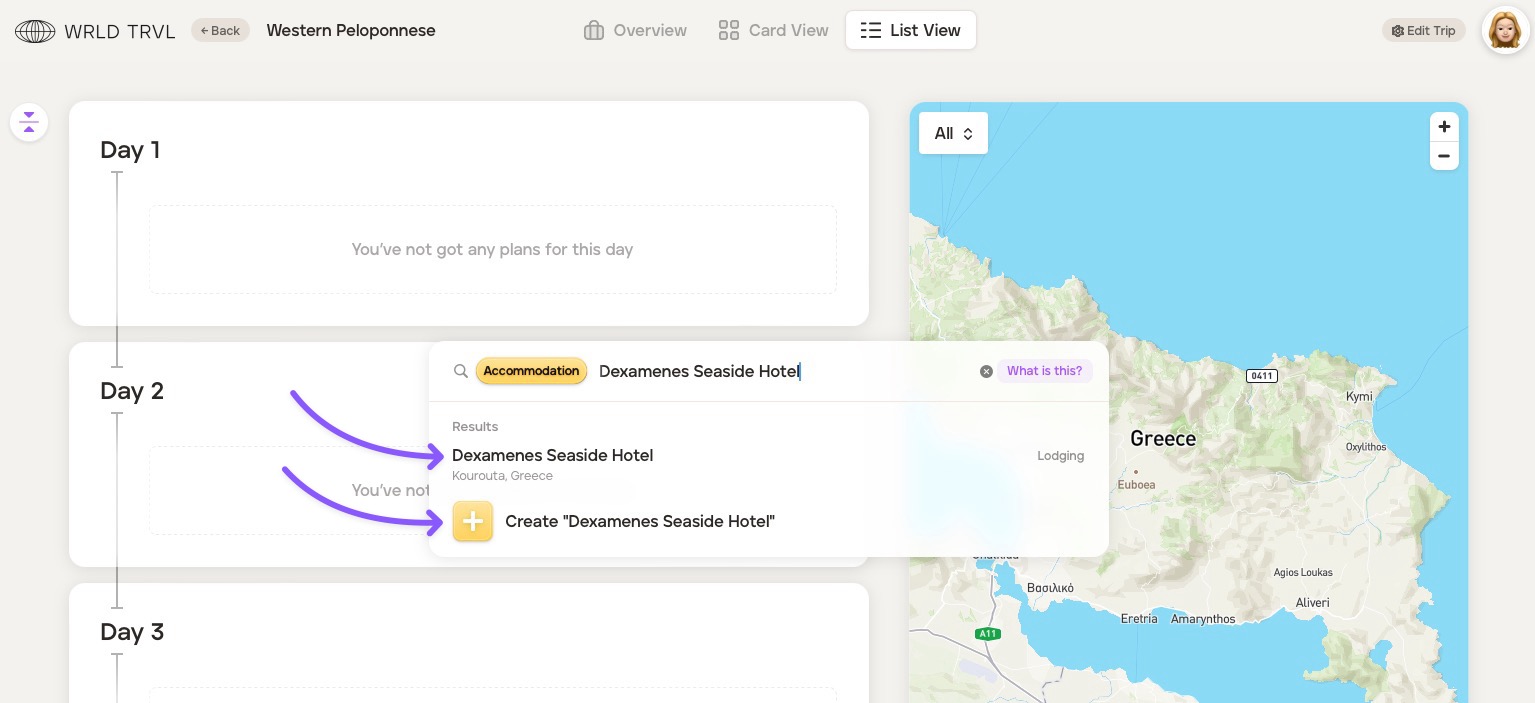
The search bar will show the card category chosen. Search for the location or add a card title. This will display:
Google location results; AND
the ability to simply create a card with the title typed in the search bar.
Click either:
the relevant Google location result (which will add the name of the result as the card title and add accompanying location and business data to the card); OR
'+ Create ''xxxx" which will add the card with the title typed in the search bar only.
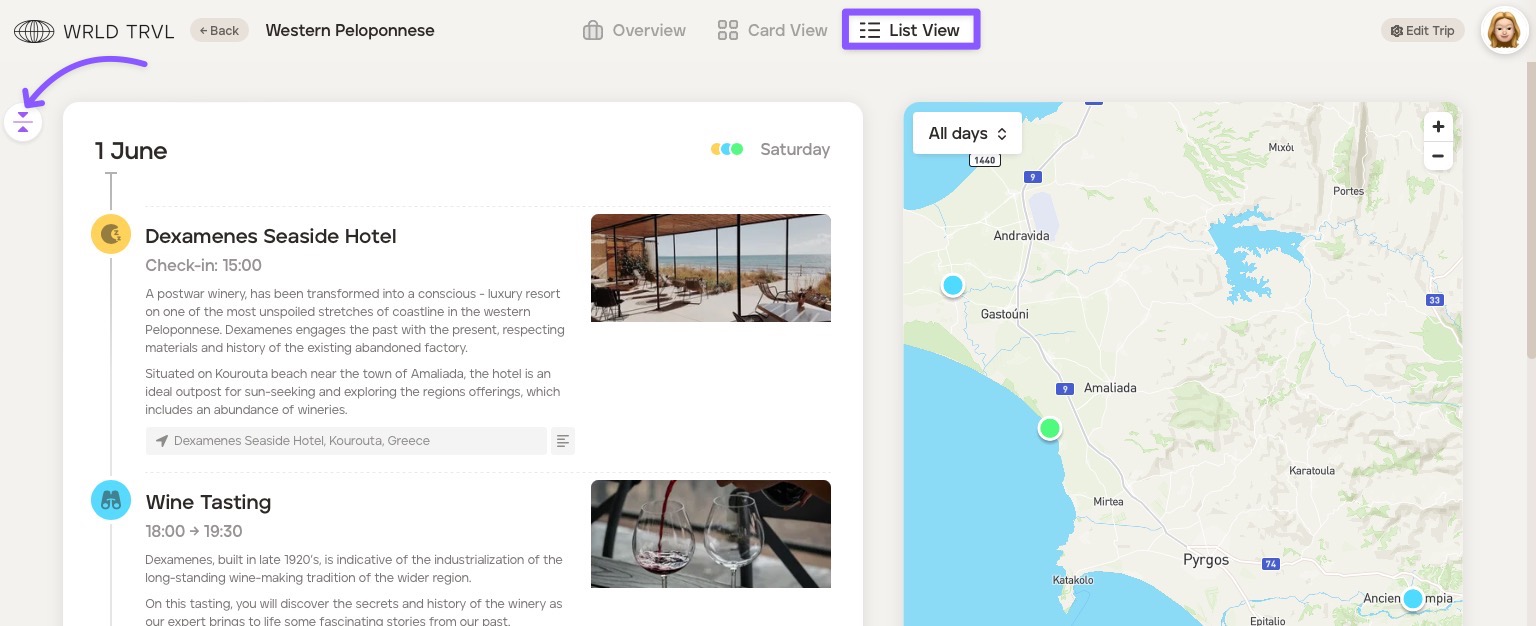
The card will then slide in from the right.
Add any additional information you wish to the card. Fill in as much, or as little, information as you wish on the card. Scroll down the card to reveal all the fields which are slightly different depending on the card type ('Accommodation', 'Activity', 'Travel', 'Food' or 'Other').
Once you have input your information, close the card by clicking ‘Close’ on the top right of the card (or click anywhere on the screen outside the card).
To add images to your cards, please read this article.
Continue to build your proposal by repeating this process of adding cards. Drag- and-drop functionality allows for quick and easy building and editing. All cards are colour-coded to easily differentiate between the cards and to make the itinerary visual for you and your clients. To change the default card colours to match your brand, please read this article.
Once you have created your proposal click ‘Back’ on the top left of the screen to return to the ‘Proposals’ database, where it will now be located. You can go back into your proposal at any time to make changes.
Expand and collapse functionality in list view
To show or hide any notes added to cards in 'List view', click the expand/ collapse icon.
PDF template itinerary
Download the template itinerary in PDF by clicking ‘Download Itinerary’ in List view.