Adding your template itinerary to your website
In addition to a beautifully designed TripMapper page for your Showcase-enabled Template, you can also embed the itinerary on your own website, provided it supports iFrame embedding.
In this guide, we'll use WordPress and Squarespace as example platforms for displaying your itinerary.
Getting started
Before jumping into your website backend, make sure you follow the steps to enable showcase on the template you'd like to embed.
To do this,
Navigate to the template you want to showcase
Click the
Edit Templatebutton in the top-right of the screenClick the
ShowcasetabToggle the
Showcase this template itineraryswitch so it turns purpleClick
Save
Now that's done, scroll to the Embed this itinerary box and copy the contents to your clipboard. I'll look something like this:
<iframe
    src="https://trpm.app/embed/15a60964-b265-11ef-93a6-eb20a3e8d661-3"
    width="100%"
    height="500"
    title="Greece Adventure"
    frameborder="0">
</iframe>
The iFrame code
You should be able to, in most cases, leave the code as-is when you want to use it. However, some of the attributes in the code can be tweaked to achieve better results.
width: the width attribute is specified as a percentage or a px value. By default we set this to100%, which will cause the itinerary to fill all the available space it can horizontally.height: the height attribute defines how tall the itinerary is. By default, this is 500, meaning 500px. You can adjust this number up or down to make it taller or set a percentage to have it behave similarly to the default width.
Now we have our code and understand how to adjust it to our needs, let's get on with adding it to our website.
Squarespace
Once you've decided where you want to add your itinerary, you need to click the + Block button in the relevant section and then select the Embed option.

That will drop an empty Embed block onto your page, as seen below. You can drag it into position and adjust the width and height of the container to suit your website.

Next, click the block, then the pencil Edit icon. Then click the Code Snippet option under the 'Embed as' heading. Then click Embed data.
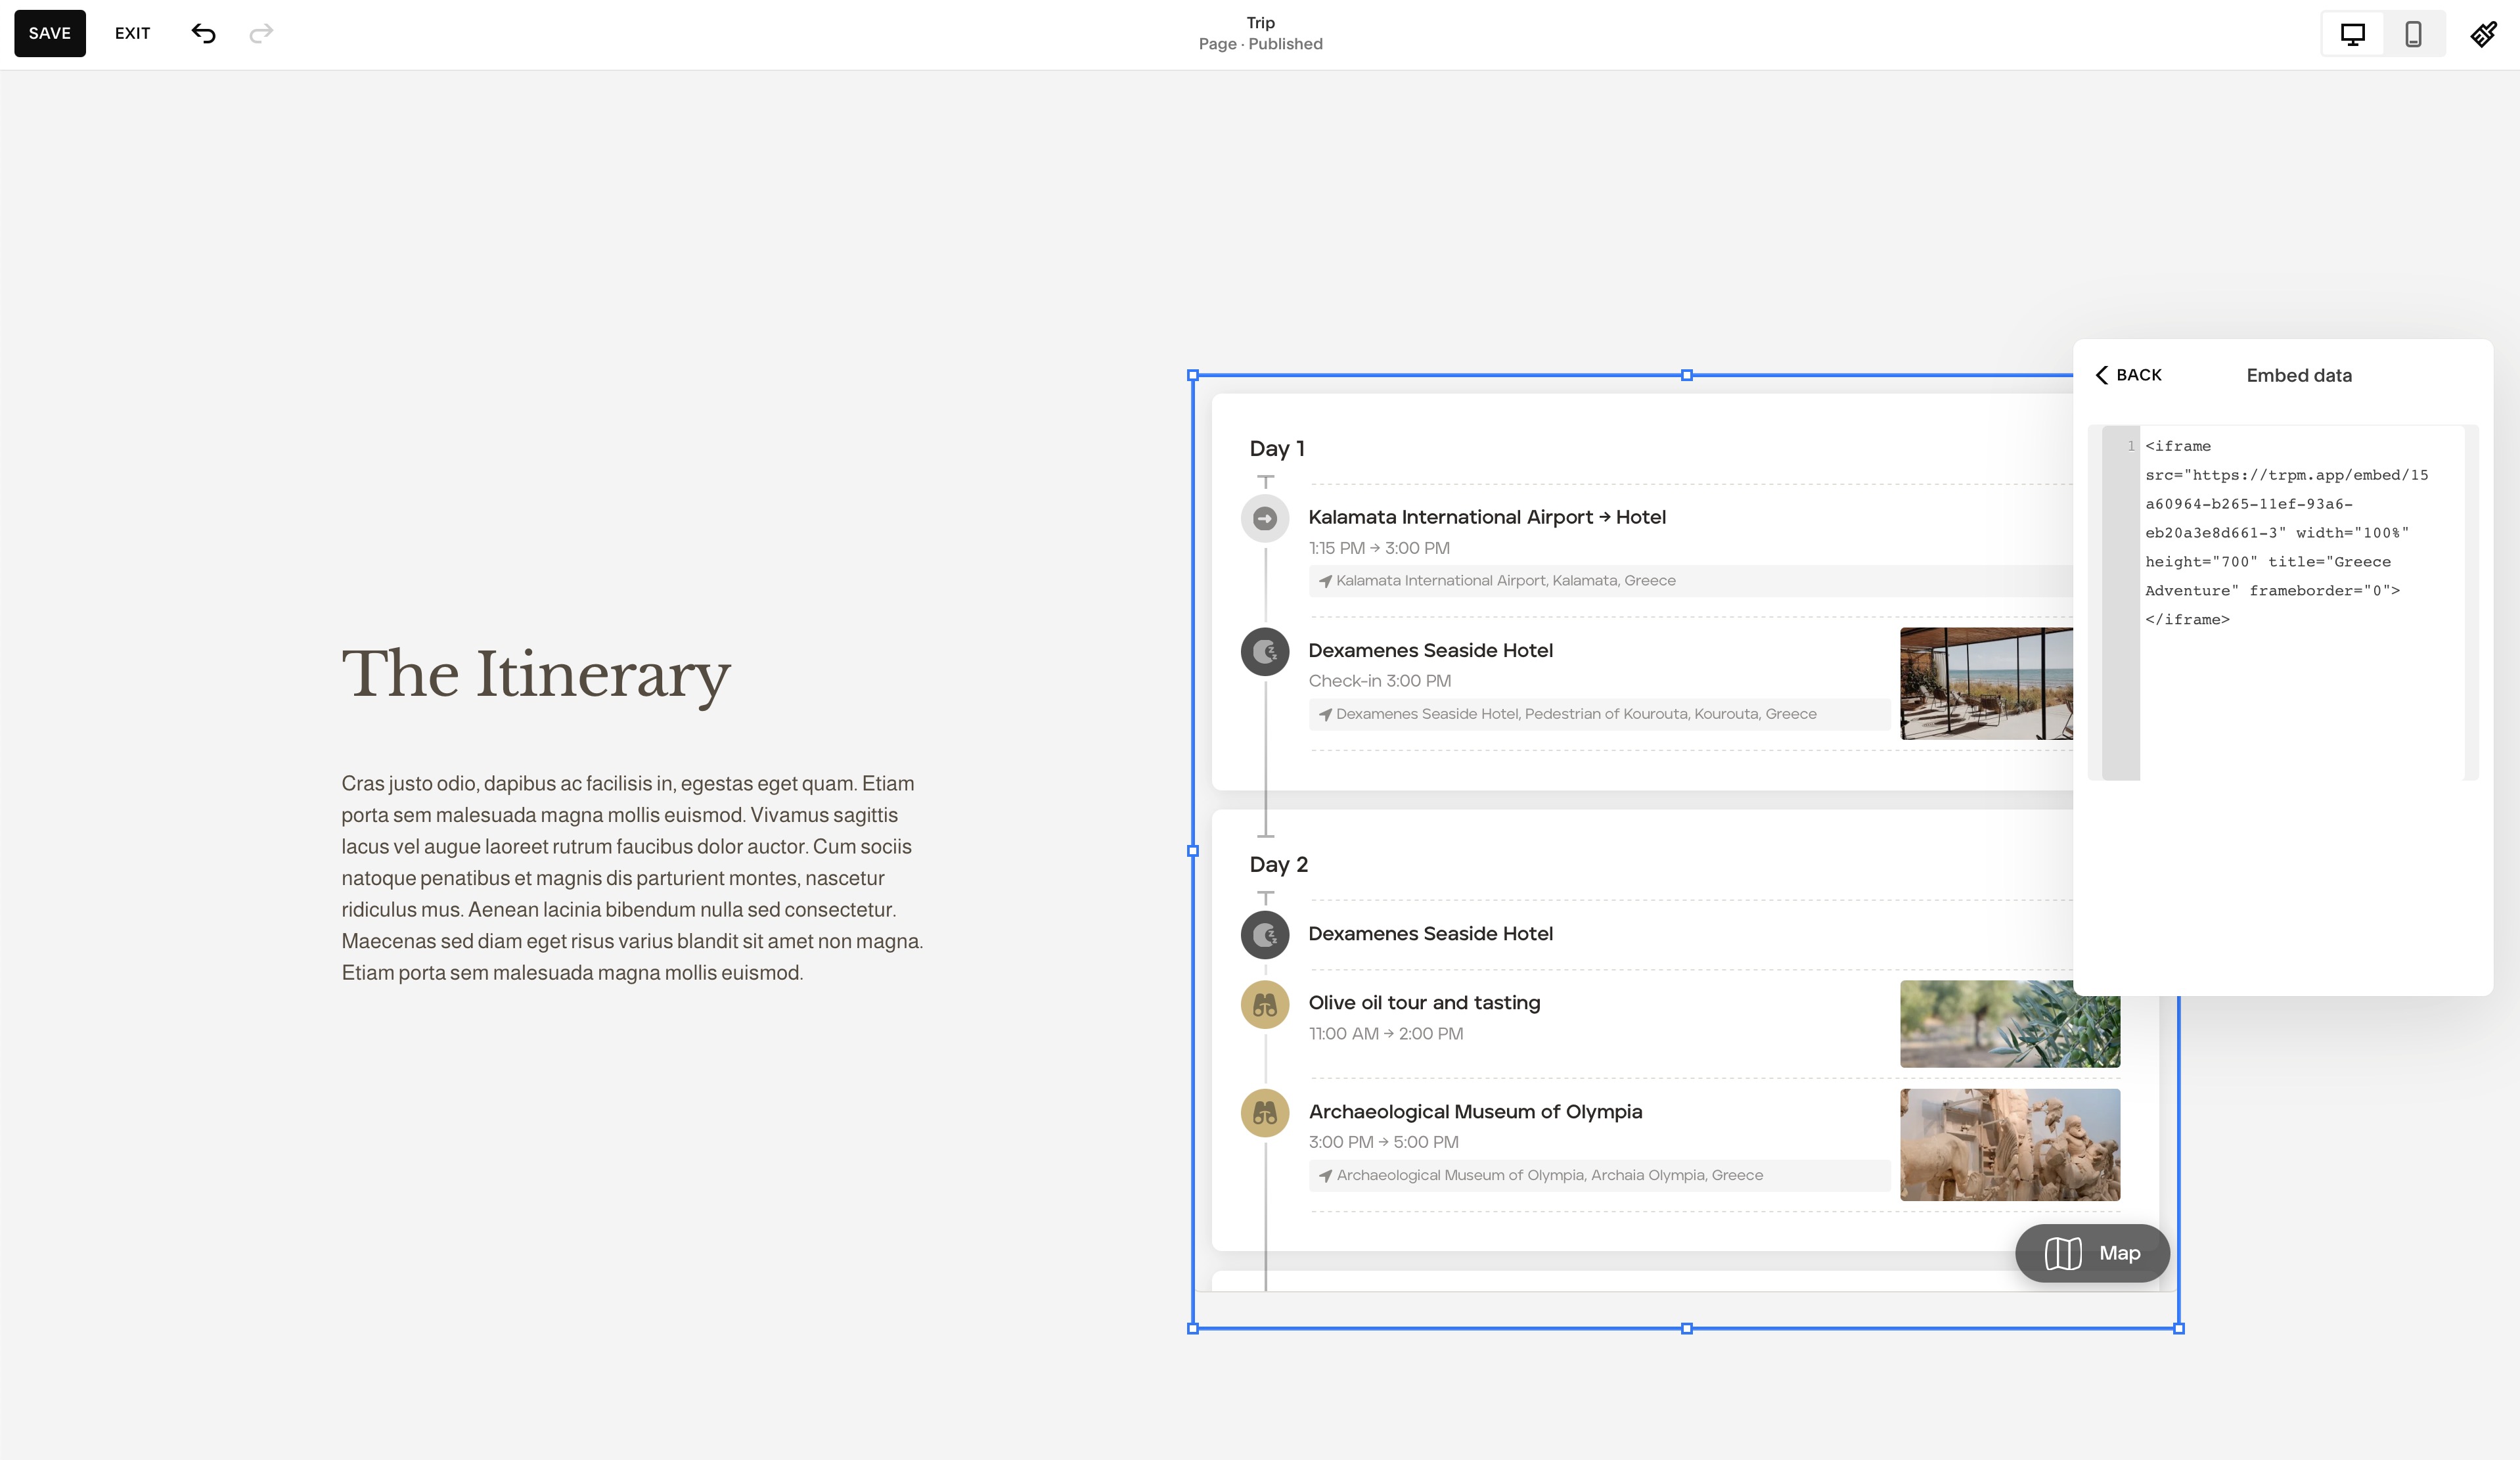
After clicking Embed data you'll be presented with a box to paste the embed code you copied from TripMapper. It'll look something like the screenshot above.
As soon as you paste the code, the itinerary from TripMapper will become visible on the page. From there you can make any width or height adjustments you like to get the itinerary looking as good as possible.
Here's how the example looks on our demo site.

WordPress
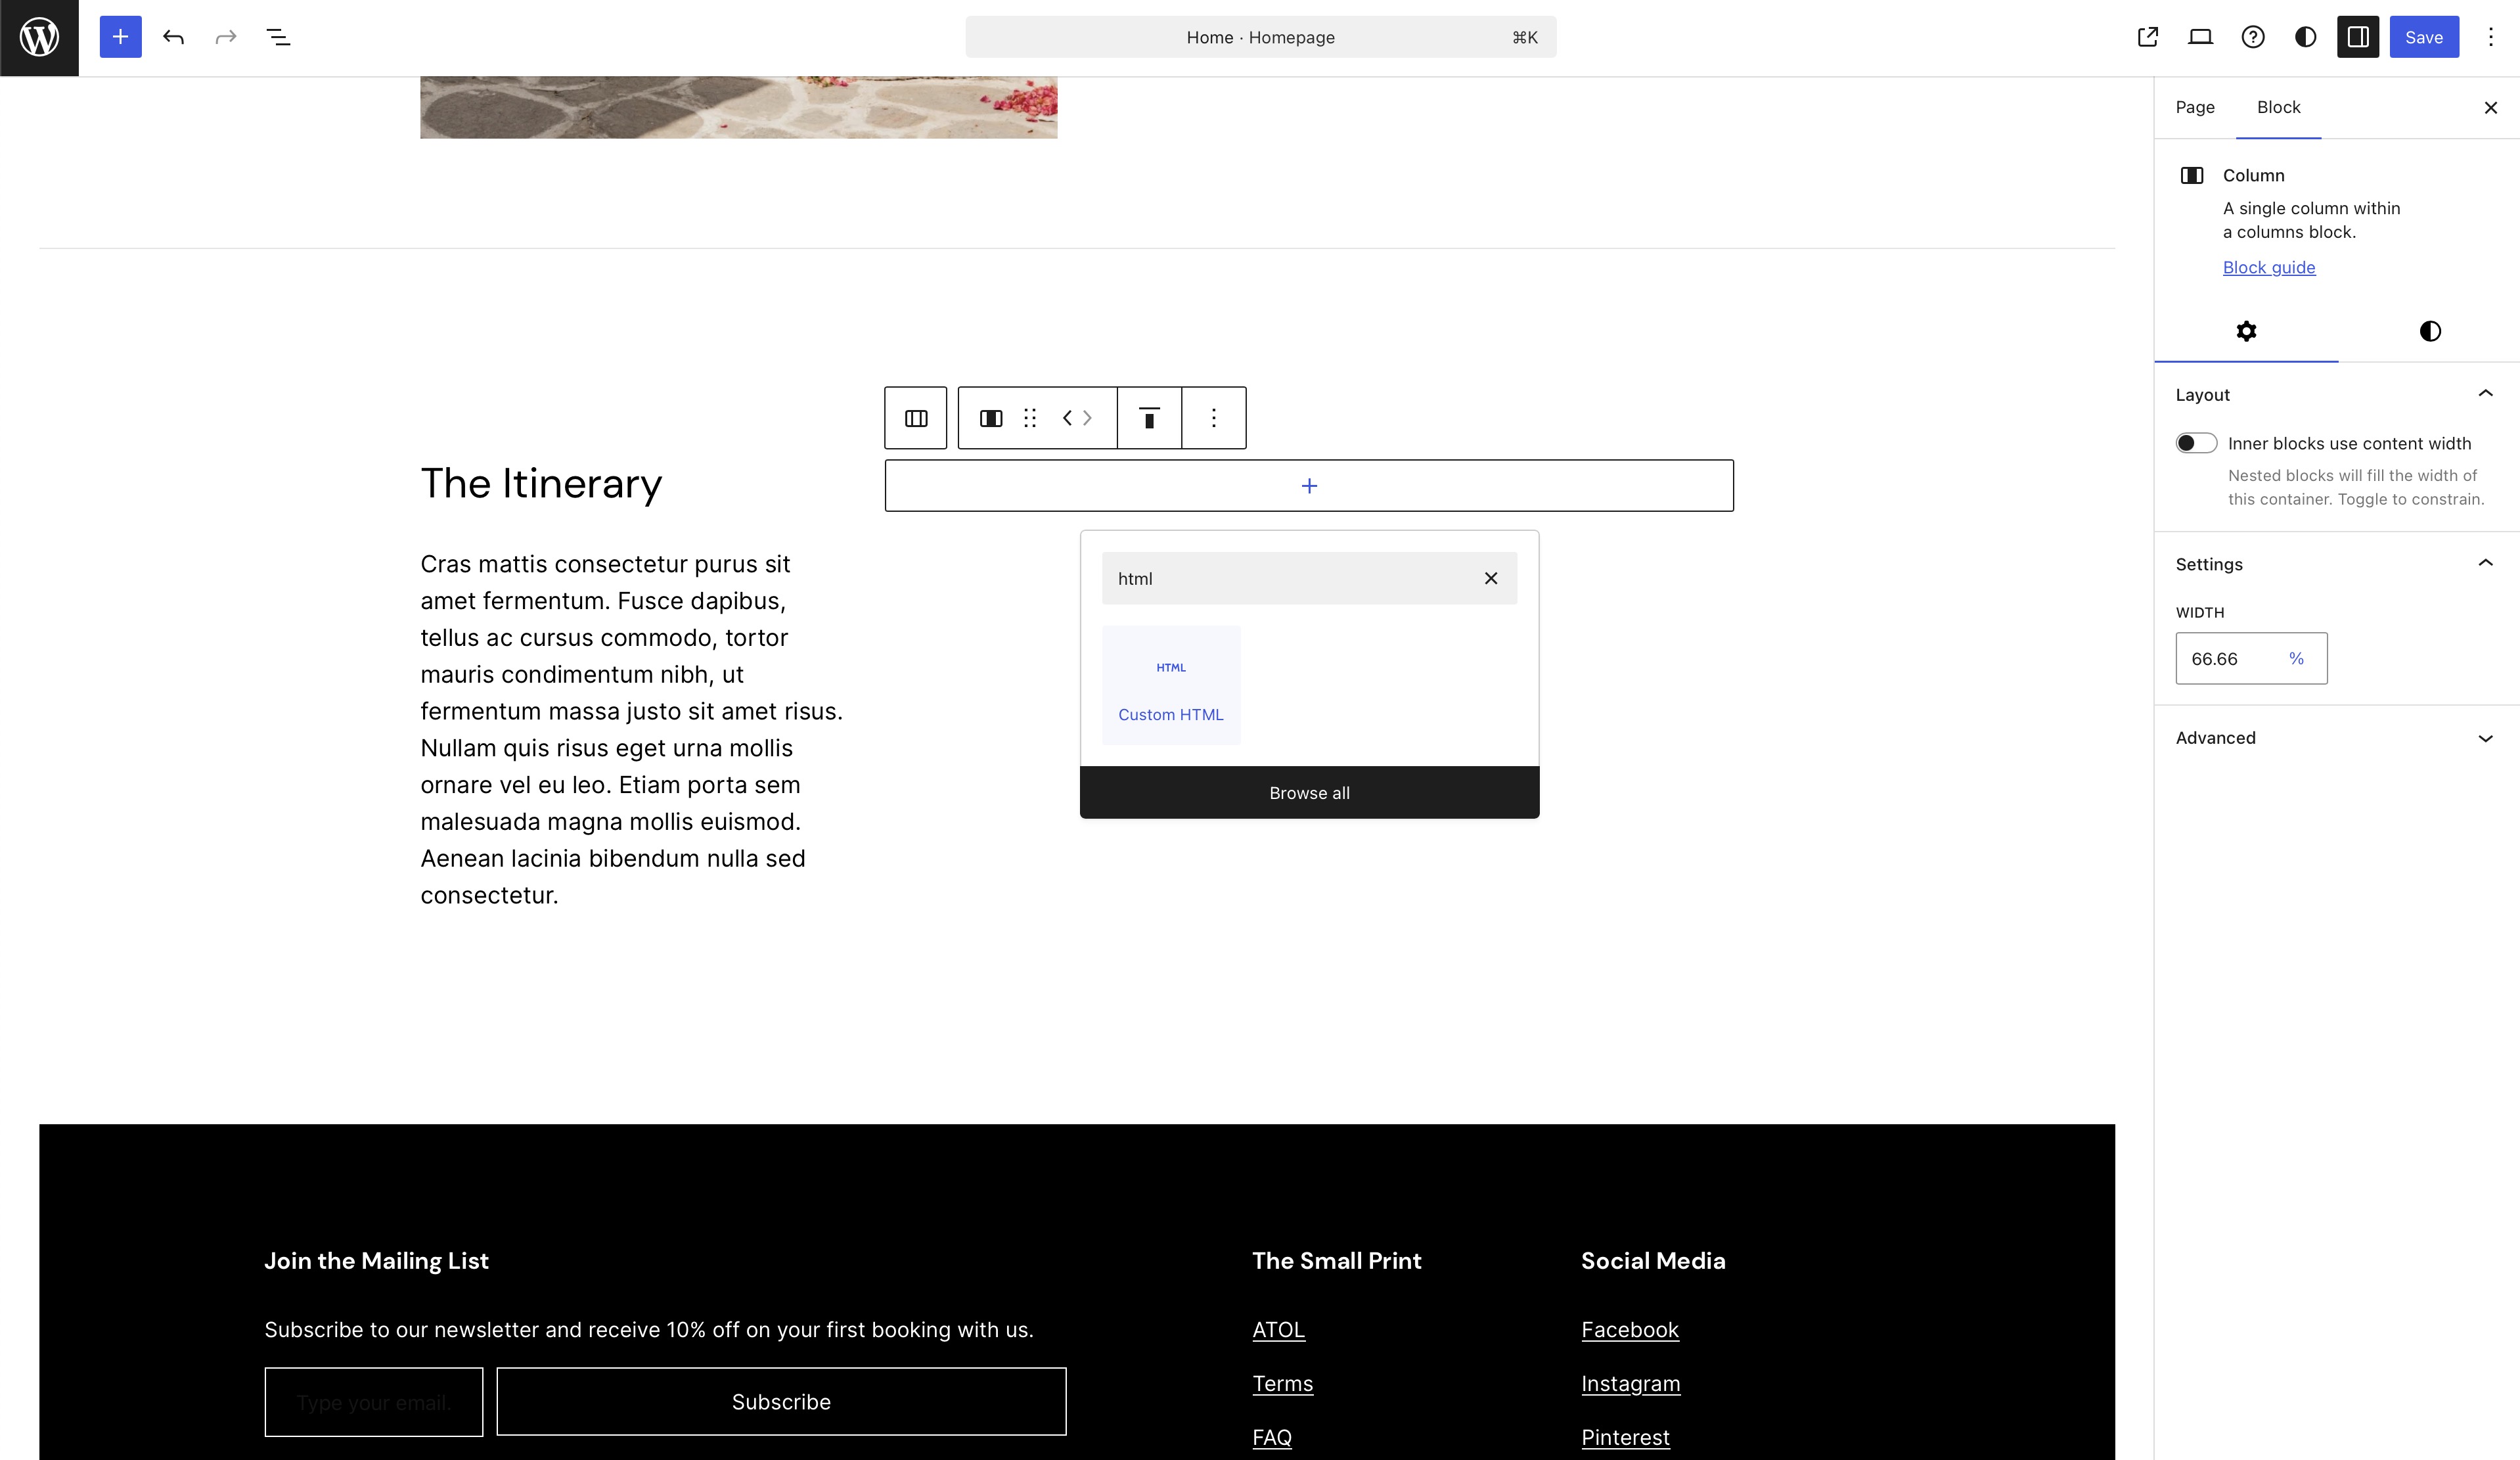
Once you've picked where you want the itinerary to go and have created space for it, click to add a block and search for the Custom HTML option.
Once selected, paste the embed code that you copied earlier from TripMapper into the box provided.
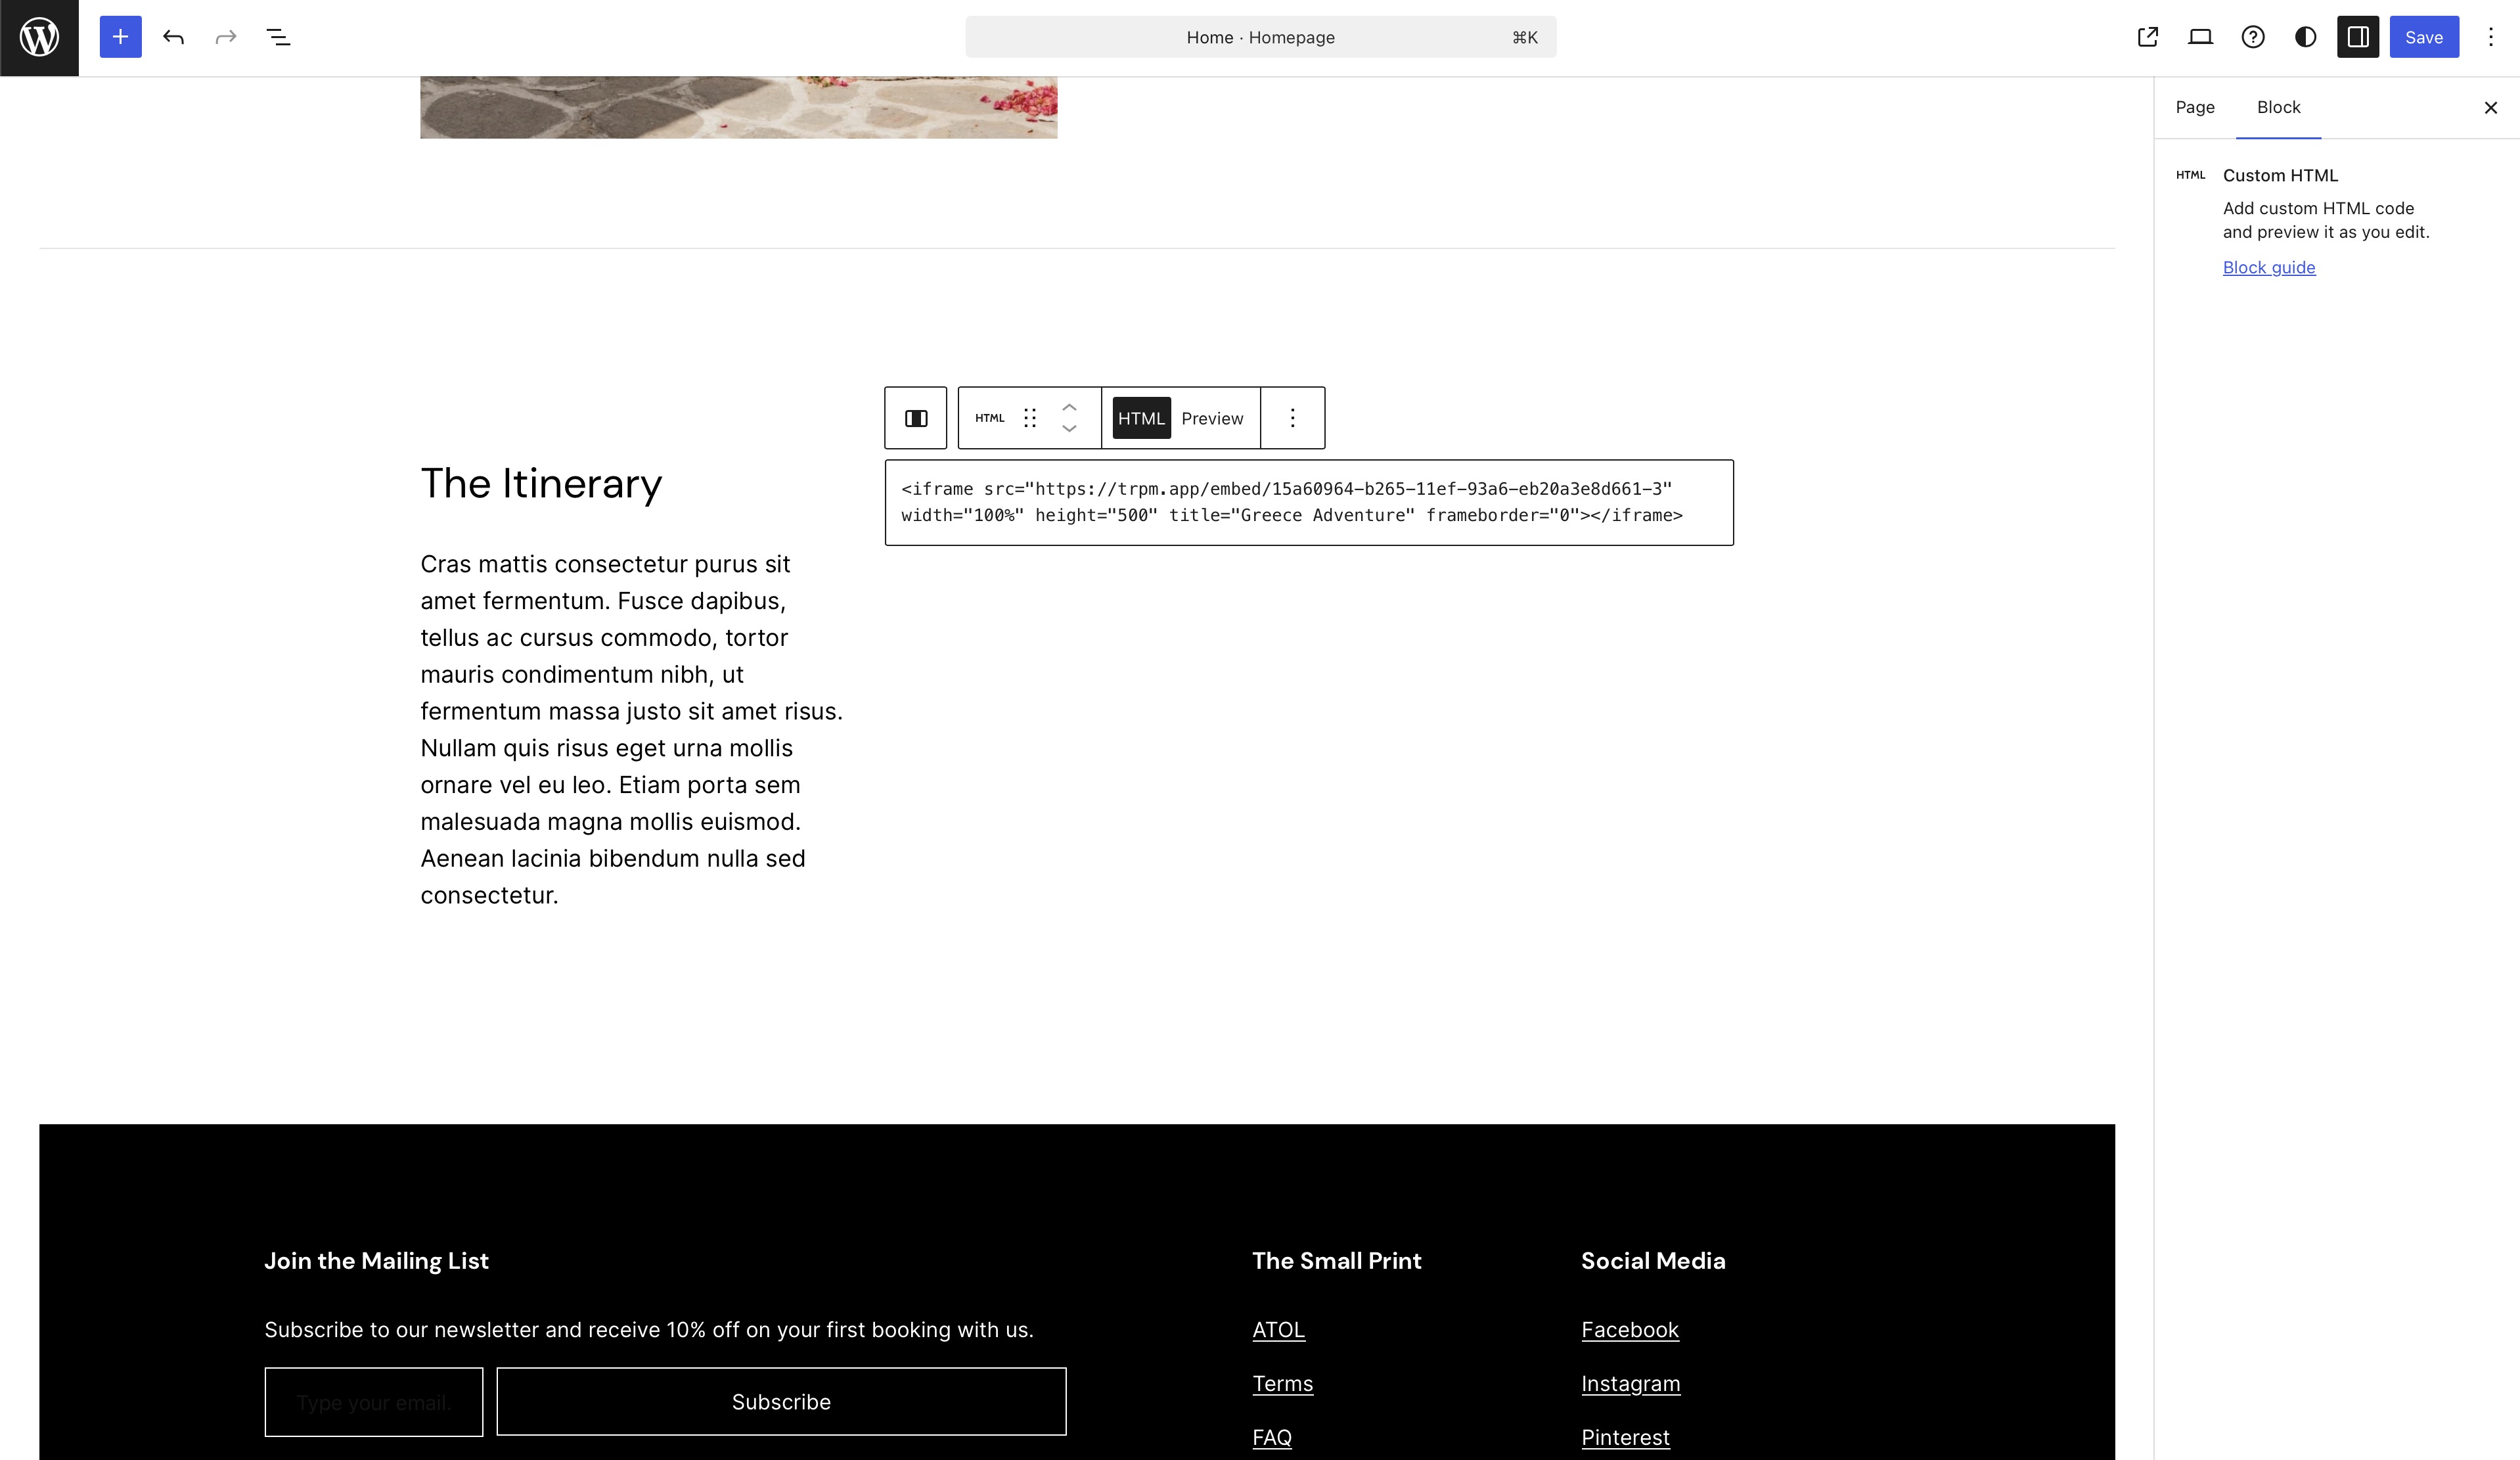
To check everything is working correctly, click the Preview button. This should render your embedded itinerary directly in the page.

Once you're happy with the size and position of the itinerary on the page, don't forget to click Save.