Creating the fixed departure master itinerary
The master itinerary is the foundation of your fixed departure trip. It holds the trip content that all child itineraries (individual client bookings) will inherit.
Create the master itinerary
Go to the 'Trips' section and click '+ New Proposal'.
Choose either 'From Template' or 'From Scratch'.
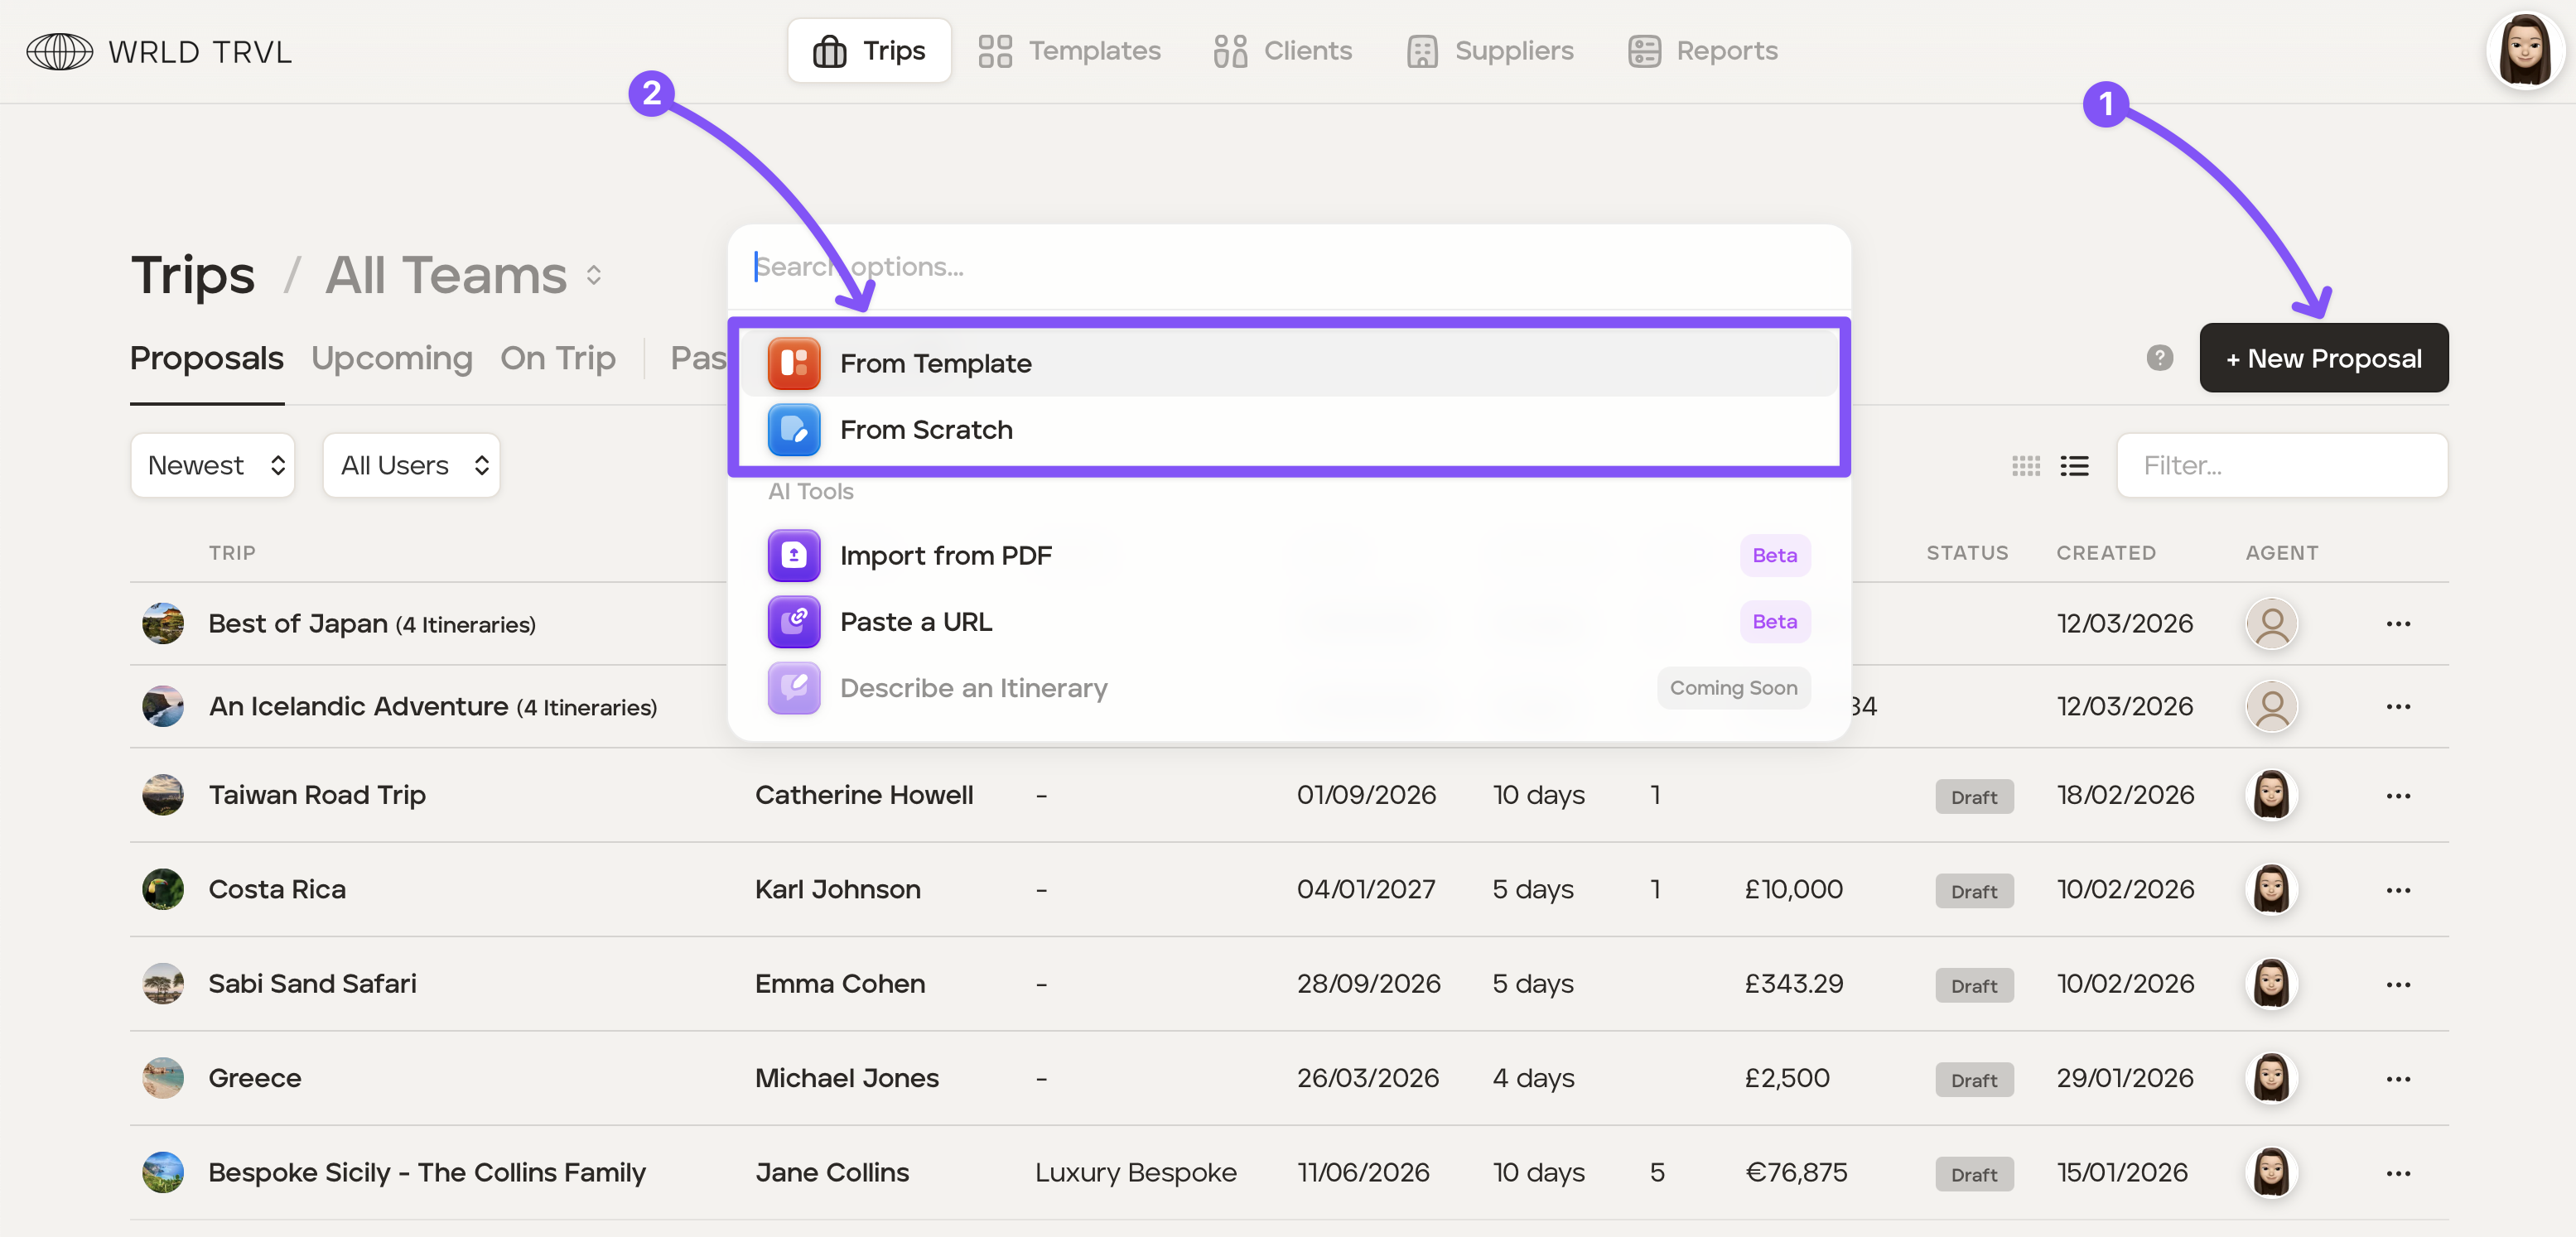
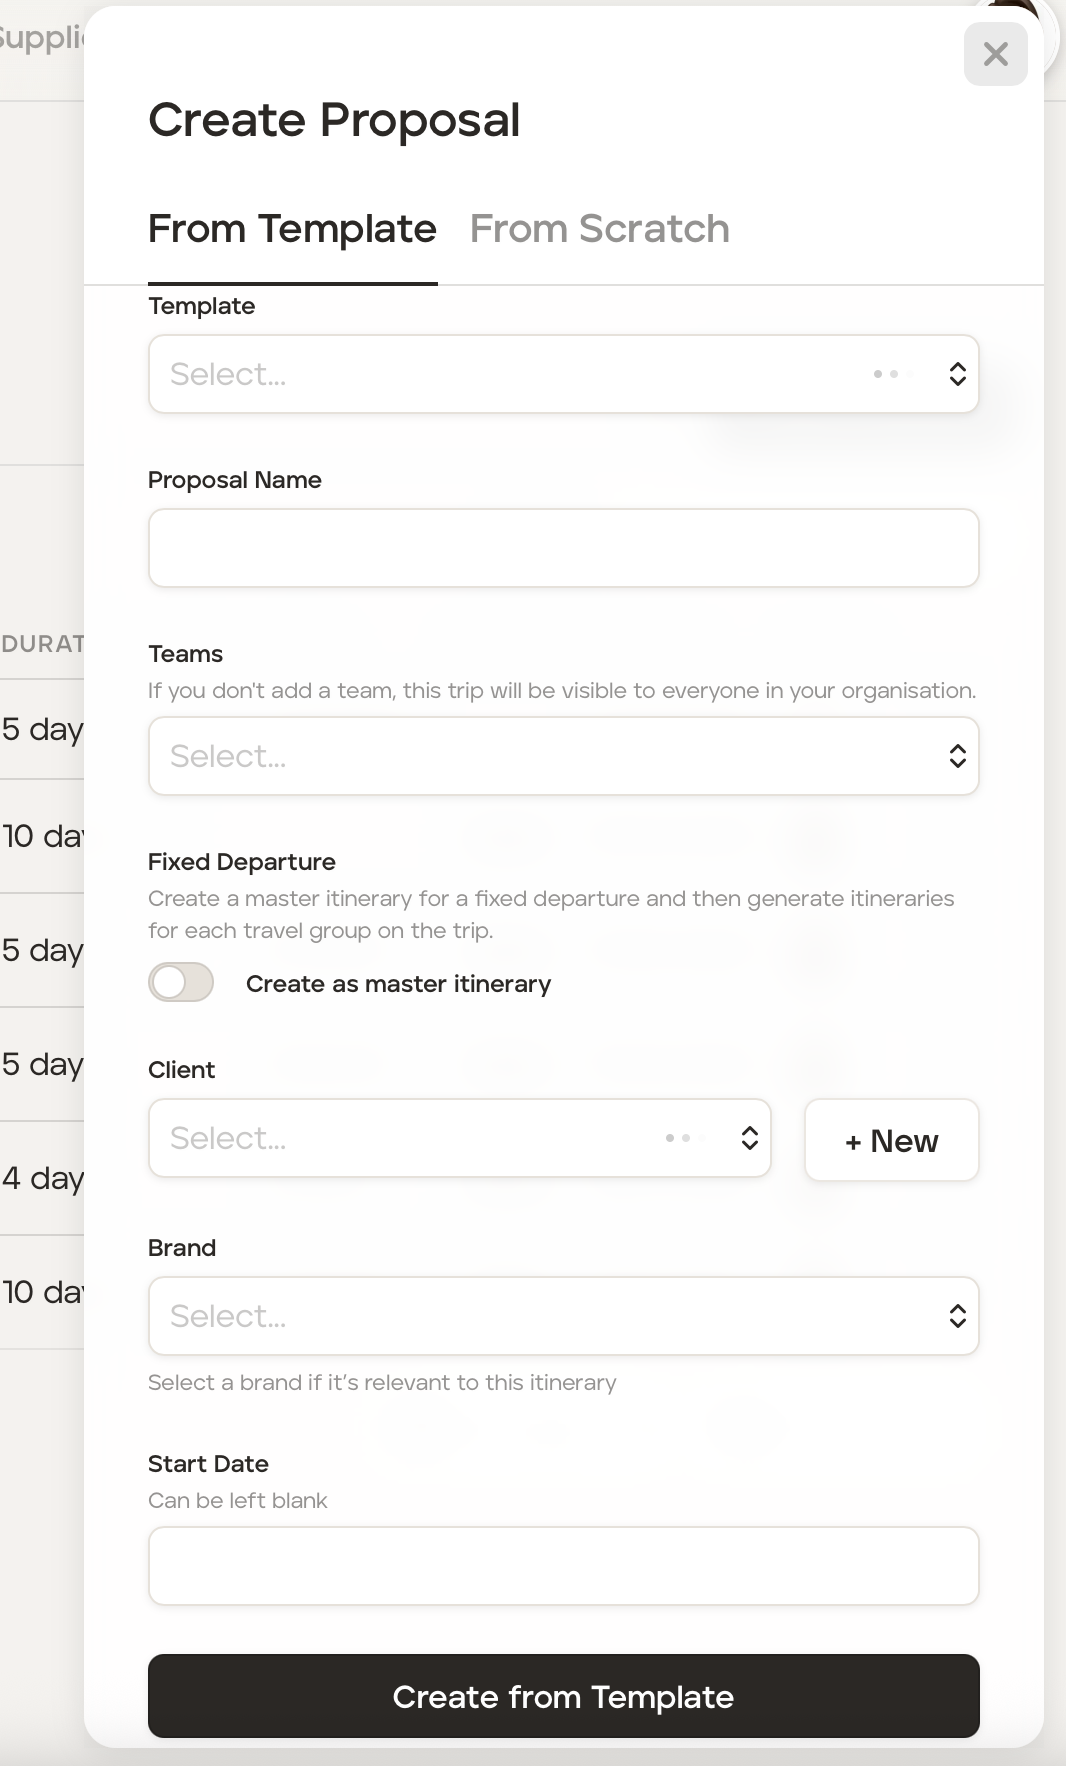
If creating the master itinerary from a template, fill in:
the proposal name
team access (optional)
switch on the 'Create as Master Itinerary' option — this is what designates it as a fixed departure trip rather than a standard proposal
the brand if not the main account brand (optional)
the fixed departure start date
and then click 'Create from Template.'
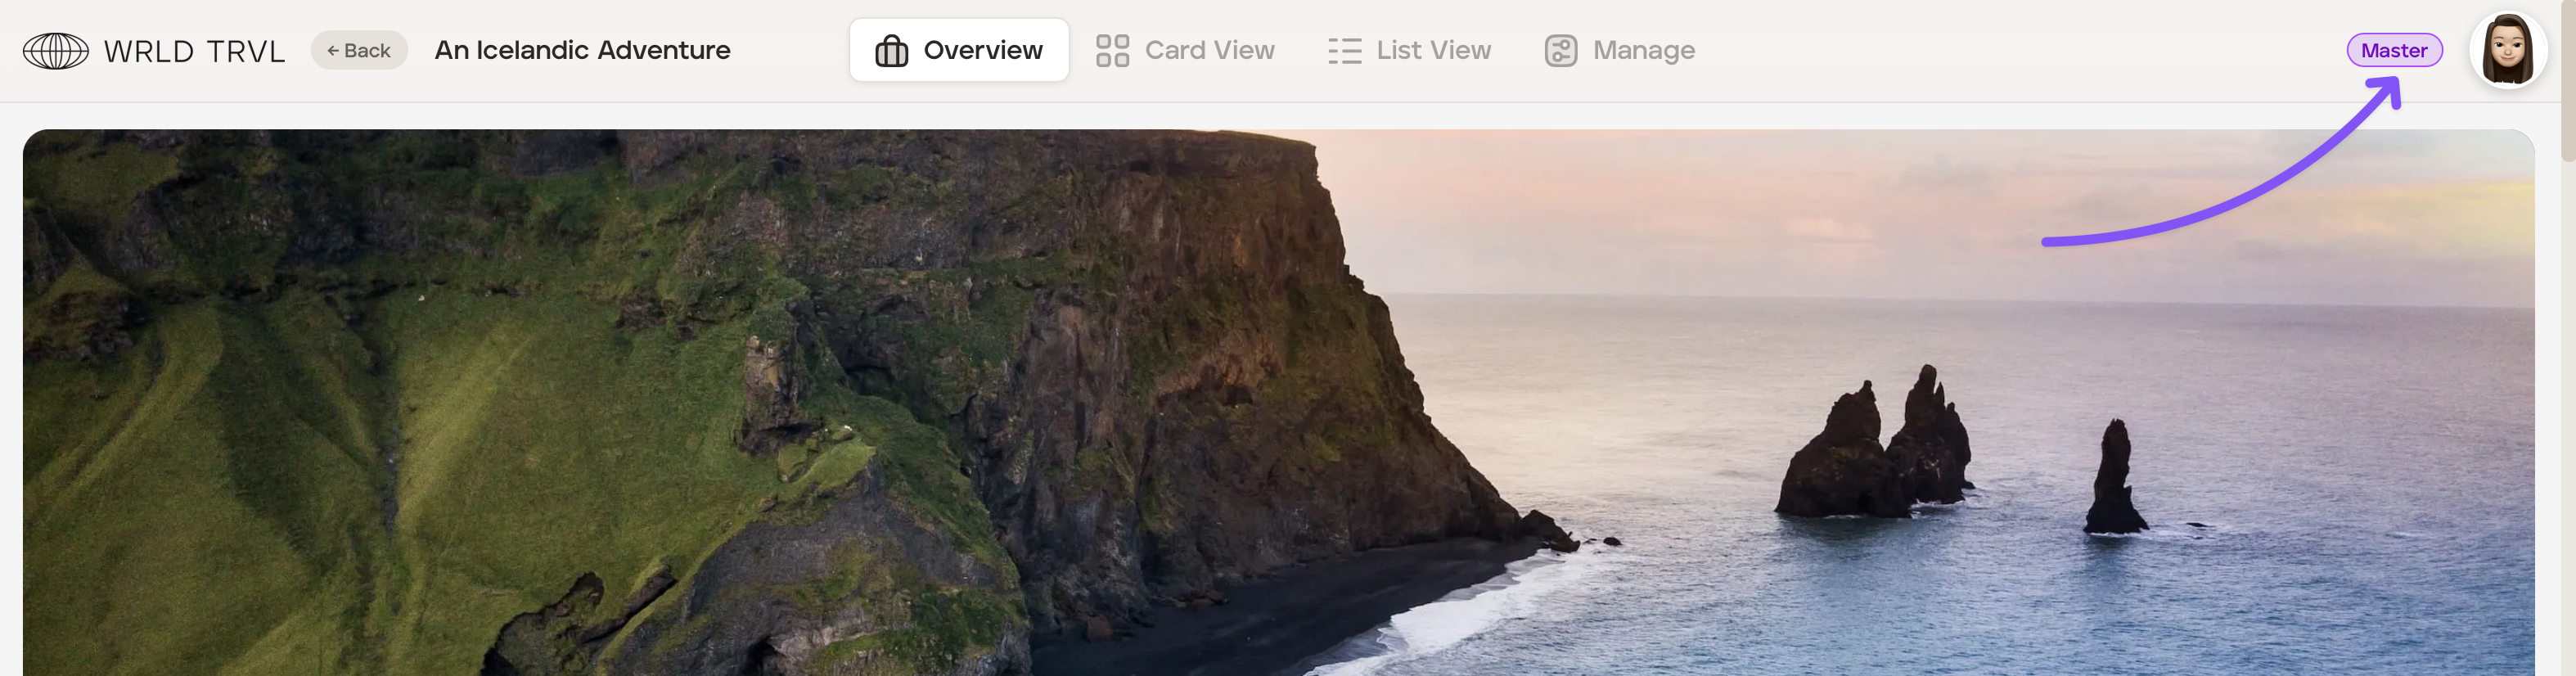
Once created, the master itinerary is identified by a 'Master' tag in the top right corner of the screen.
Build the itinerary content
Build the itinerary in Card View or List View exactly as you would a standard itinerary. You can add cards, suppliers, images, attachments, tasks and notes.
Everything you add to the master itinerary will automatically cascade to all child itineraries. This includes:
Itinerary cards - all cards on the master appear in child itineraries and update automatically when the master changes
Overview content - the trip description and advanced overview blocks
Trip files - files added to the master overview are available in all child itineraries as read-only
Costs and charge groups - pricing and charge groups defined on the master are used as defaults in child itineraries
Tasks - tasks added to the master are made available within all child itineraries