Send an invoice to your client (where prices have been added to individual itinerary cards)
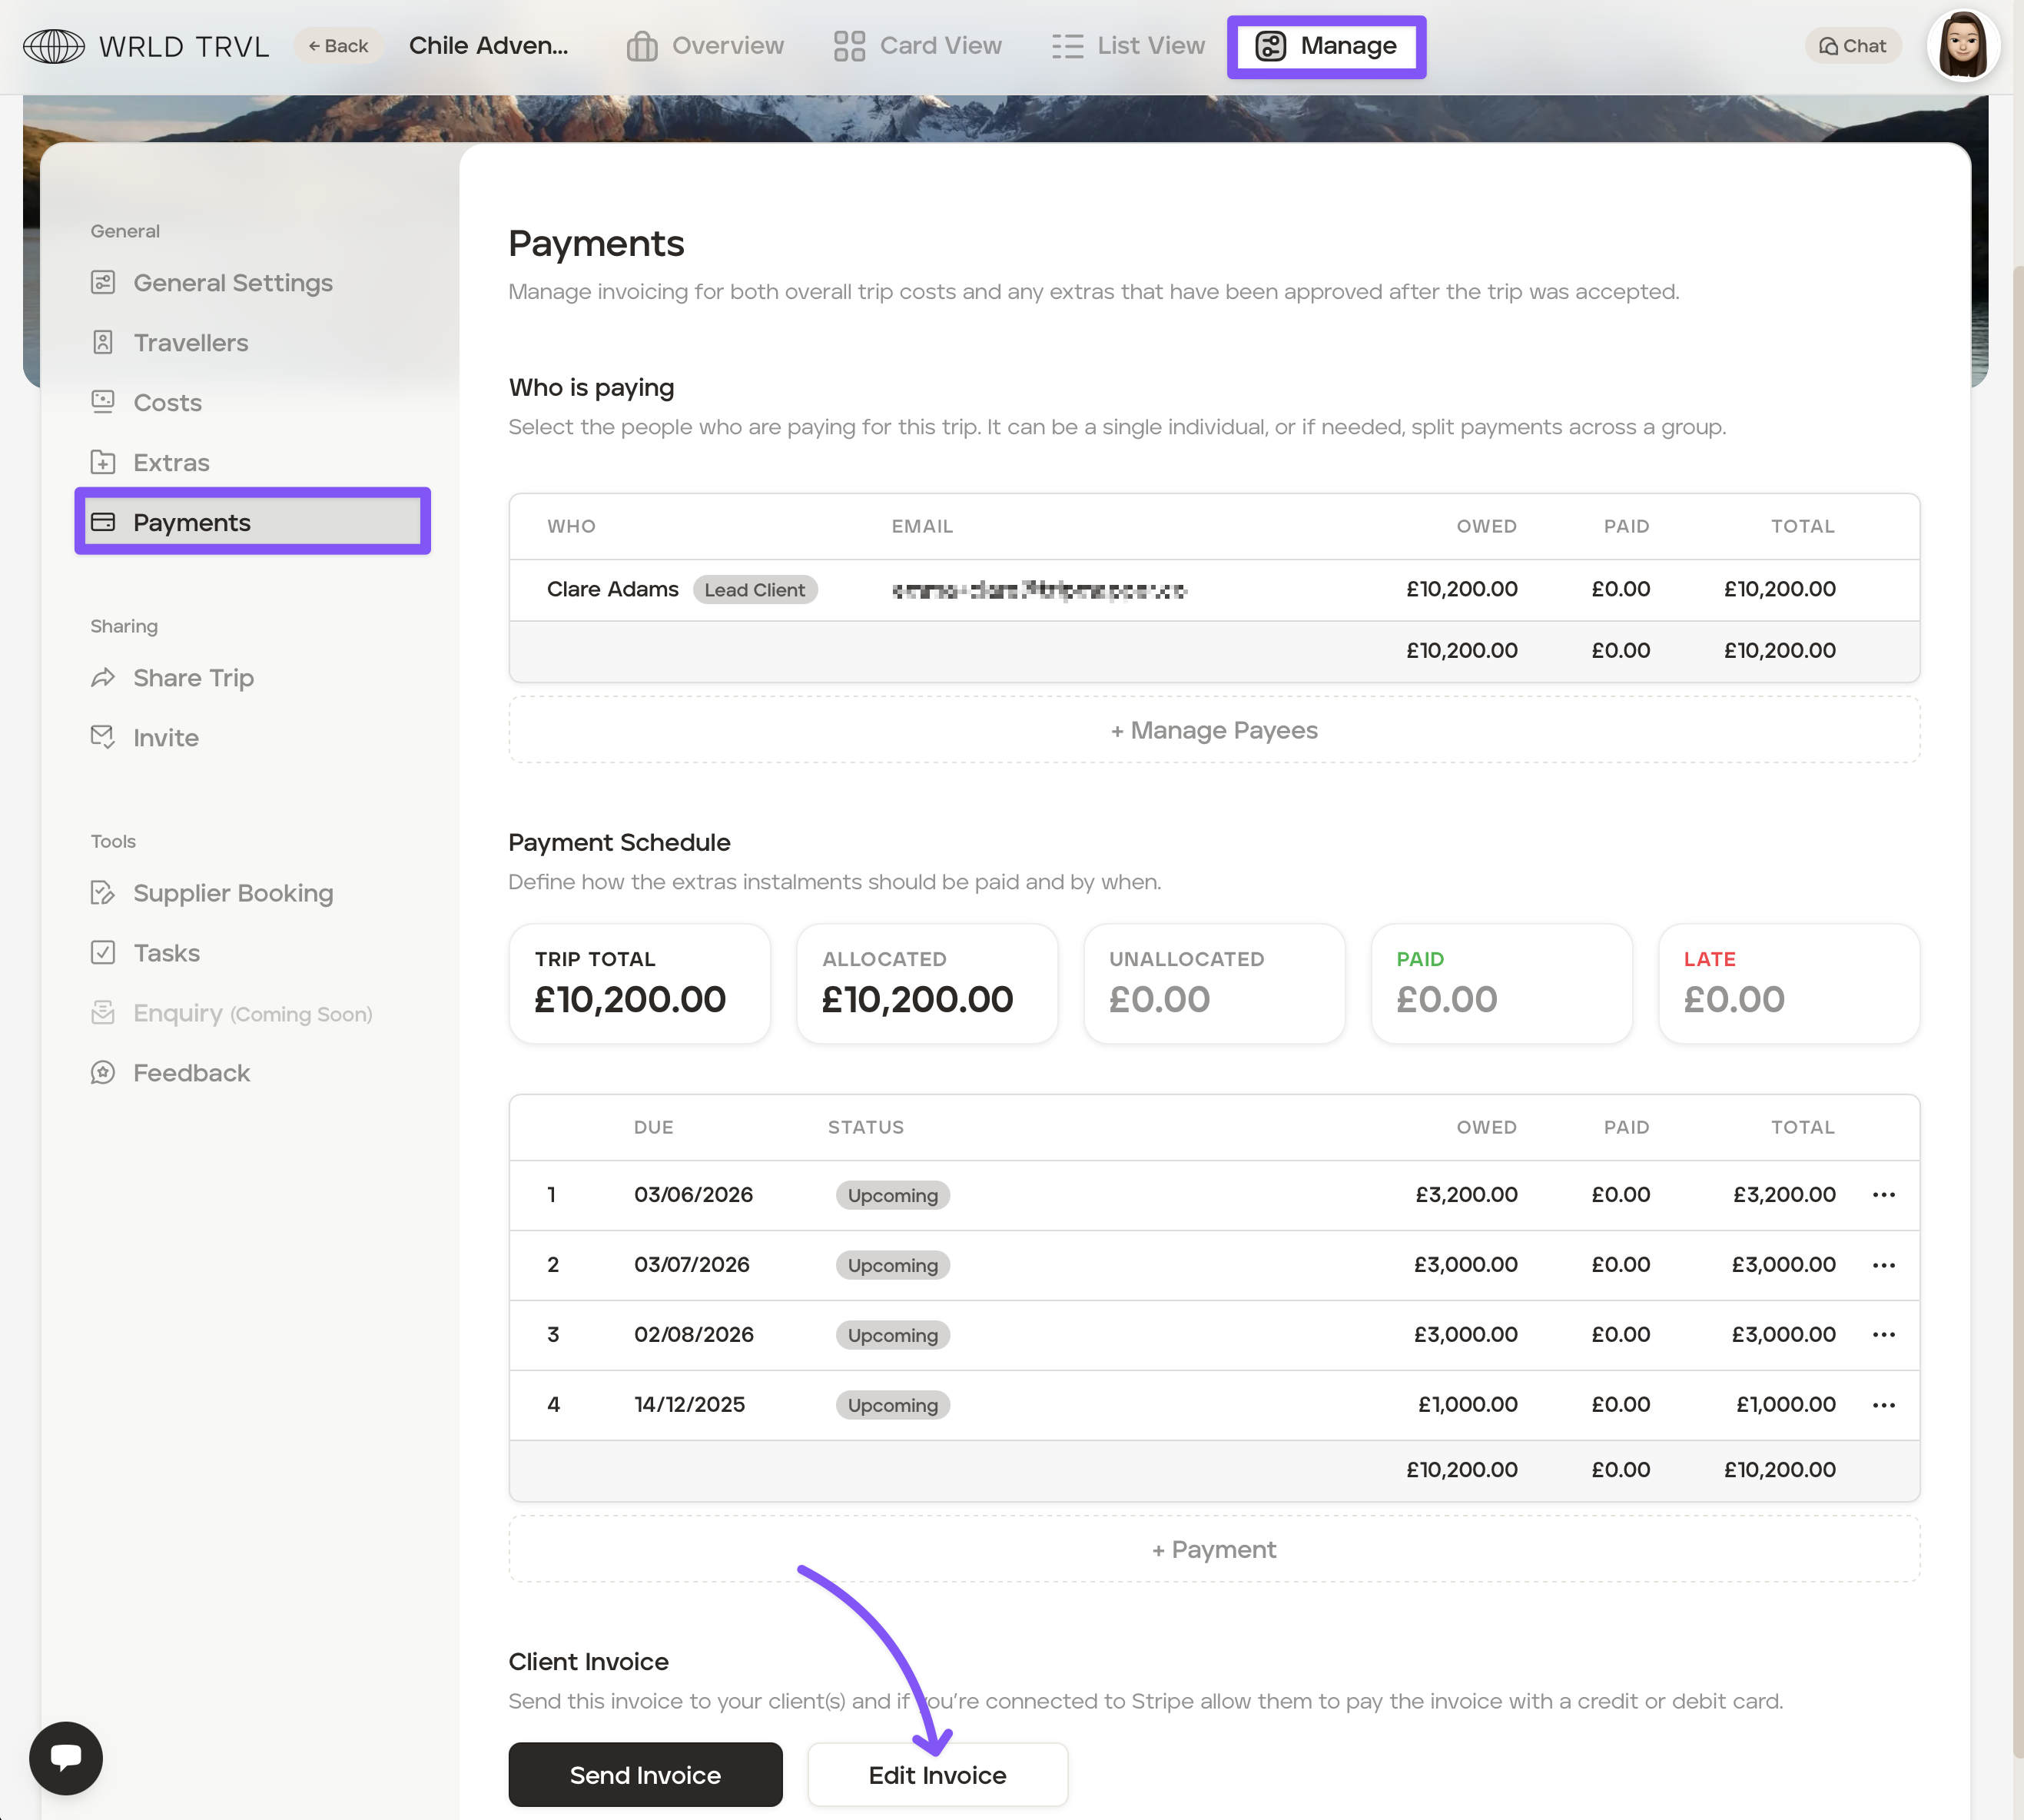
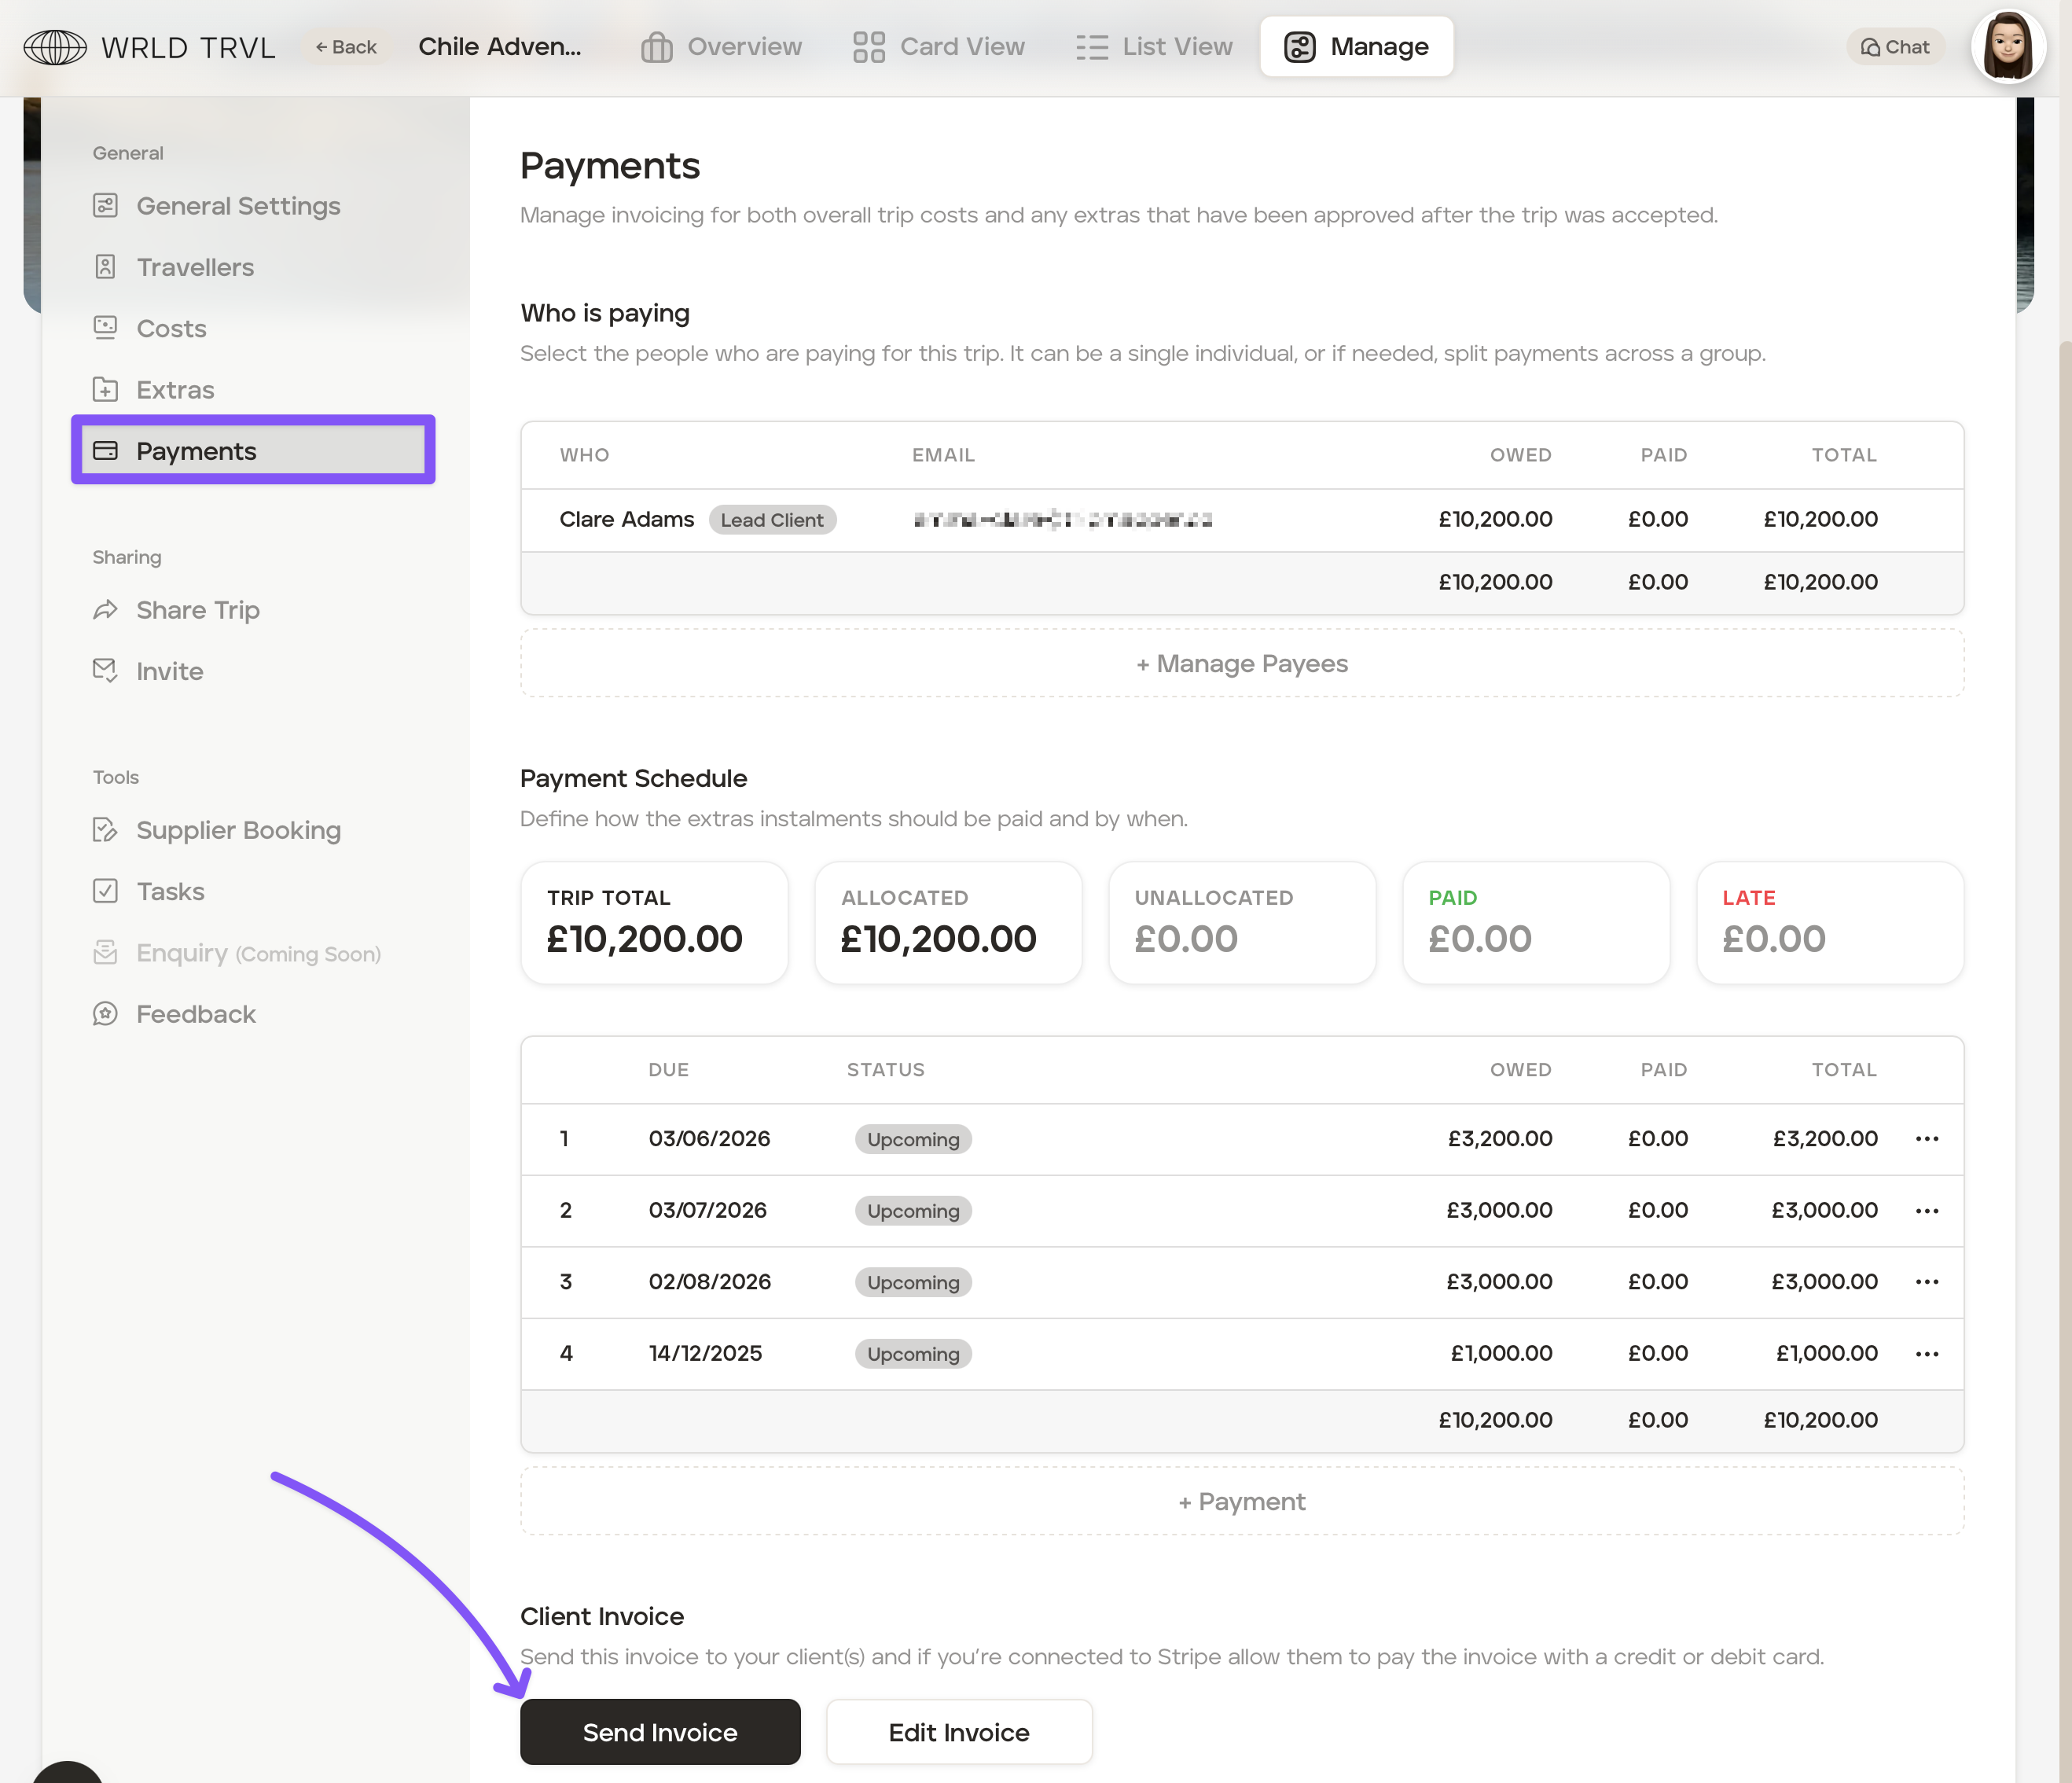
In the ‘Client Invoice’ of the 'Payments' section of a trip, you can edit and send invoices to your clients. The invoices will be branded with the business details set in the account 'Settings'.
To customise and edit an invoice, follow the steps below click 'Edit Invoice':
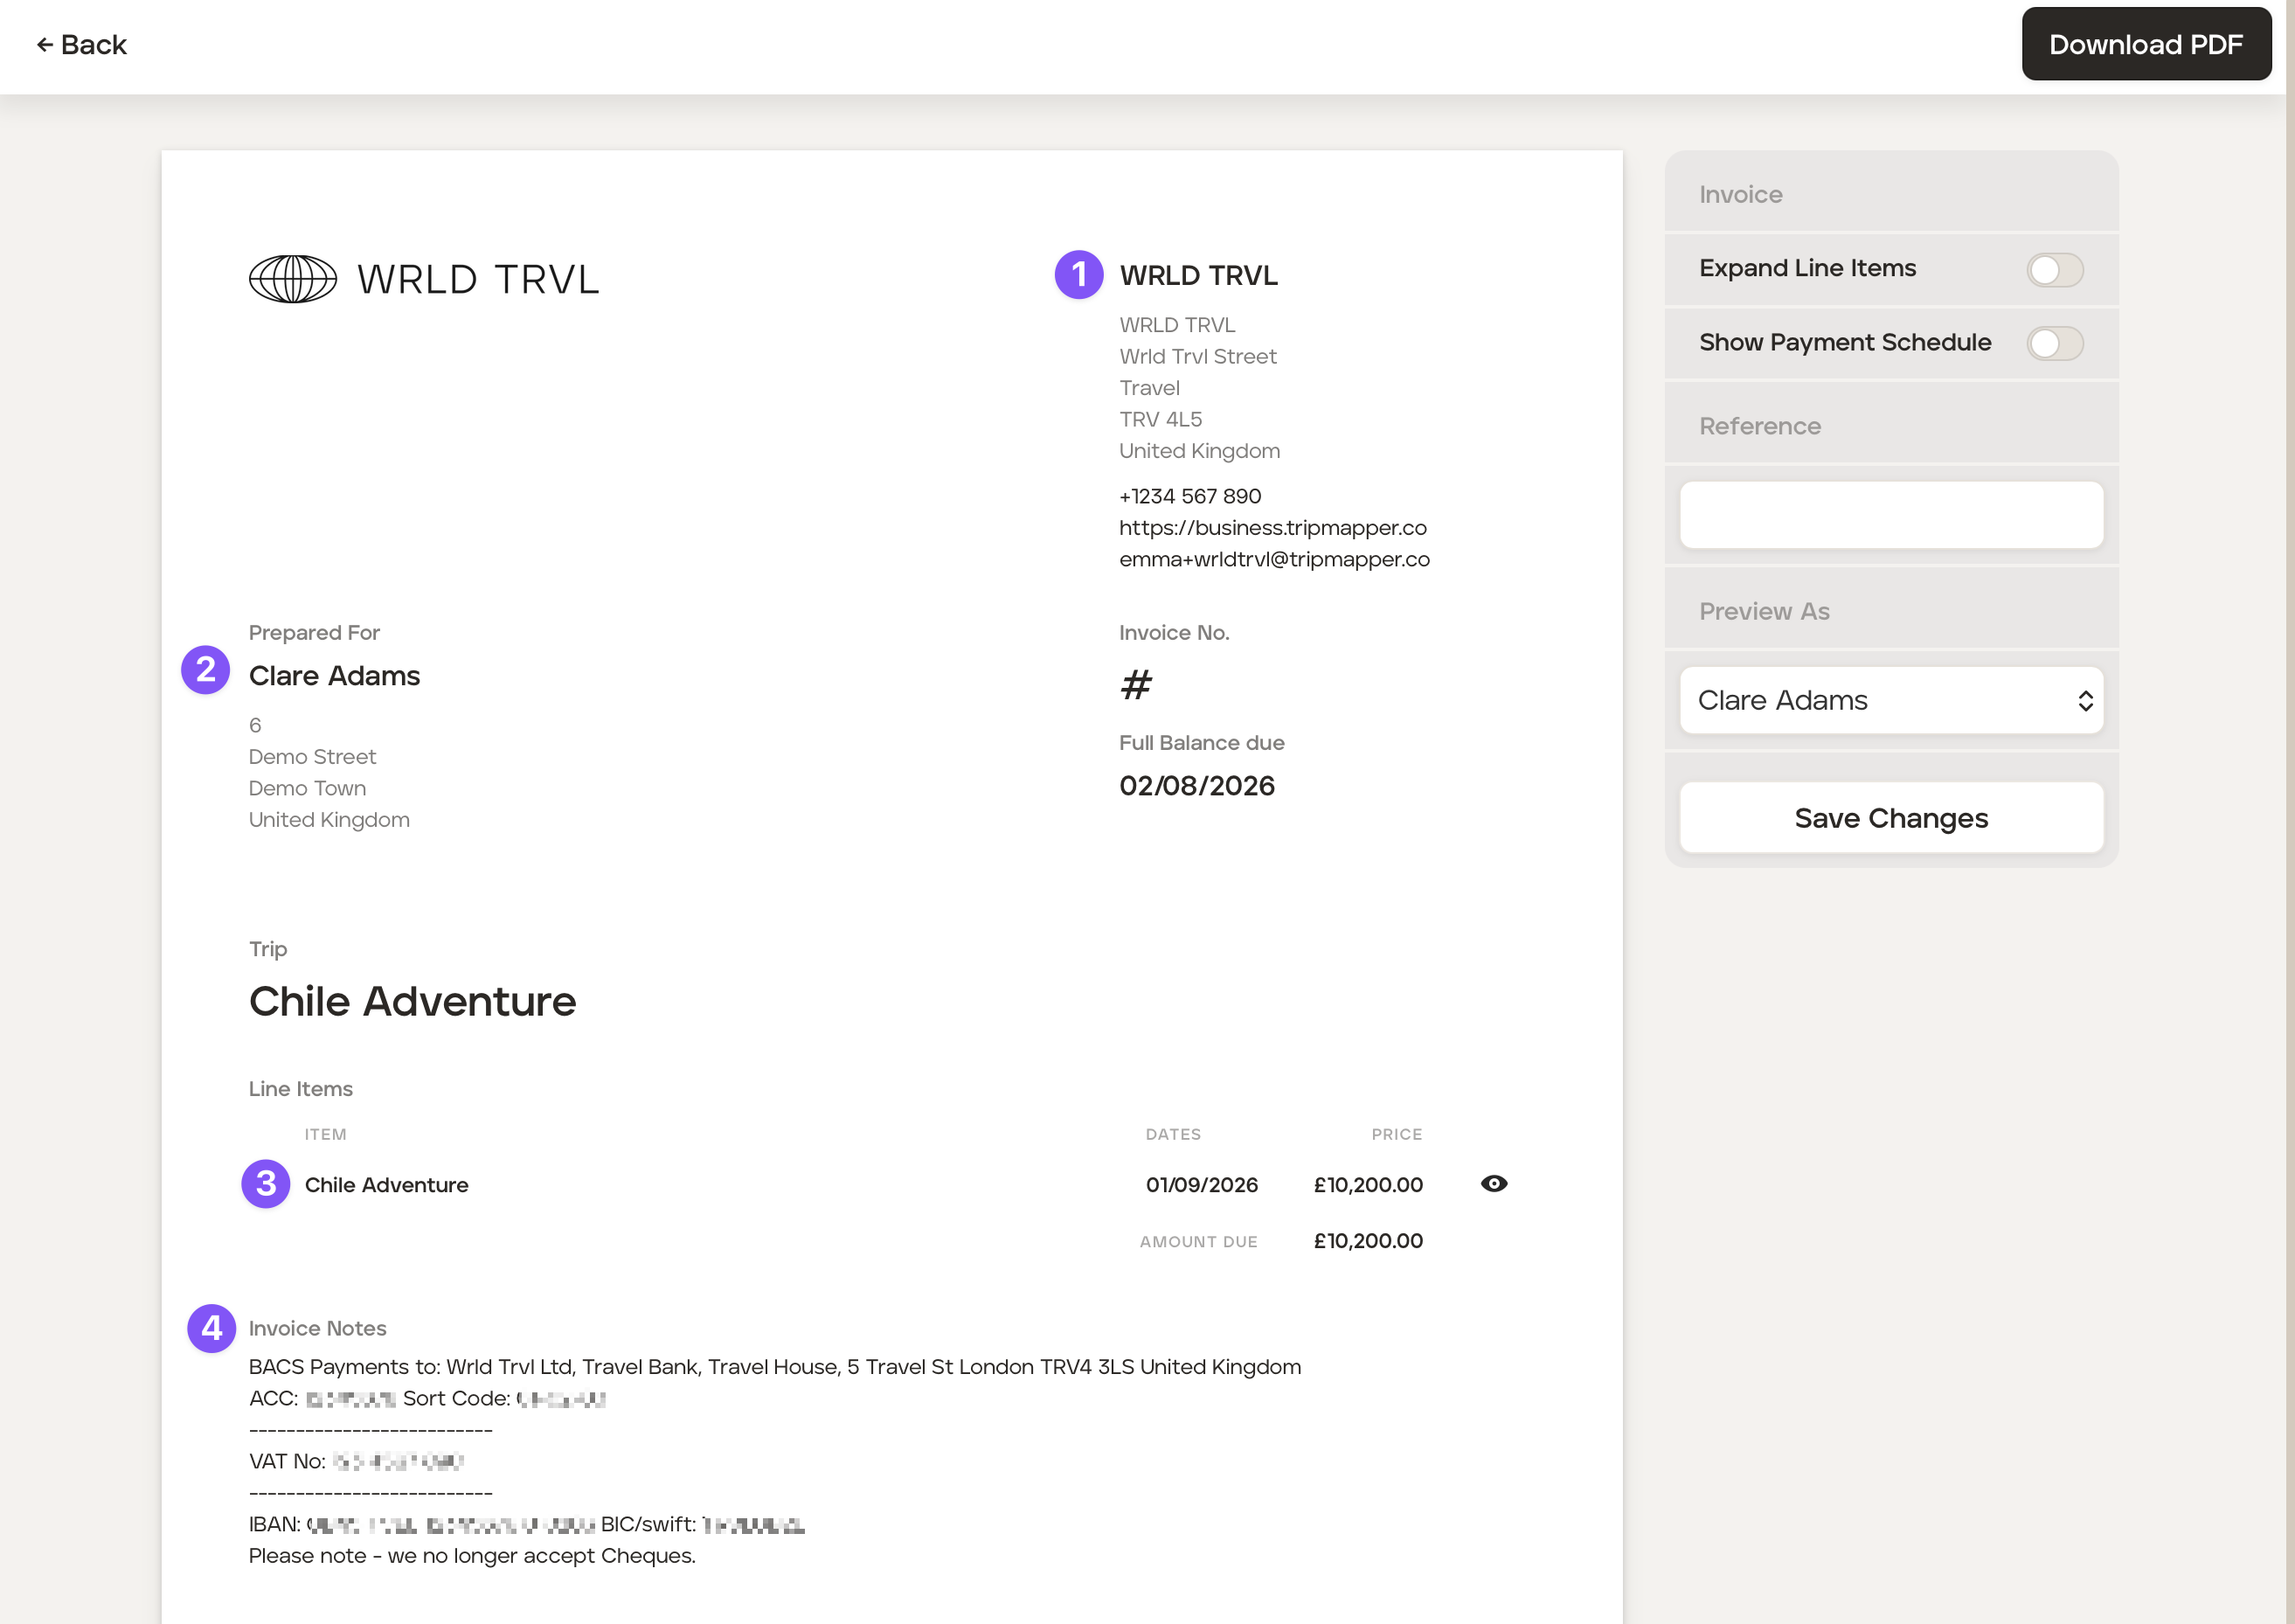
After clicking the 'Edit Invoice' button you will be taken to the customisable preview of the invoice. You will see:
1 - The company details as set in your account 'Settings.'
2 - The client's name and address.
3 - The name and start date of the trip alongside the total amount due.
4 - The invoice notes as set in your account 'Settings'.
NB. As this is a preview, the invoice number will not yet generate.
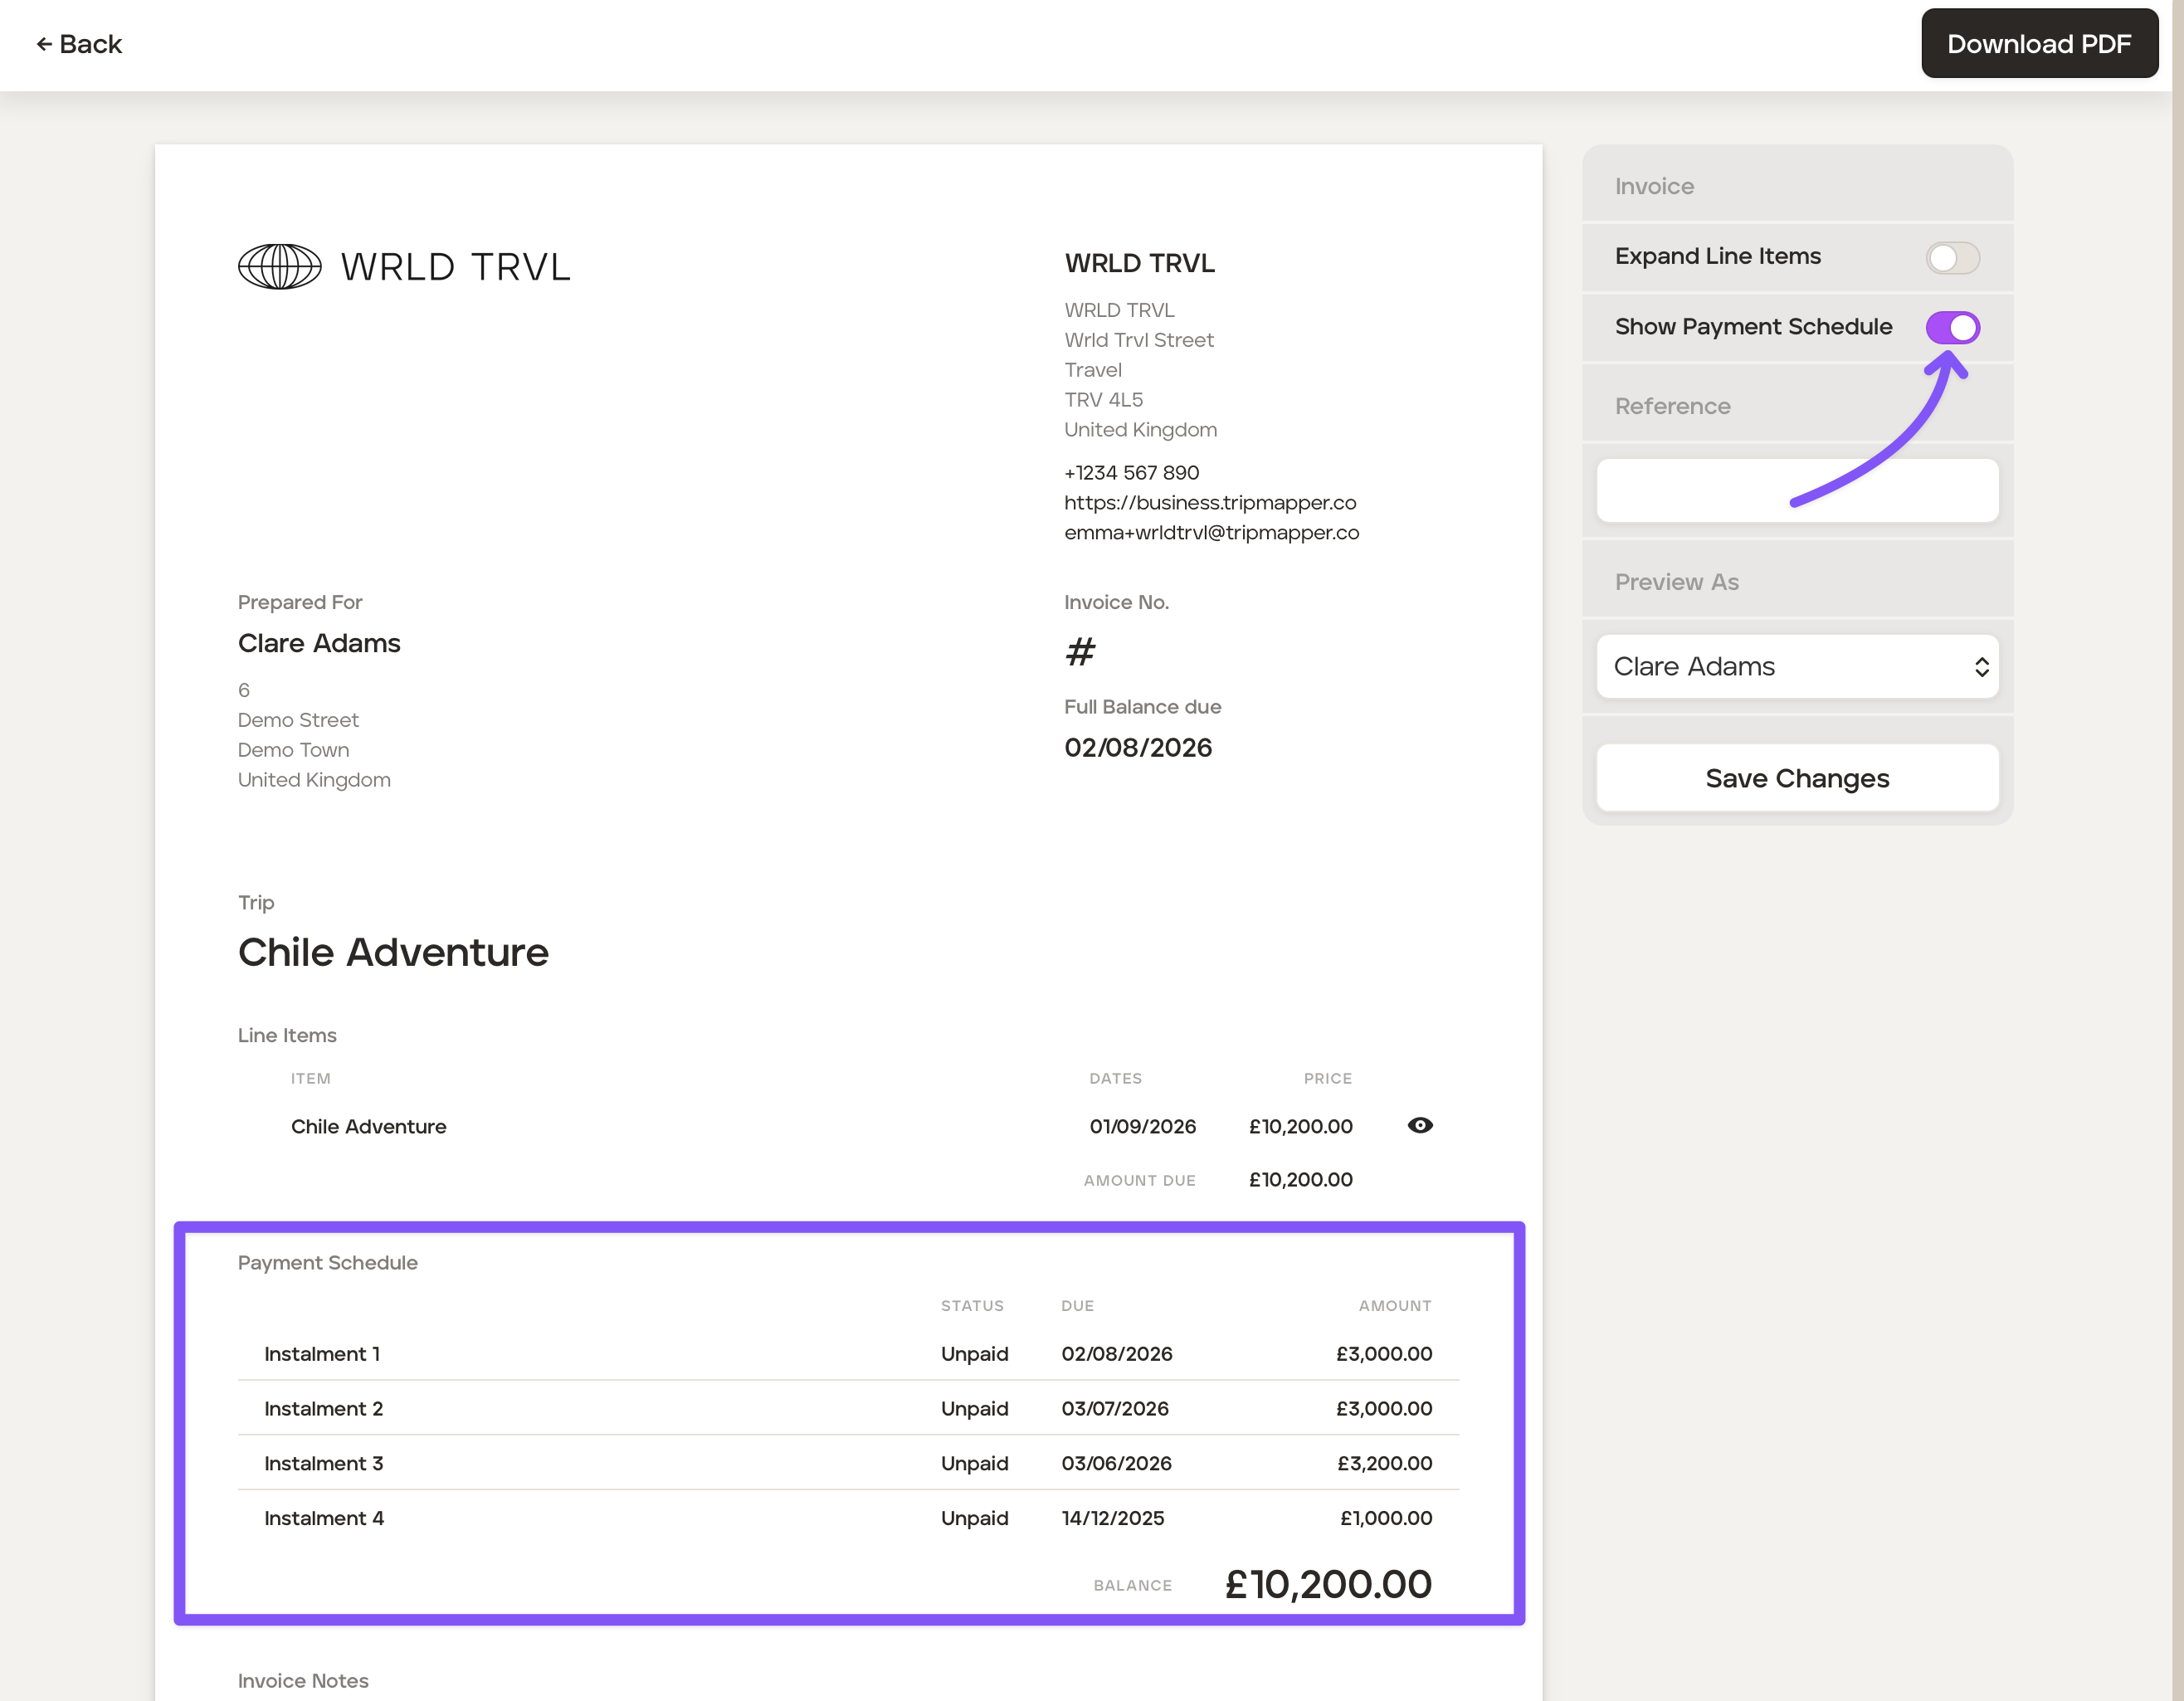
To include the payment schedule, toggle the 'Show Payment Schedule' on and click the 'Save Changes' button.
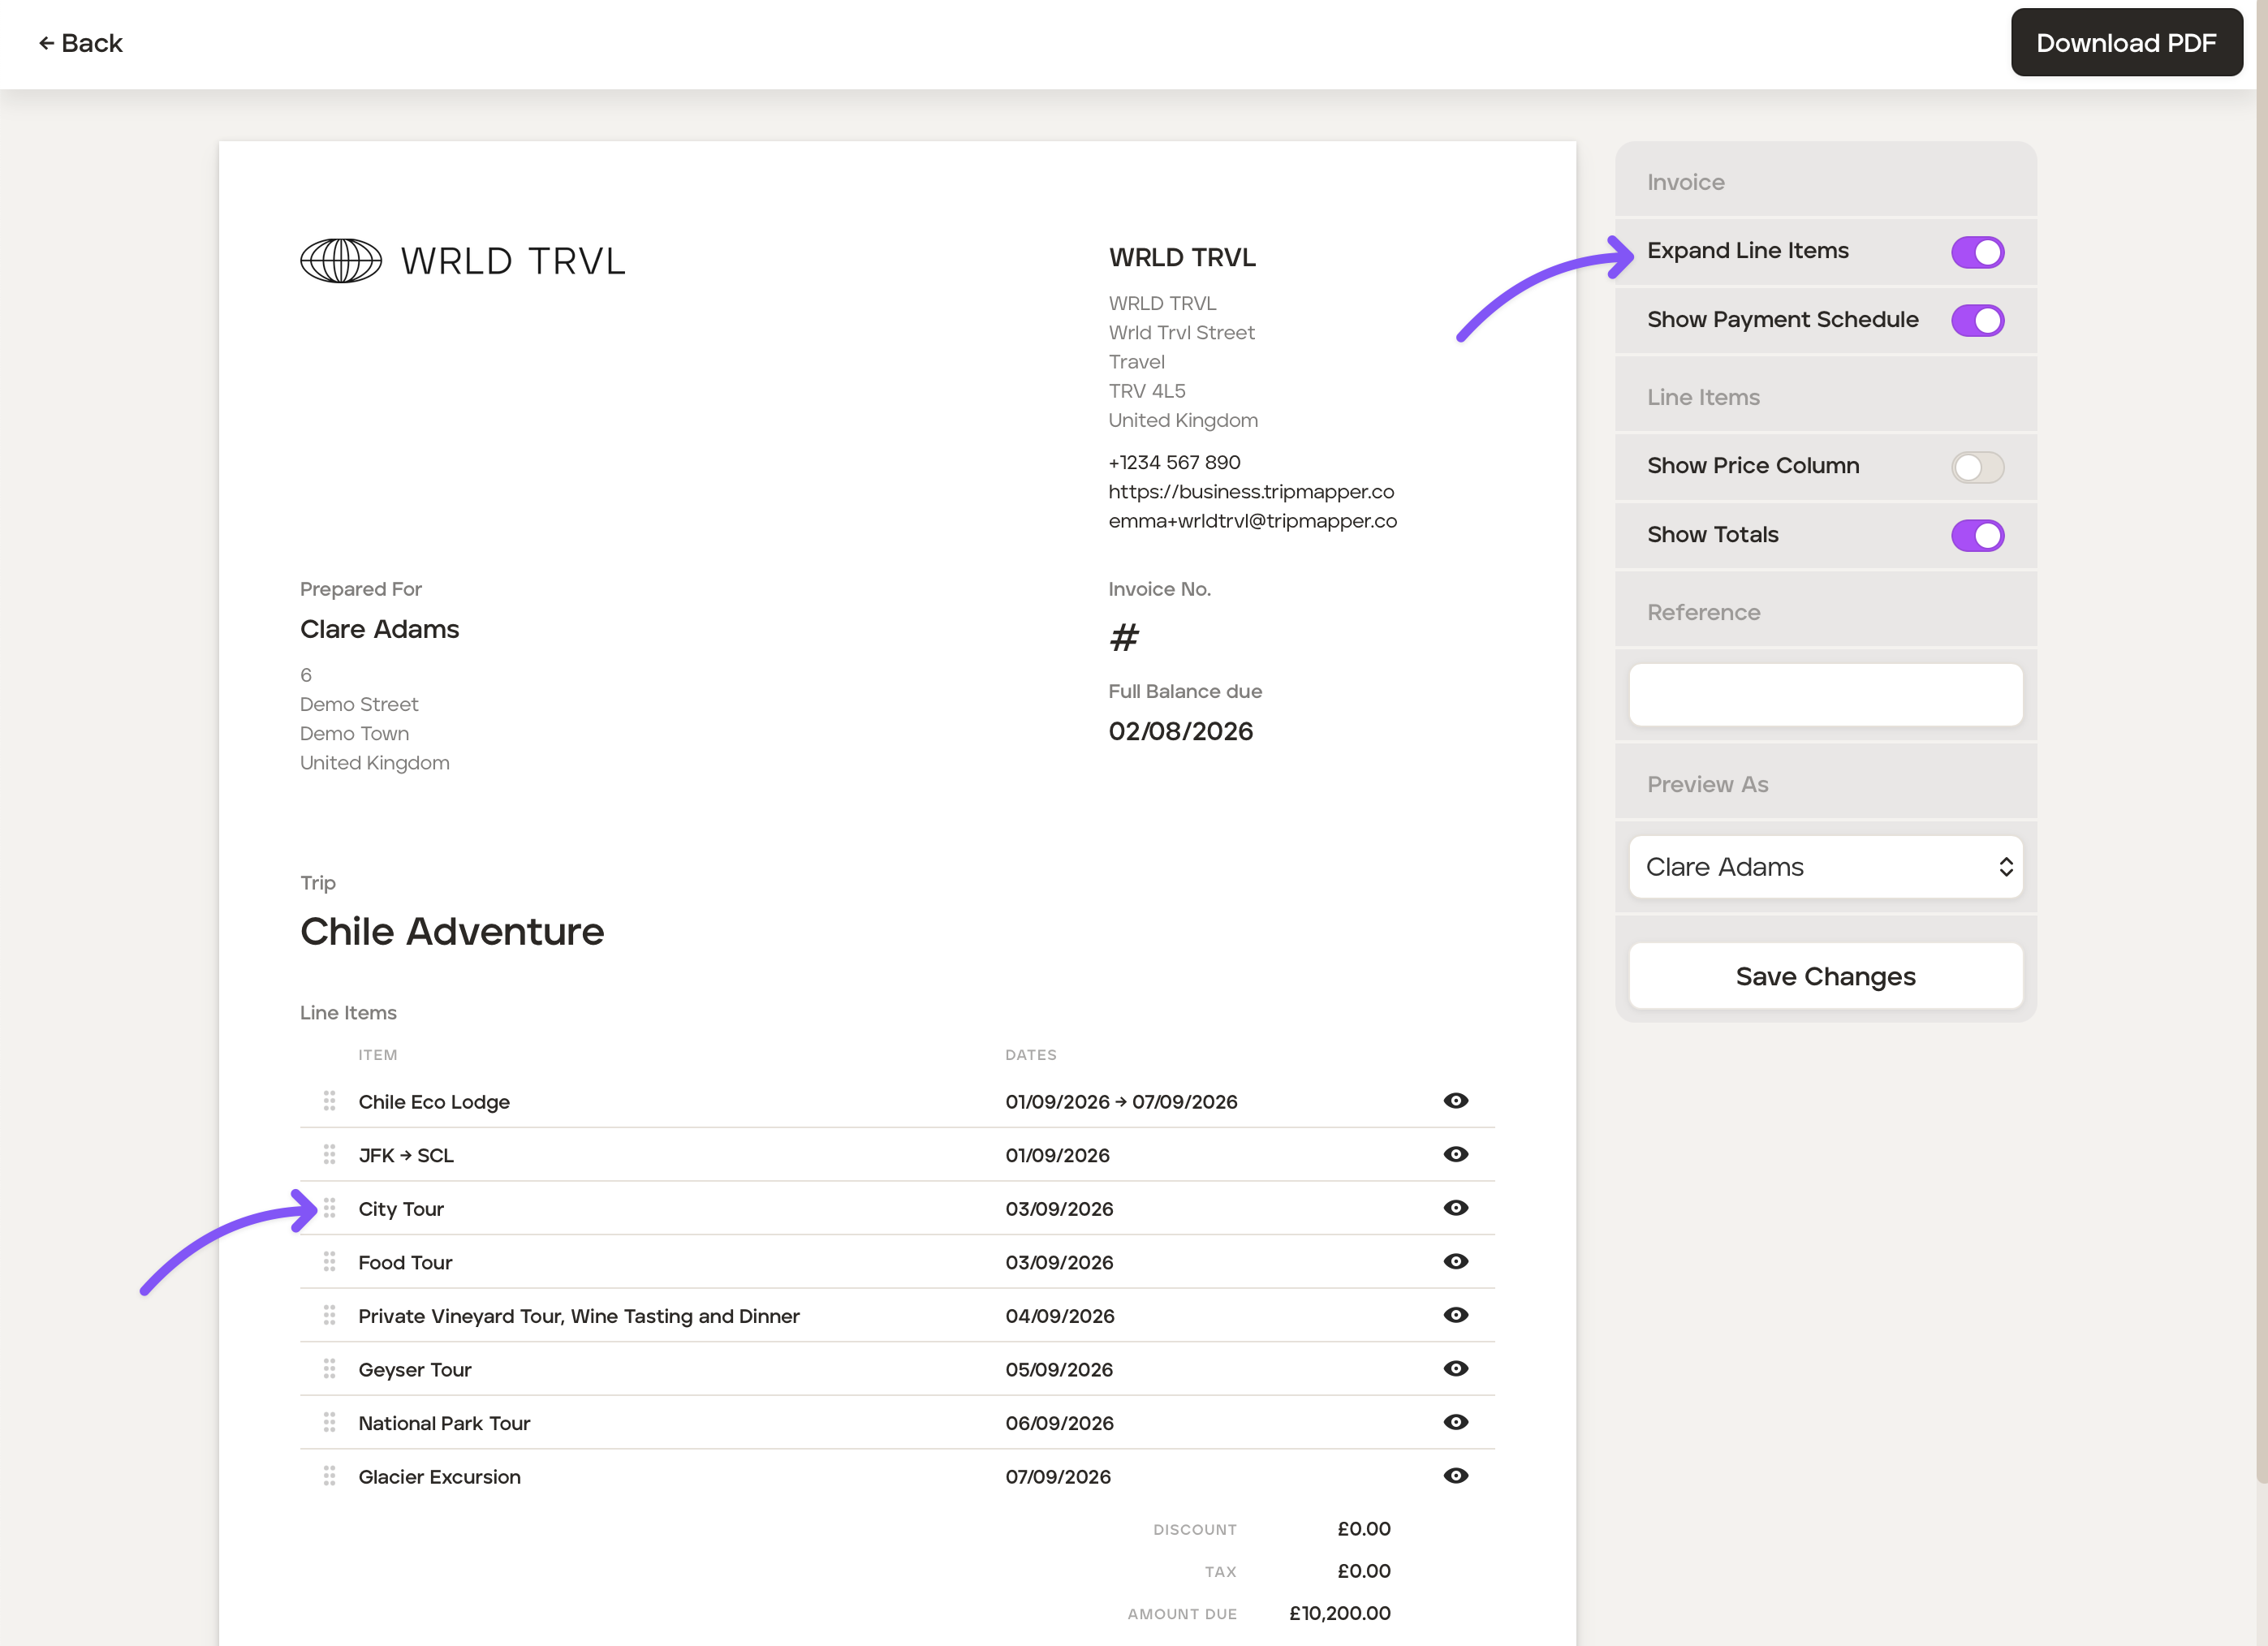
To include all individual itinerary items on the invoice as opposed to just the total client price, toggle the 'Expand Line Items' on. To change the order of the itinerary items hover over the icon and drag the applicable item above or below. Save by clicking the 'Save Changes' button.
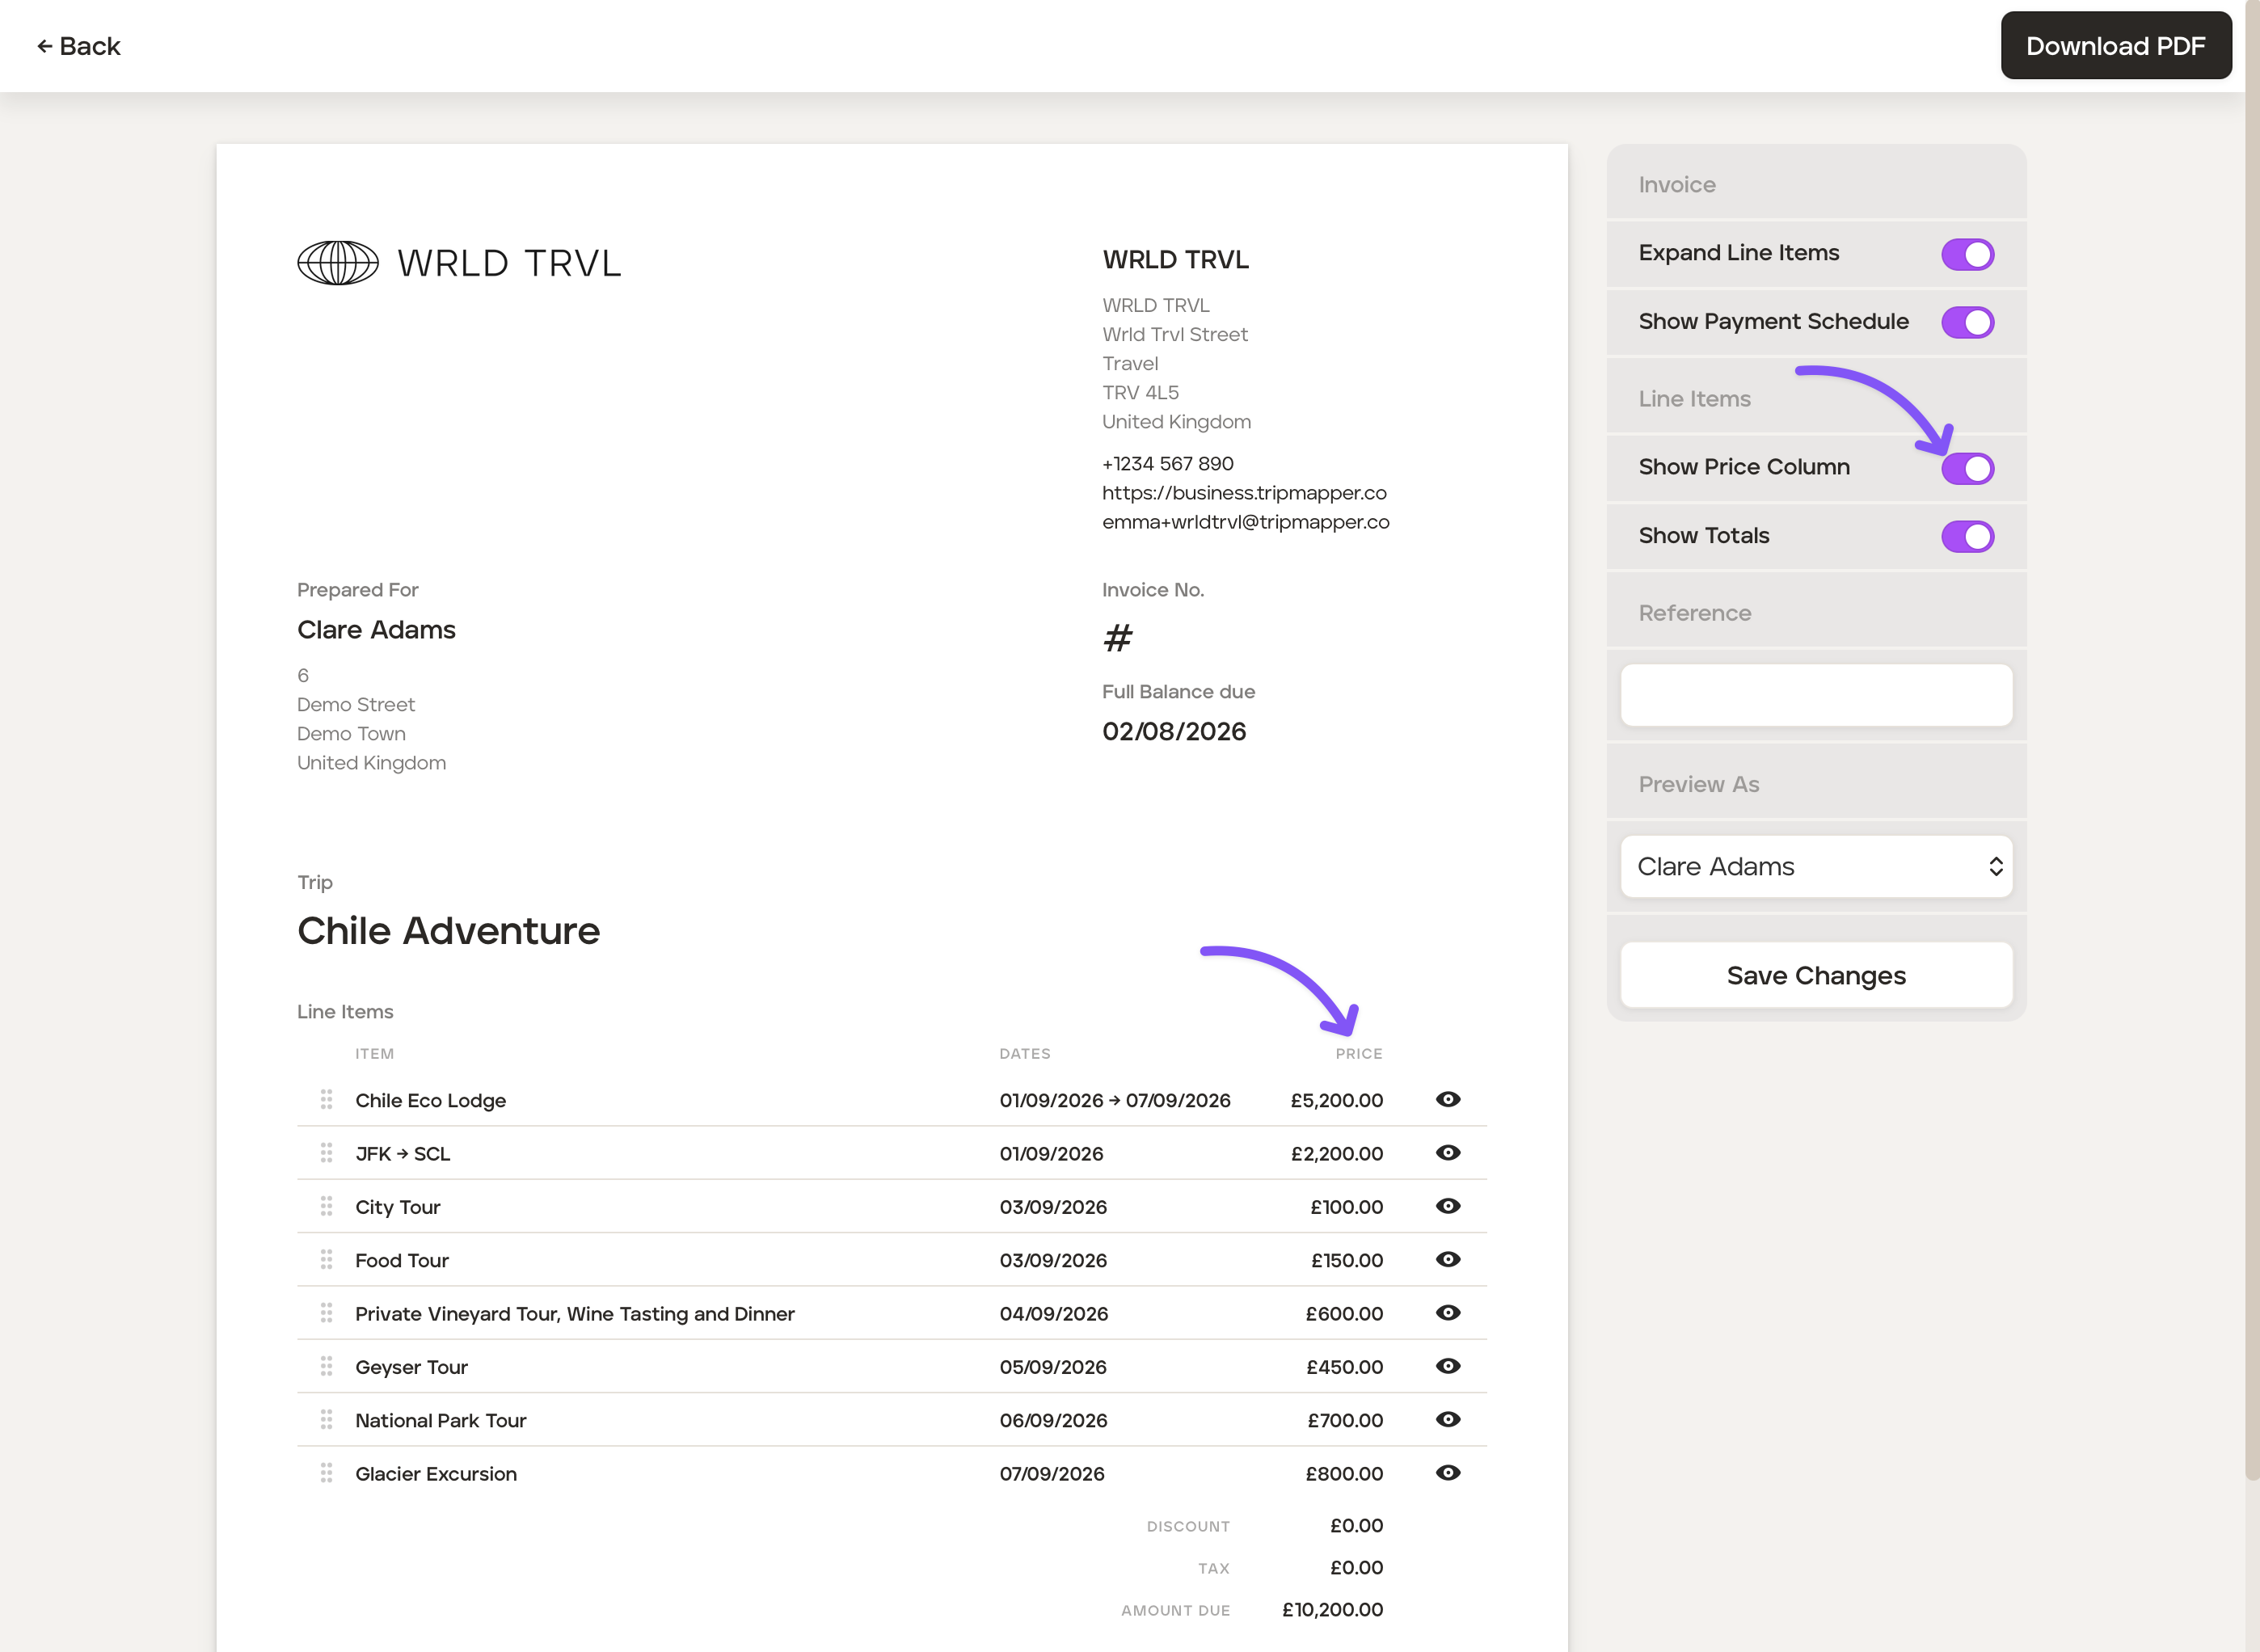
To show (or hide) the all prices of the individual itinerary items toggle the 'Show Price Column' switch. Remember to save your changes by clicking the 'Save Changes' button.
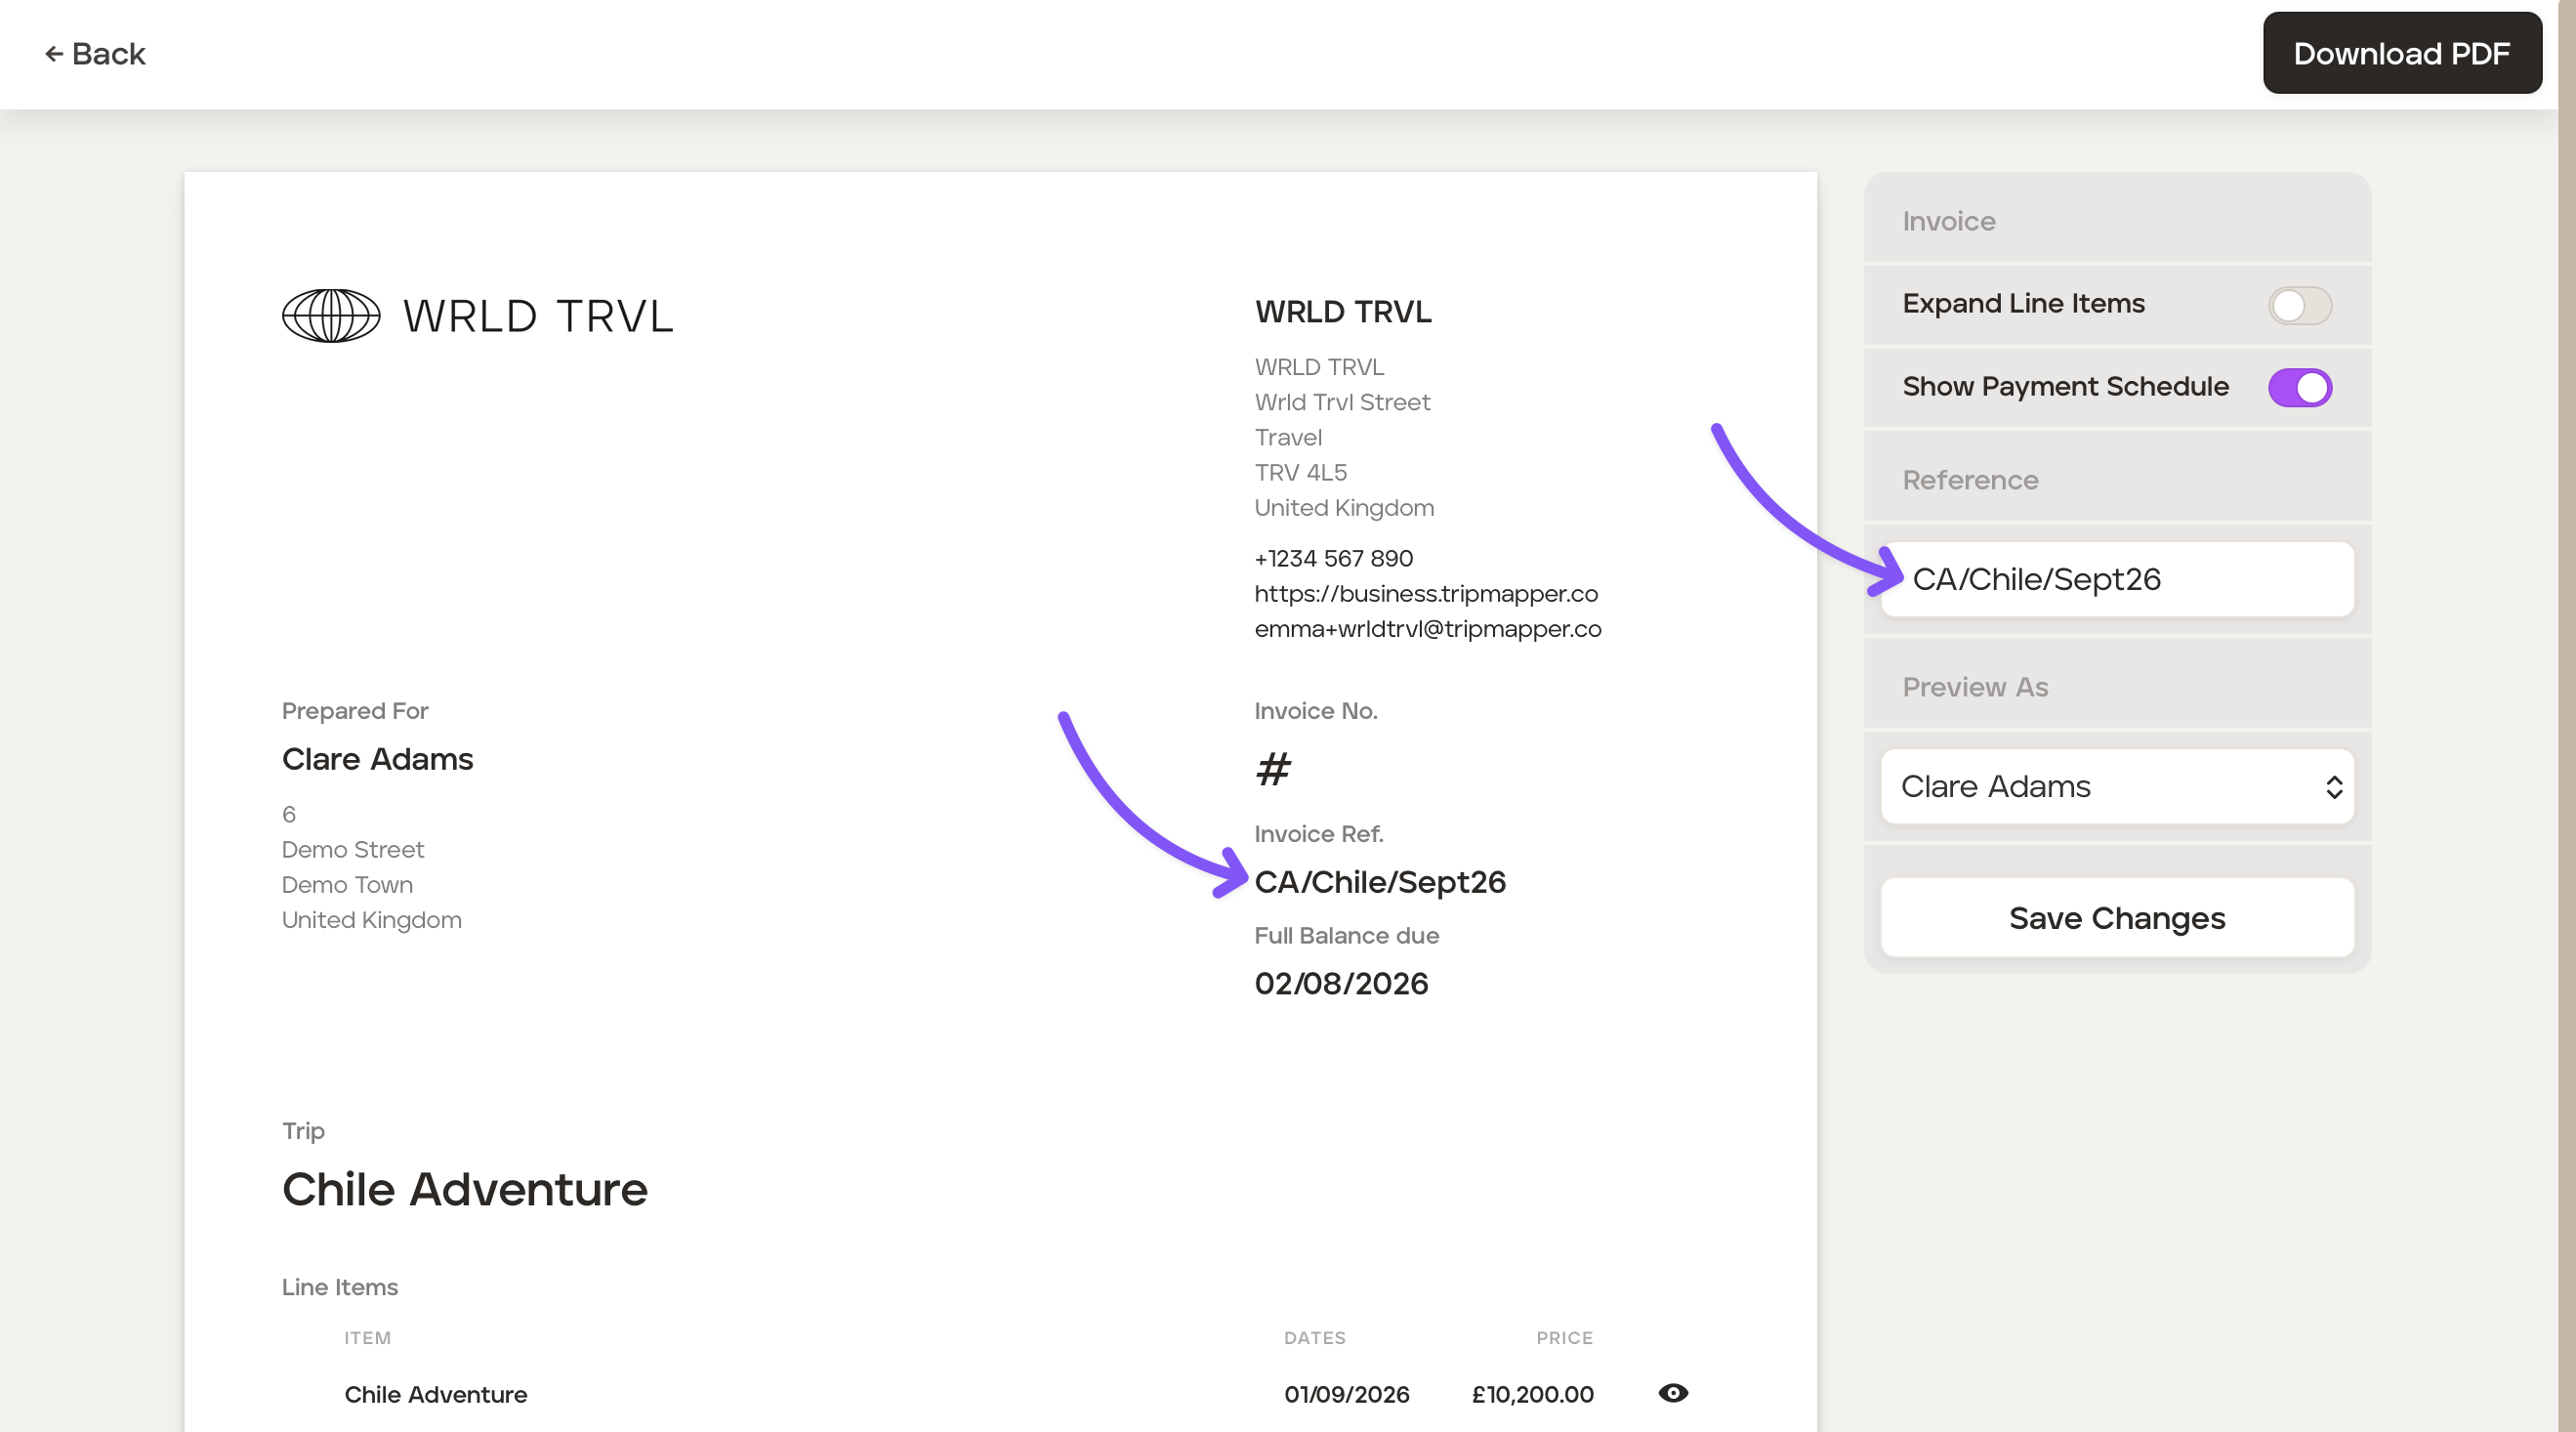
You can also add an invoice reference in the 'Reference' field, which will be shown in addition to the invoice number. After adding the reference click the 'Save Changes' button.
If you have multiple payers, click the 'Preview As' dropdown menu and select the applicable payer.
Download the invoice by clicking the 'Download PDF' button.
Click '←Back' to return to the 'Payments' section of the trip.
Sending an invoice
To send the invoices (and Stripe payment link if connected to Stripe for online payment) to your client, follow the steps below:
Click the 'Send Invoice' button.
Select the applicable payer (if you have more than one) by ticking the applicable checkbox for that payer. If there are multiple payers, the payer selected will receive the invoice relevant to their own payment share as set out in your payment schedule.
You have two options to send the invoice via a link (or you can send your client a PDF as detailed above):
By email to the recipient selected: Add your text to the 'Message Body' field, and the link to view the invoice will be incorporated into the email automatically.
By copying and sending a link: Copy the link and send to your client within your own email or send the link via Whatsapp.

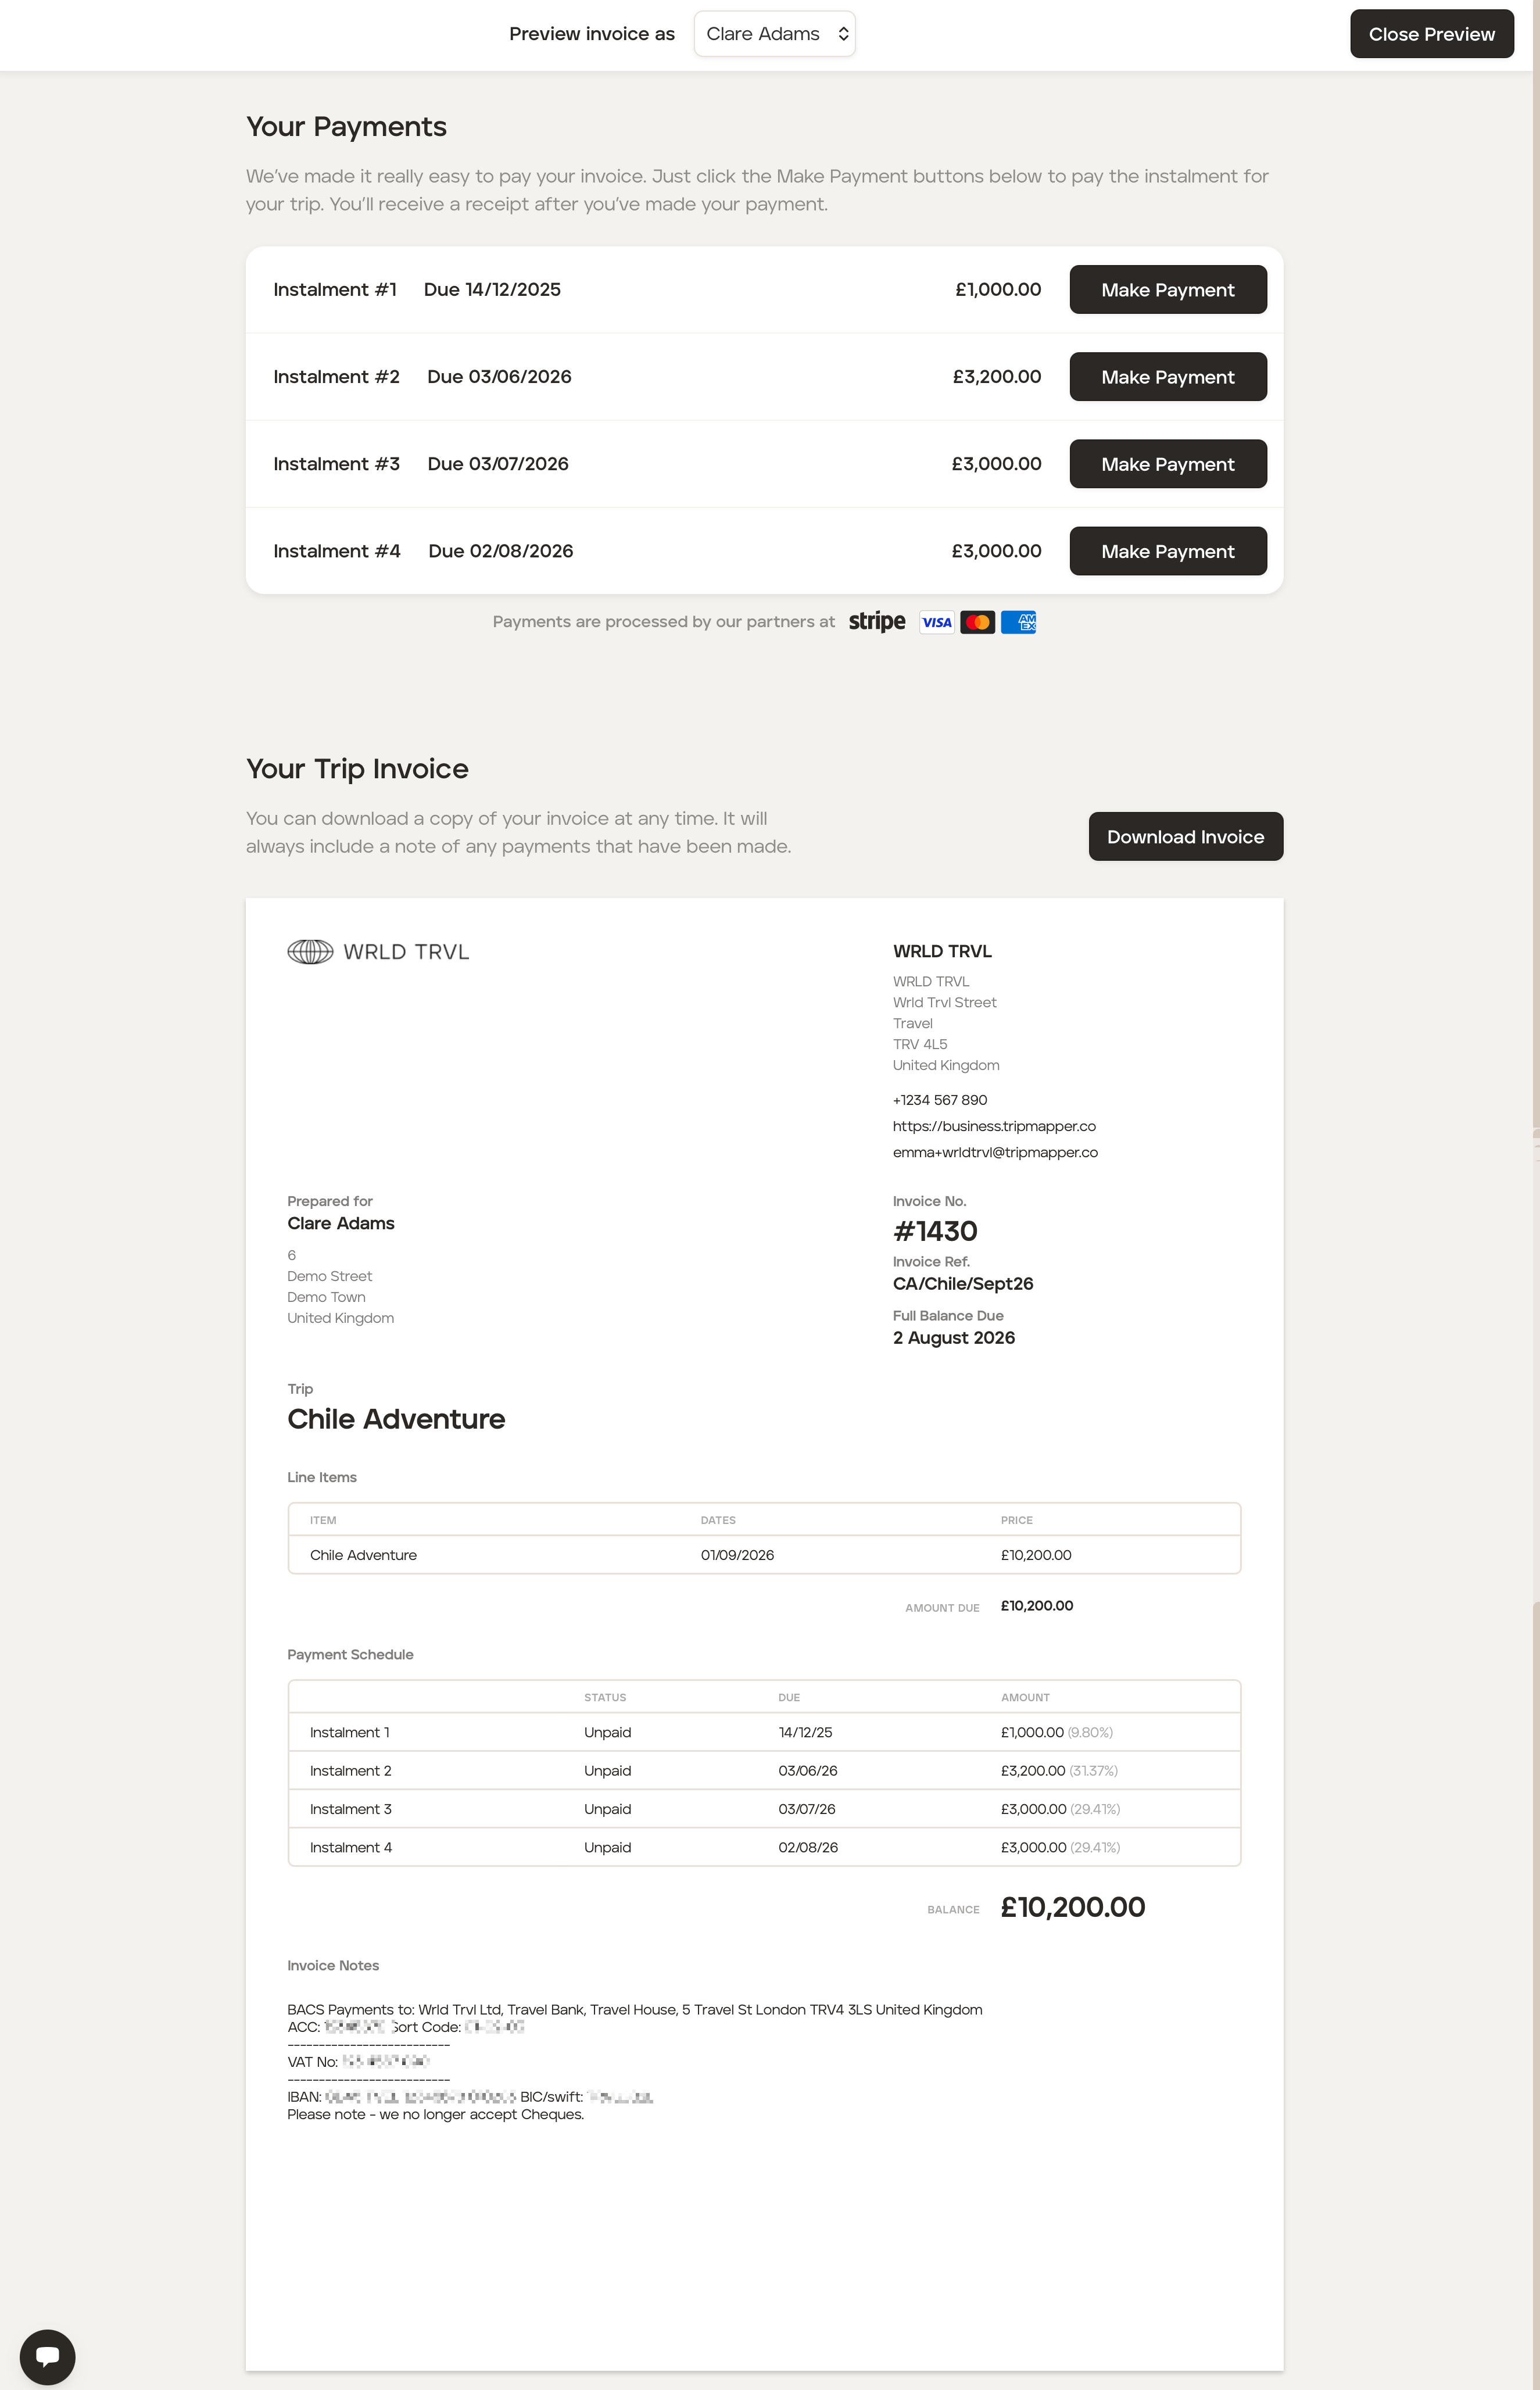
When the client opens the link, it will take them to the invoice. If you have your Stripe linked to your TripMapper for Business account, it will show the instalments alongside a 'Make Payment' button - it couldn't be easier for your clients to make a payment!