Tips for laying out your travel brochure on the Overview
TripMapper 'Travel Brochures' are the perfect tool to give your clients the 'wow factor' when sharing a proposal. With many different layouts to choose from, you can customise the travel brochure to best suit your needs and the stage of the process, whether proposal or approved upcoming trip.
Follow the detailed step-by-step guide here to learn how to create a visually enticing and informative travel brochure.
Otherwise, for general travel brochure layout tips, please read on!
The ‘Overview’ screen within an itinerary is where you will create your travel brochure. You can personalise this exactly as you wish, but below are a few layout ideas.
Idea 1 step-by-step:
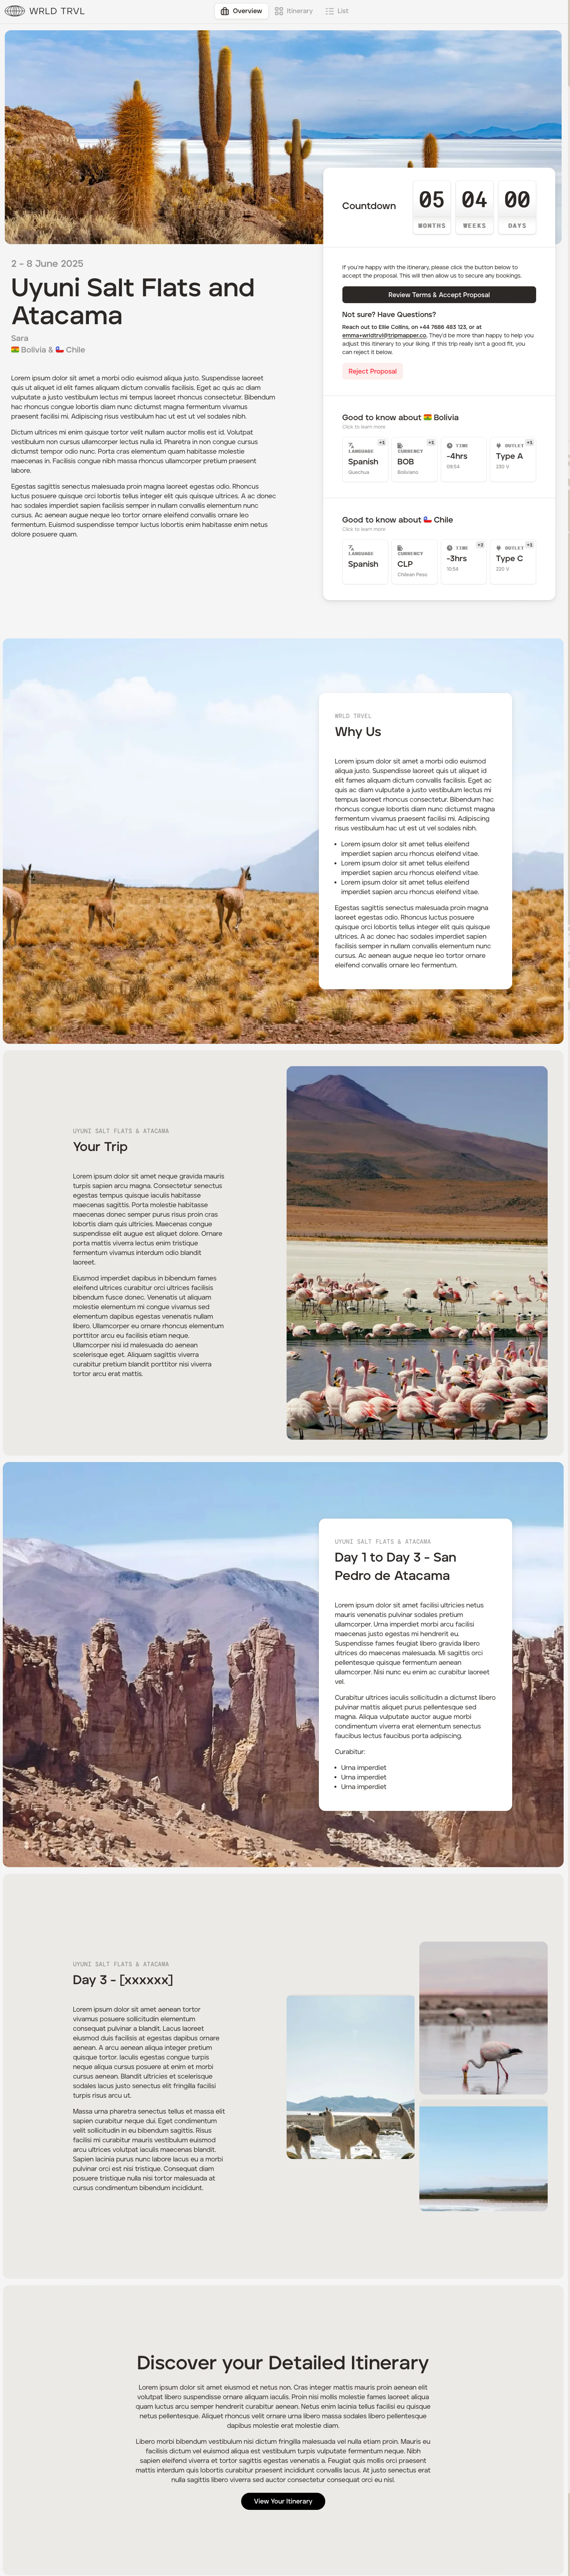
Brief summary of the trip
This will always be shown to your clients at both the proposal stage and the upcoming stage (and will also be included on the PDF itinerary).
BLOCK 1 [FOR PROPOSAL ONLY]: About Us or Why Us
Select the 'Large Image' block.
Click the 'Content' tab:
In the 'Sub-heading' field, add your business name.
In the 'Heading' field, type 'About Us' or 'Why Us' (or similar).
Add a few paragraphs of text in the 'Text' field.
In 'Text position', select 'Right'.
Add an image.
Optional: Attach a file with more information about your business.
Click the 'Settings' tab:
In the 'Visabilty' field turn off 'Show on Trip' (so this block will be shown on the proposal only).
BLOCK 2 [FOR BOTH PROPOSAL & UPCOMING TRIP]: Brief Summary of the trip
Select the 'Half Image' block.
Click the 'Content' tab:
In the 'Sub-heading' field, add the trip name.
In the 'Heading' field, type 'Your trip' (or similar).
Add a few paragraphs of text in the 'Text' field.
In 'Text position', select 'Left'.
Add an image.
Click the 'Settings' tab:
In the 'Visabilty' field turn on both 'Show on Proposal' and 'Show on Trip' (so this block will be shown on both the proposal and the upcoming trip).
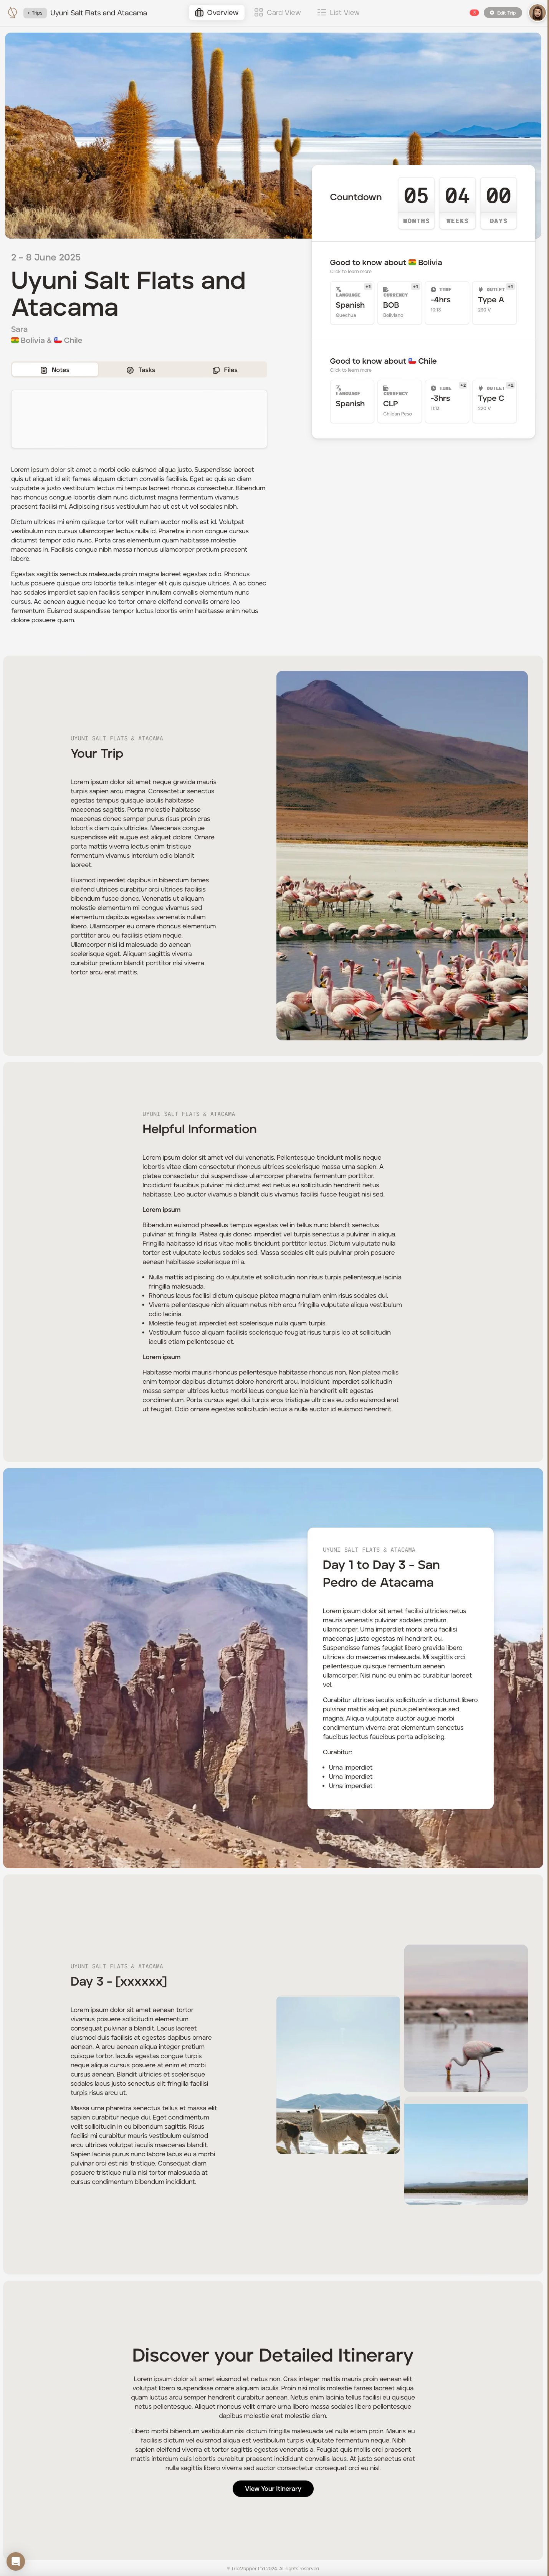
BLOCK 3 [FOR UPCOMING TRIP ONLY]: Helpful information
Select the 'Text' block.
Click the 'Content' tab:
In the 'Sub-heading' field, add the trip name.
In the 'Heading' field, type 'Helpful Information' (or similar).
In the 'Max Columns' dropdown, select '1'.
Add a few paragraphs of text in the 'Text' field.
Click the 'Settings' tab:
In the 'Visabilty' field, turn off 'Show on Proposal' (so this block will only show when on an upcoming trip).
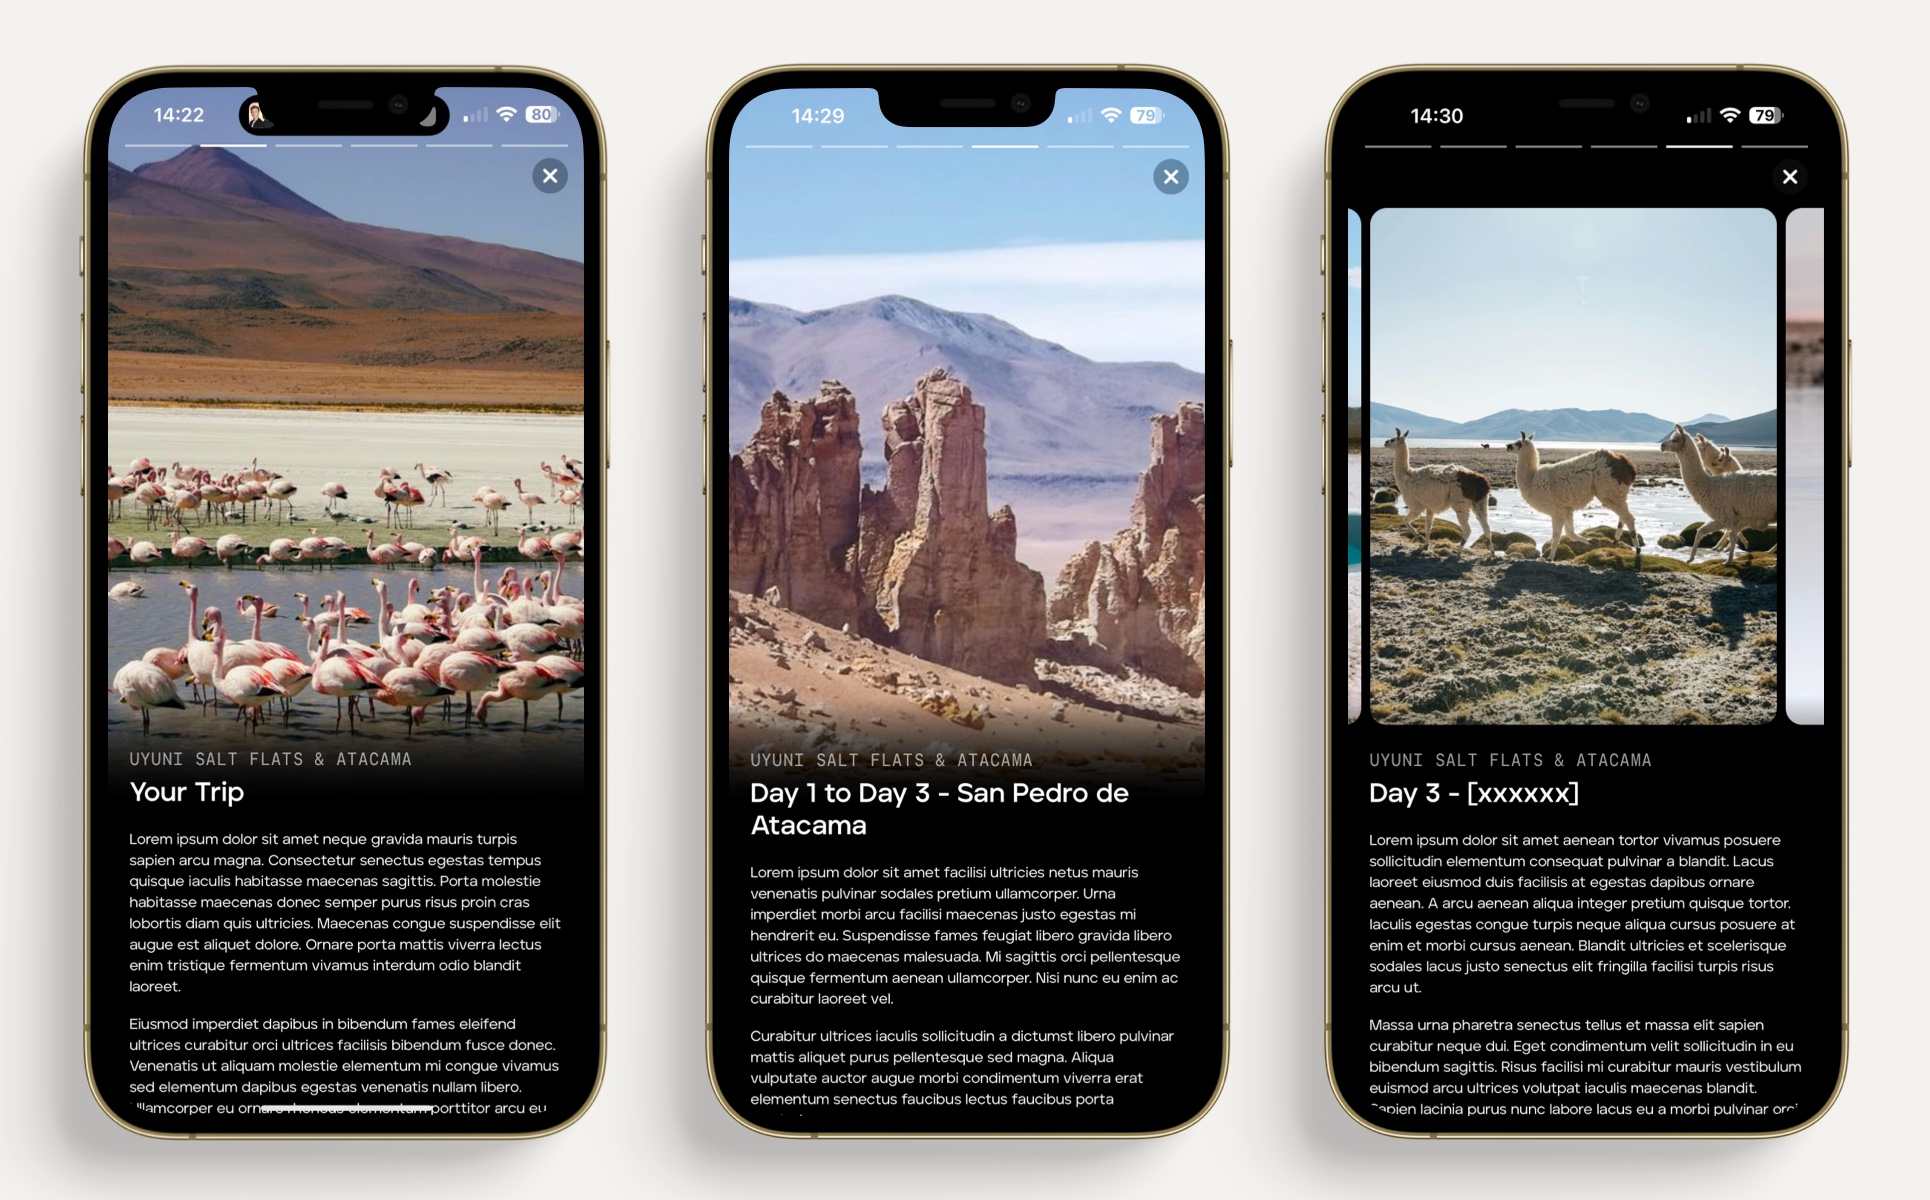
BLOCK 4 [FOR BOTH PROPOSAL & UPCOMING TRIP]: Summary of Day [NUMBER]
Select the 'Large Image' block.
Click the 'Content' tab:
In the 'Sub-heading' field, add the trip name.
In the 'Heading' field, type 'Day 1 - [Location]' (or similar).
Add a few paragraphs of text in the 'Text' field.
In 'Text position', select 'Right'.
Add an image.
Click the 'Settings' tab:
In the 'Visabilty' field, turn on both 'Show on Proposal' and 'Show on Trip' (so this block will be shown on both the proposal and the upcoming trip).
FINAL BLOCK [FOR PROPOSAL & UPCOMING TRIP]: Link to the detailed card view itinerary
Select the 'Links' block.
Click the 'Content' tab:
In the 'Heading' field, type 'Discover Your Detailed Itinerary' (or similar).
Add a few paragraphs of text in the 'Text' field.
In the 'Links' drop-down, select 'Itinerary' (which will take your client to the card view itinerary) and in the 'Button Label' field type 'View Your Itinerary' (or similar).
Click the 'Settings' tab:
In the 'Visabilty' field turn on both 'Show on Proposal' and 'Show on Trip' (so this block will be shown on both the proposal and the upcoming trip).
Idea 1 - What your client will see when opening the PROPOSAL on the web (also mobile-friendly):
Idea 1 - What your client will see when opening their UPCOMING TRIP on the web app:
Idea 1 - What your client will see when opening their UPCOMING TRIP on the mobile app (NB. sample of screens only):
Idea 2 step-by-step:
Brief summary of the trip
This will always be shown to your clients at both the proposal stage and the upcoming stage (and will also be included on the PDF itinerary).
BLOCK 1 [FOR BOTH PROPOSAL & UPCOMING TRIP]: About Us
Select the 'Large Image' block.
Click the 'Content' tab:
In the 'Sub-heading' field, add your business name.
In the 'Heading' field, type 'About Us' or 'Why Us' (or similar).
Add a few paragraphs of text in the 'Text' field.
In 'Text position', select 'Right'.
Add an image.
Optional: Attach a file with more information about your business.
Click the 'Settings' tab:
In the 'Visabilty' field turn off 'Show on Trip' (so this block will be shown on the proposal only).
BLOCK 2 [FOR BOTH PROPOSAL & UPCOMING TRIP]: Brief Summary of the trip
Select the 'Half Image' block.
Click the 'Content' tab:
In the 'Sub-heading' field, add the trip name.
In the 'Heading' field, type 'Your trip' (or similar).
Add a few paragraphs of text in the 'Text' field.
In 'Text position', select 'Left'.
Add an image.
Optional: Select 3 highlights from the itinerary.
Click the 'Settings' tab:
In the 'Visabilty' field turn on both 'Show on Proposal' and 'Show on Trip' (so this block will be shown on both the proposal and the upcoming trip).
BLOCK 3 [FOR BOTH PROPOSAL & UPCOMING TRIP]: Summary of accommodation
Select the 'Large Image' block.
Click the 'Content' tab:
In the 'Sub-heading' field, add the trip name.
In the 'Heading' field, type 'Your accommodation' (or similar).
Add a few paragraphs of text in the 'Text' field.
In 'Text position', select 'Right'.
Add an image.
Click the 'Settings' tab:
In the 'Visabilty' field, turn on both 'Show on Proposal' and 'Show on Trip' (so this block will be shown on both the proposal and the upcoming trip).
BLOCK 4 [FOR BOTH PROPOSAL & UPCOMING TRIP]: Summary of activities
Select the 'Gallery' block.
Click the 'Content' tab:
In the 'Sub-heading' field, add the trip name.
In the 'Heading' field, type 'Your activities' (or similar).
Add a few paragraphs of text in the 'Text' field.
In 'Text position', select 'Right'.
Add 3 images.
Click the 'Settings' tab:
In the 'Visabilty' field, turn on both 'Show on Proposal' and 'Show on Trip' (so this block will be shown on both the proposal and the upcoming trip).
BLOCK 5 [FOR BOTH PROPOSAL & UPCOMING TRIP]: Inclusions and exclusions
Select the 'Text' block.
Click the 'Content' tab:
In the 'Sub-heading' field, add the trip name.
In the 'Heading' field, type 'Inclusions and Exclusions' (or similar).
In the 'Max Columns' dropdown, select '1'.
Add a few paragraphs of text in the 'Text' field.
Click the 'Settings' tab:
In the 'Visabilty' field, turn on both 'Show on Proposal' and 'Show on Trip' (so this block will be shown on both the proposal and the upcoming trip).
FINAL BLOCK [FOR PROPOSAL ONLY]: Link to the detailed card view itinerary
Select the 'Links' block.
Click the 'Content' tab:
In the 'Heading' field, type 'View the full itinerary' (or similar).
Add a few paragraphs of text in the 'Text' field.
In the 'Links' drop-down, select 'Itinerary' (which will take your client to the card view itinerary) and in the 'Button Label' field type 'View itinerary' (or similar).
Click the 'Settings' tab:
In the 'Visabilty' field turn off 'Show on Trip' (so this block will be shown on the proposal only).
Idea 2 - What your client will see when opening the PROPOSAL on the web (also mobile-friendly):

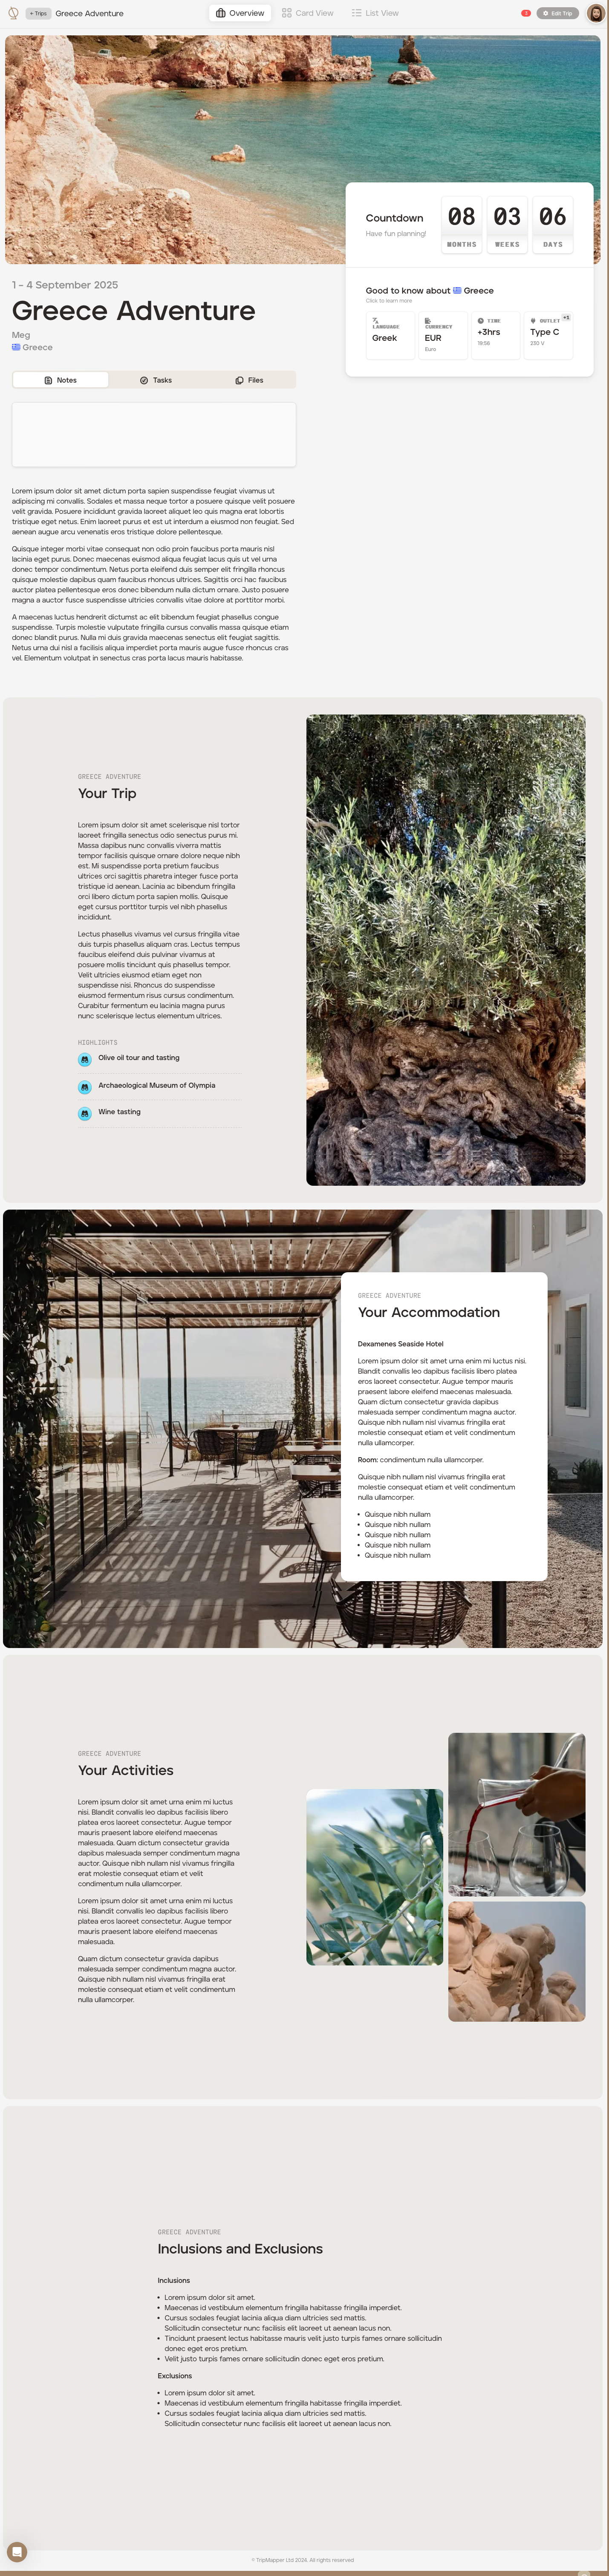
Idea 2 - What your client will see when opening their UPCOMING TRIP on the web app:
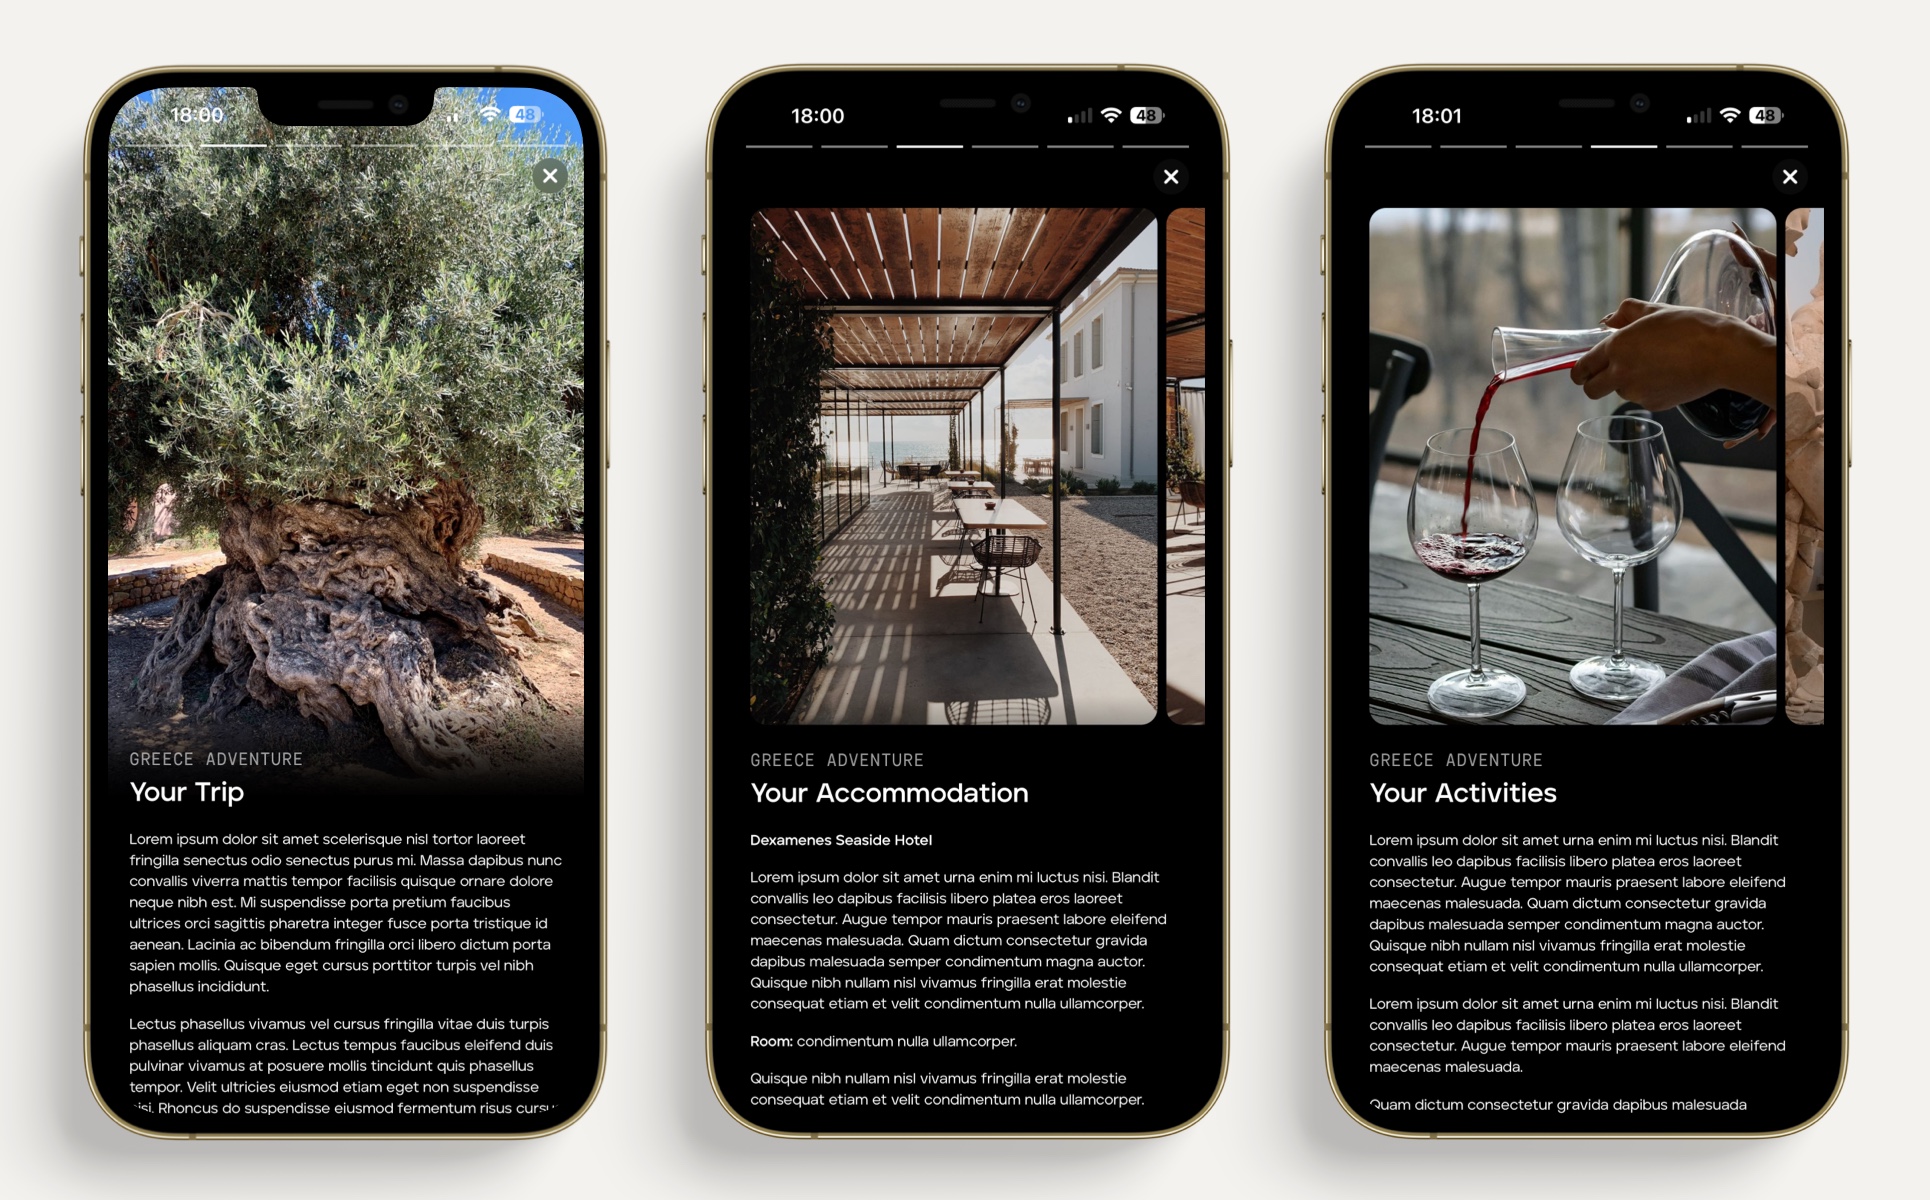
Idea 2 - What your client will see when opening their UPCOMING TRIP on the mobile app (NB. sample of screens only):
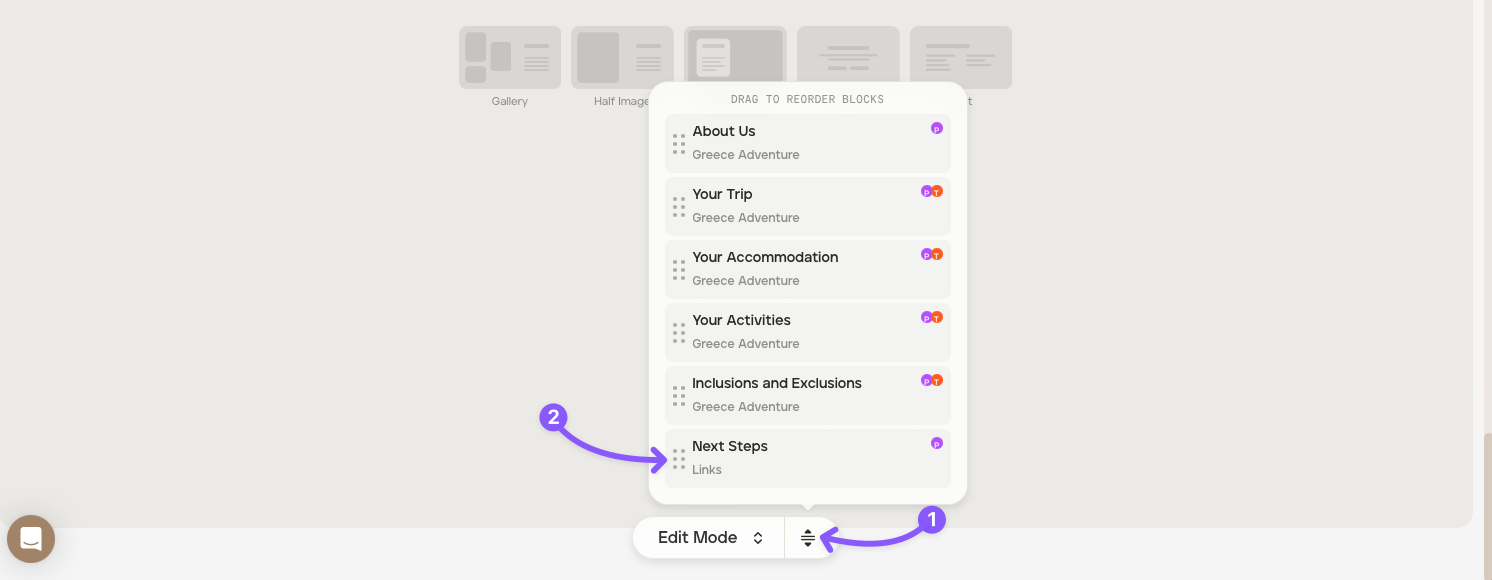
Drag and drop blocks
To drag and drop blocks you have added, click the select icon (shown at '1') to bring up your block list, and then click the relevant reorder icon to drag a block (shown at '2') to your preferred location.