Obtaining client information using the client vault
If you need to obtain information from your clients after they have approved a trip proposal (ie. once an 'upcoming' trip), such as passport numbers or dietary information, you'll find our client vault feature extremely useful. The client vault allows your clients to upload the required information using the mobile app. The data shared will be encrypted.
The client vault is not enabled globally; it is only enabled at trip level. To enable the client vault on an upcoming trip, please follow the steps below:
Select the applicable upcoming trip.
Click 'Manage' at the top of your screen.
In the 'General Settings' tab, turn the vault switch to 'on' to enable the client vault functionality for that trip.
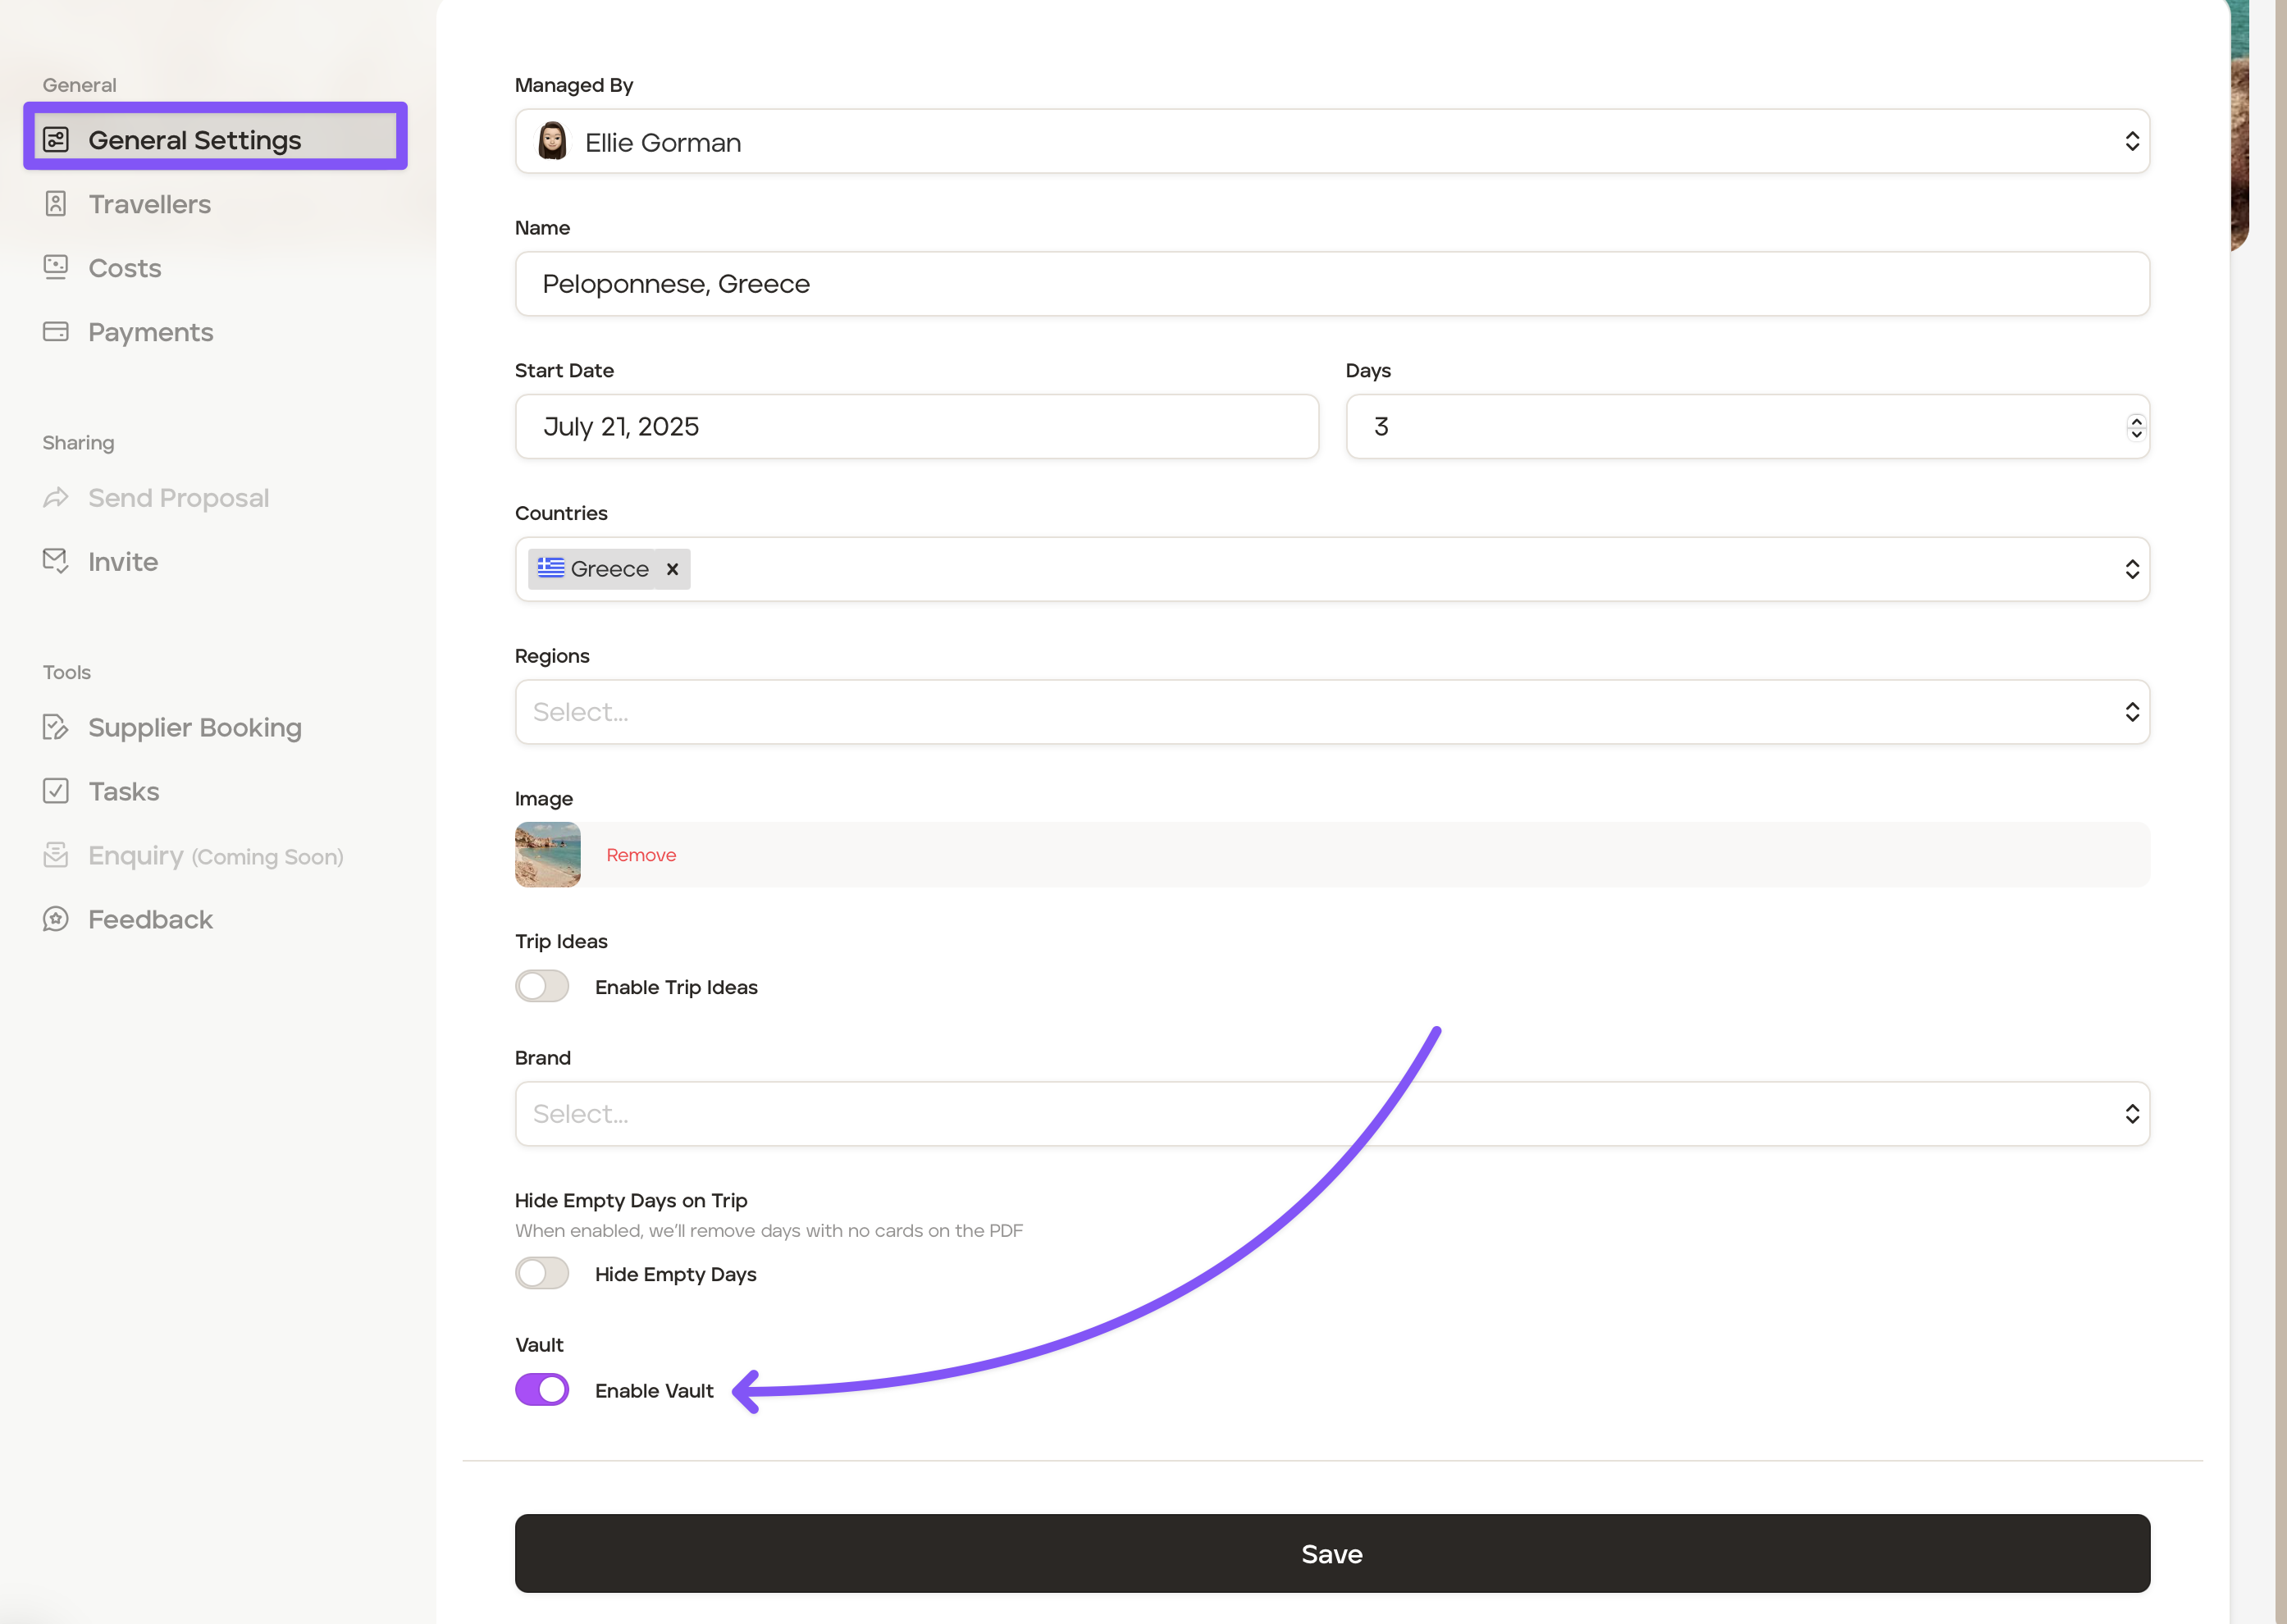
Click the 'Save' button.
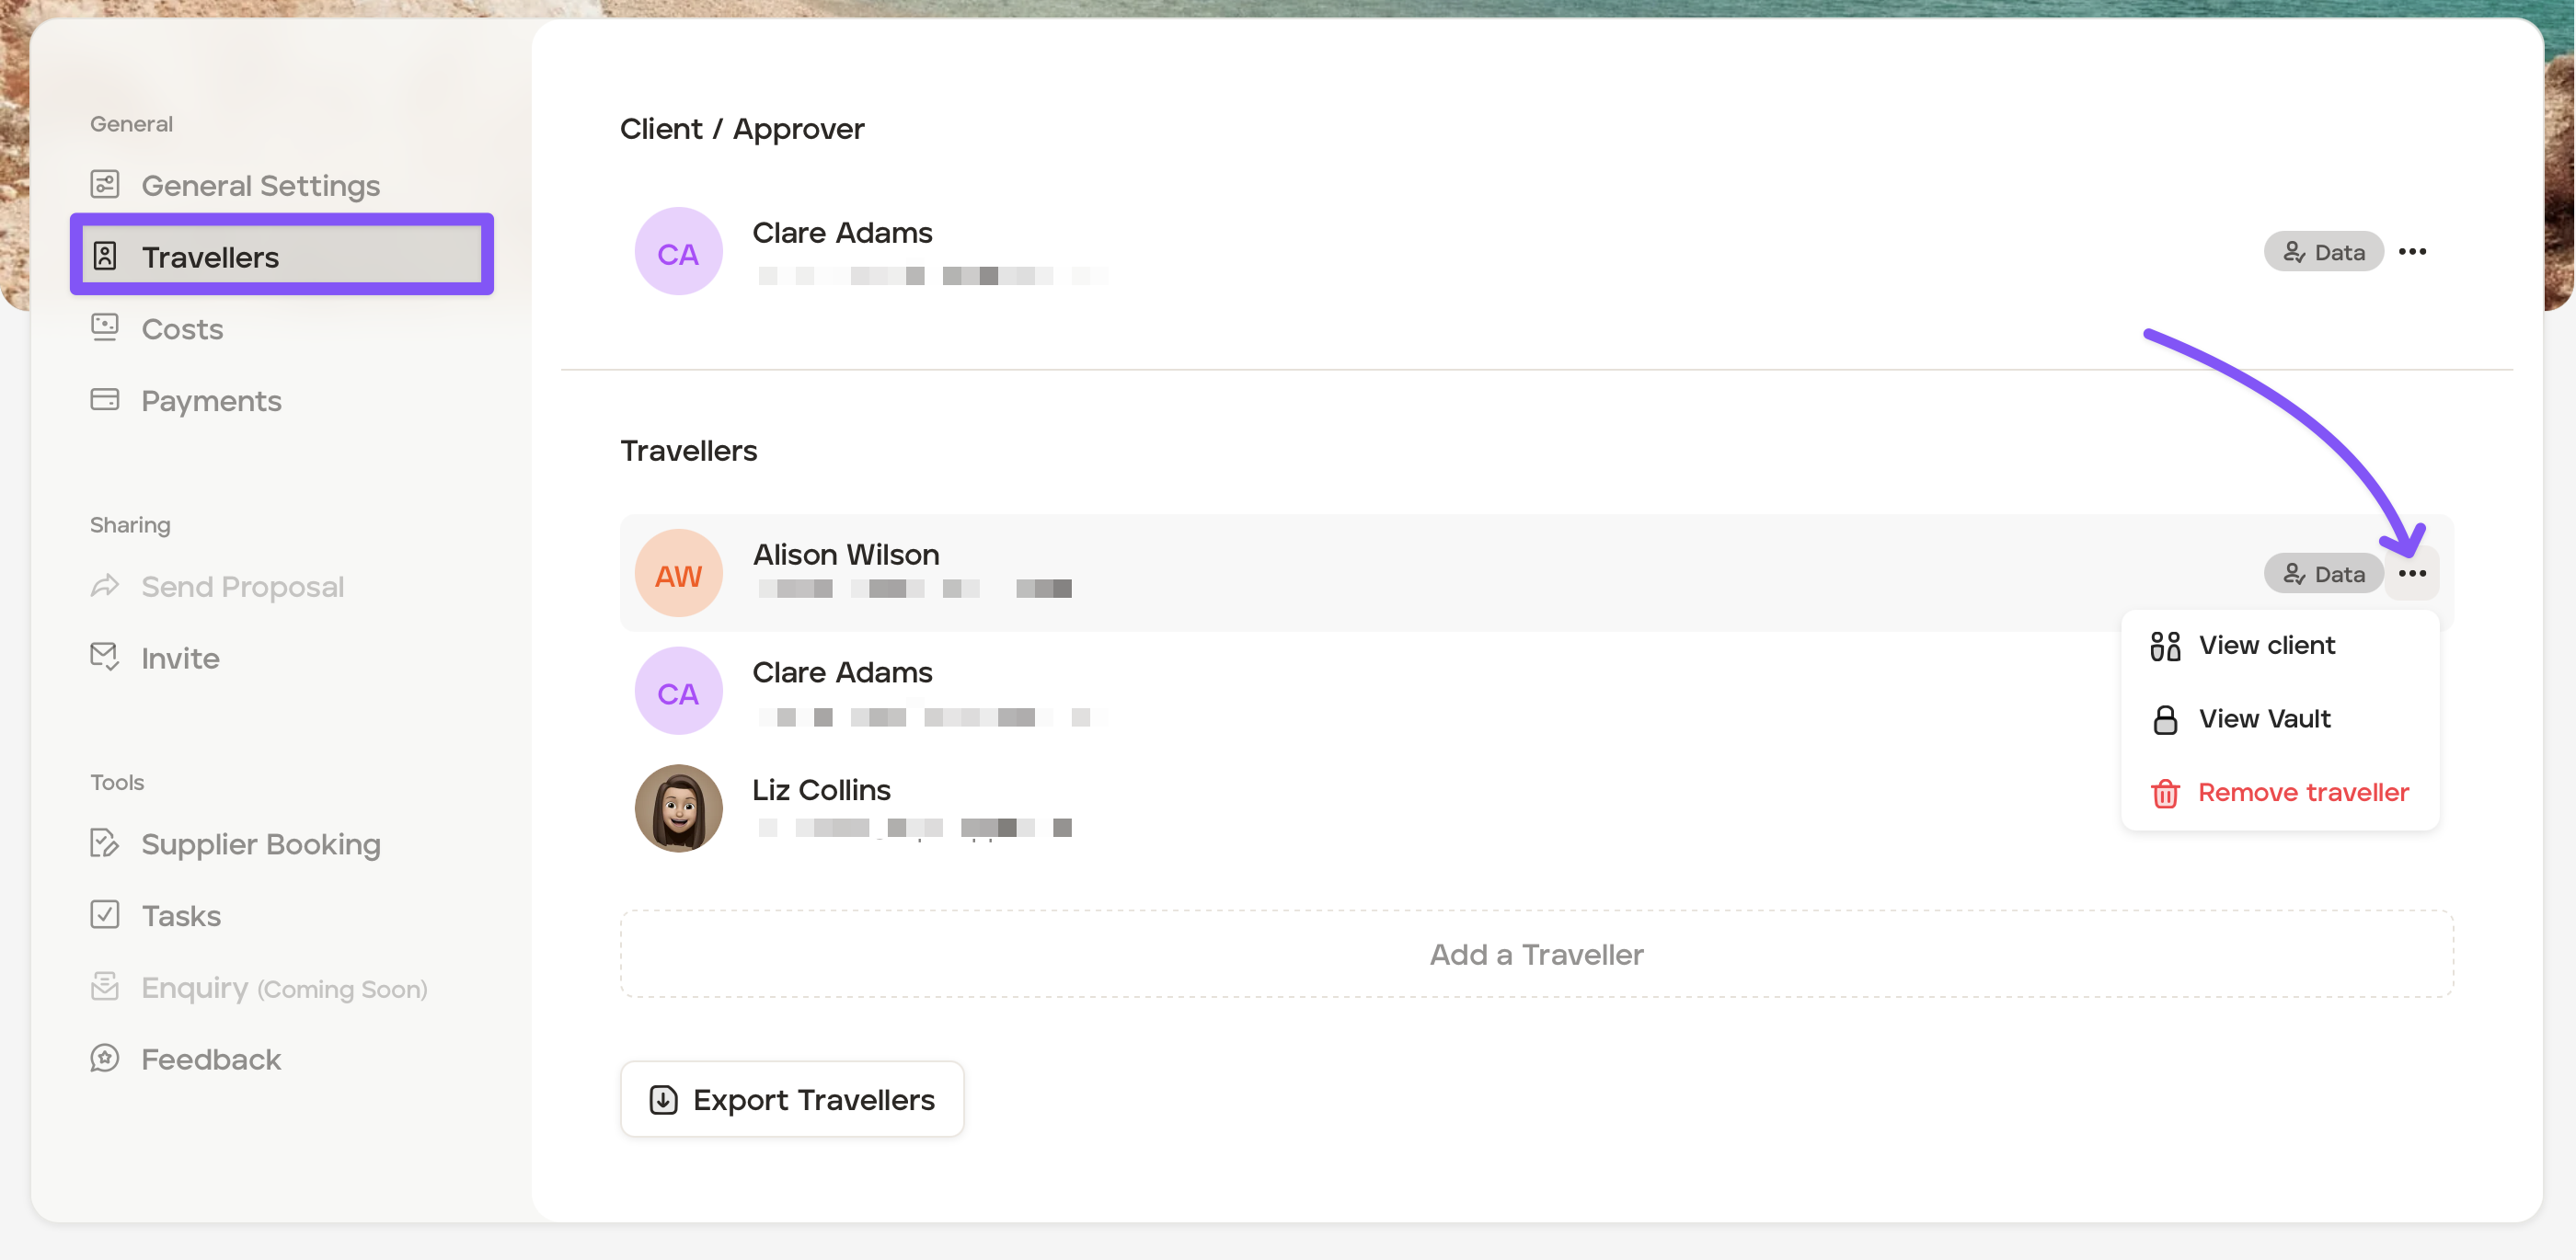
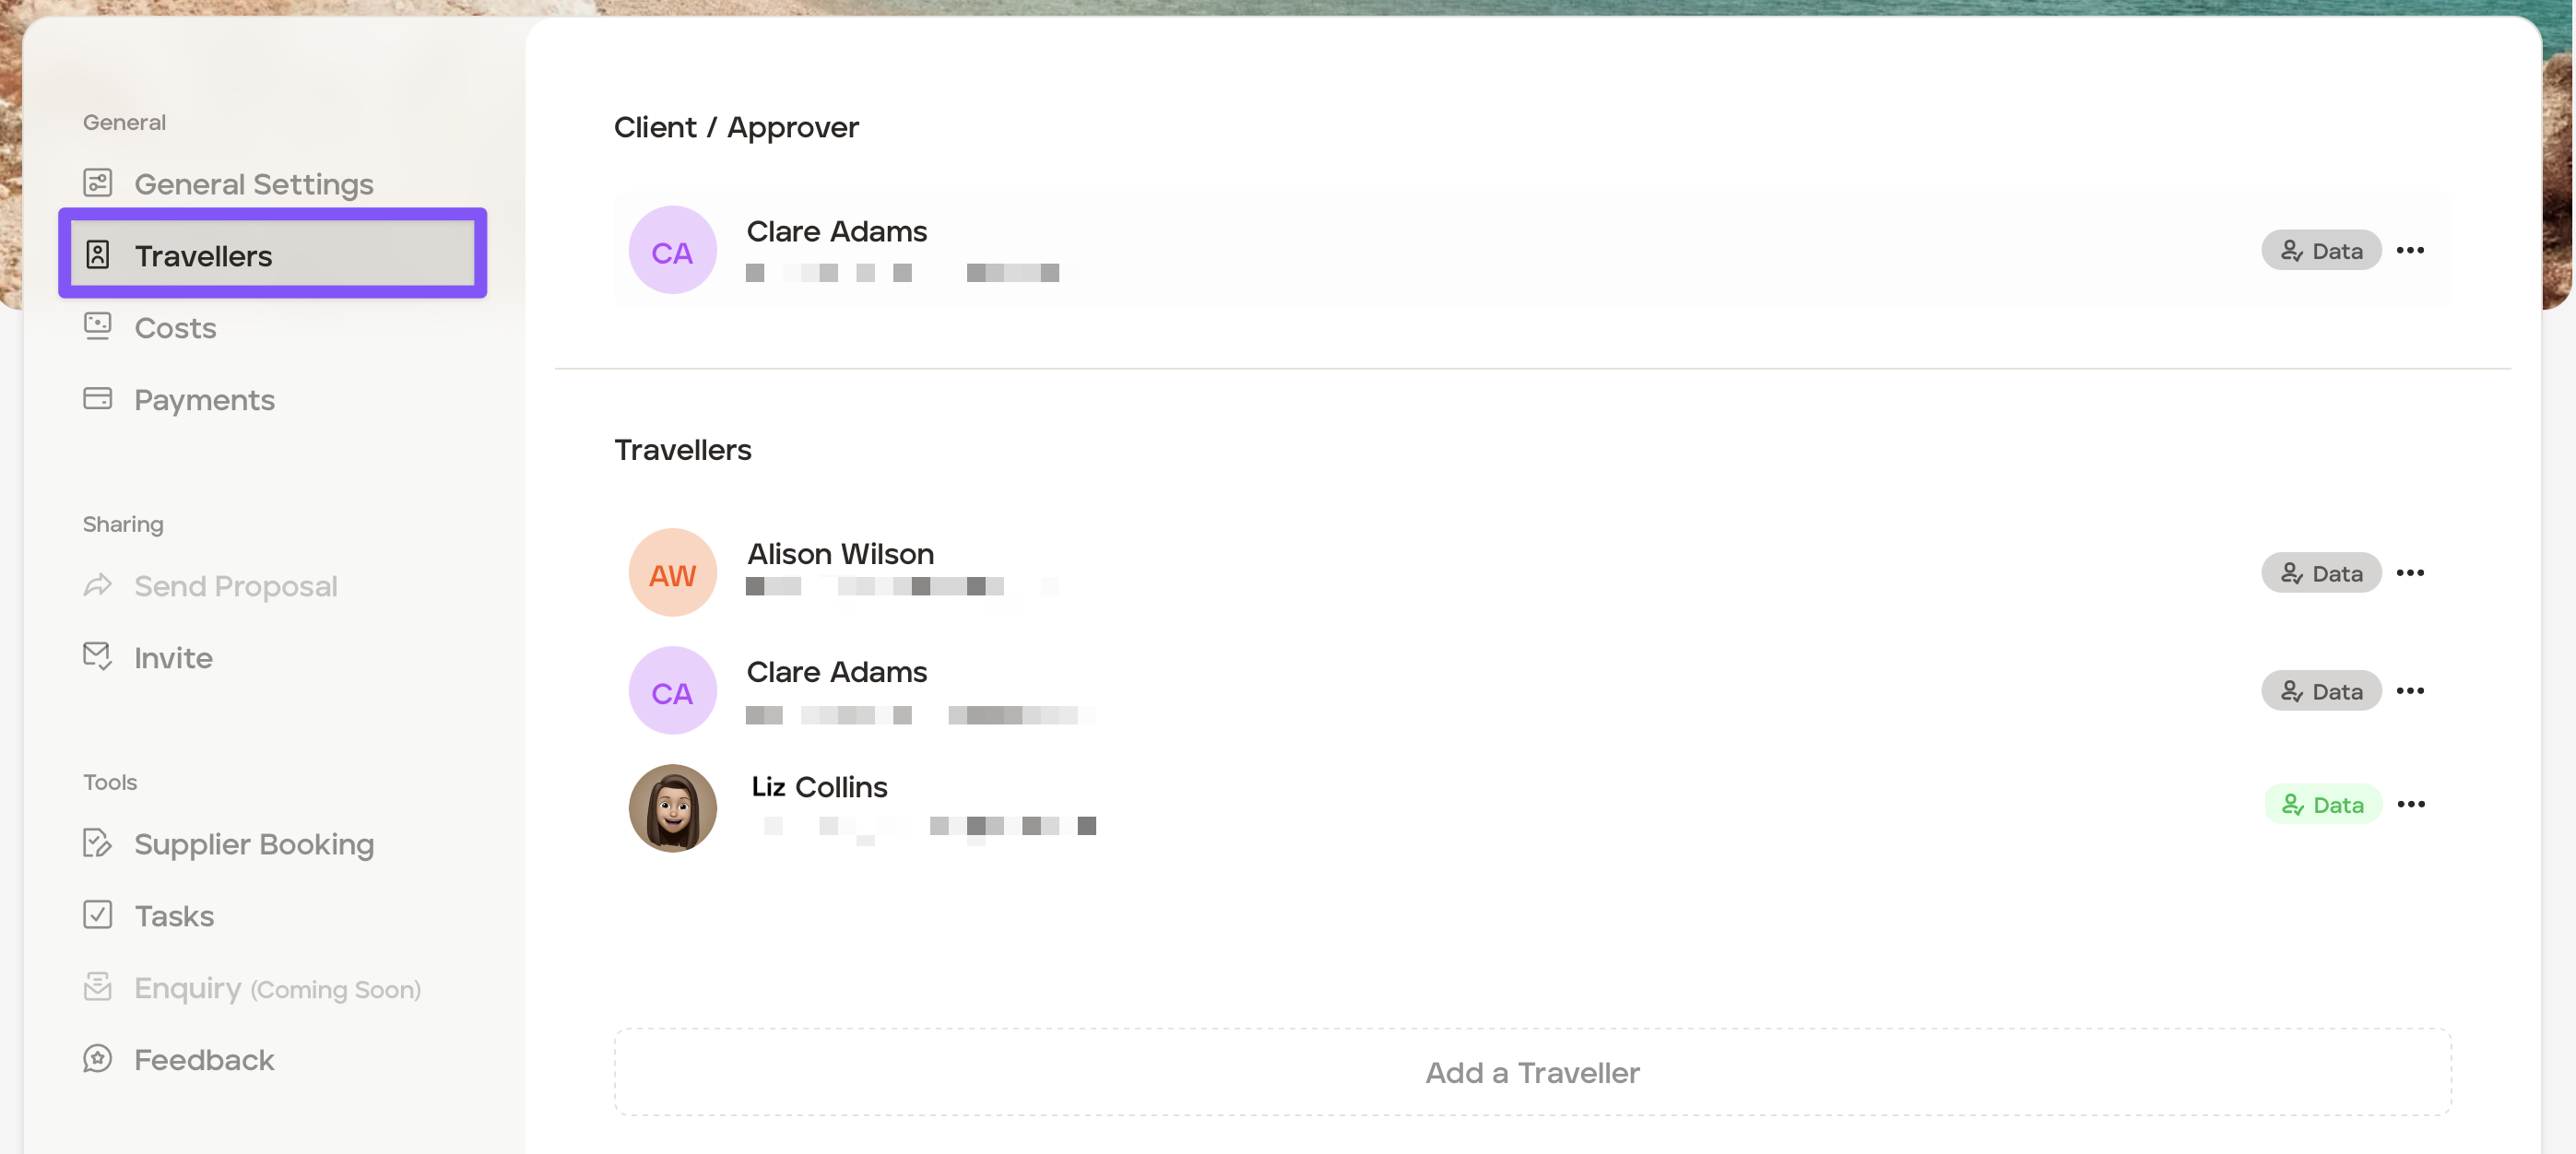
Click the 'Travellers' tab and add all travellers going on the trip.
As a side note, in this 'Travellers' tab, you will be able to:
View the client's contact information and trip history
View vault information (only after inviting the client to the mobile app, and the traveller has submitted information via the app)
Remove the traveller from the trip
When you are ready to invite the traveller to access the final itinerary, invite travellers to the mobile app by clicking on the 'Invite' tab and inviting the travellers by clicking the '+Invite' button.

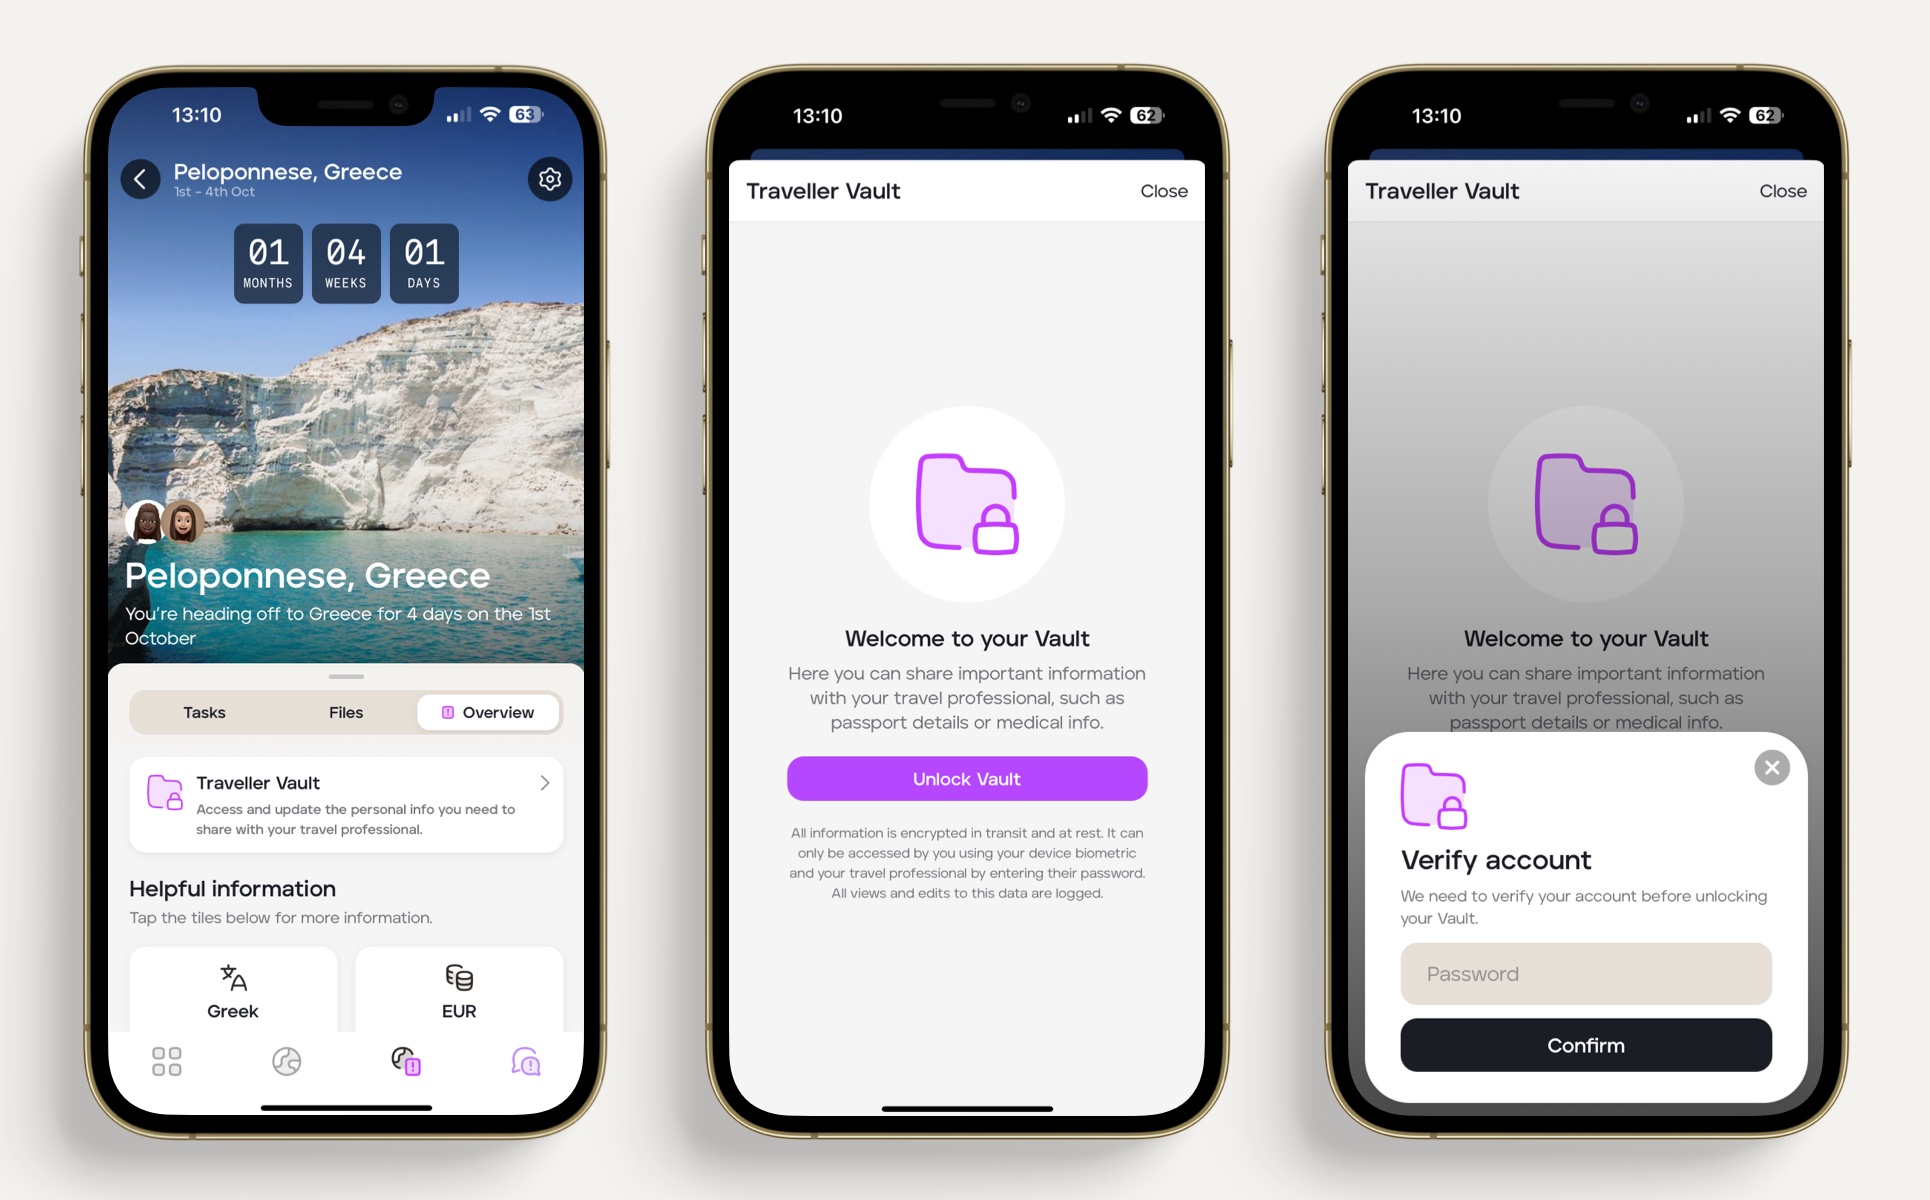
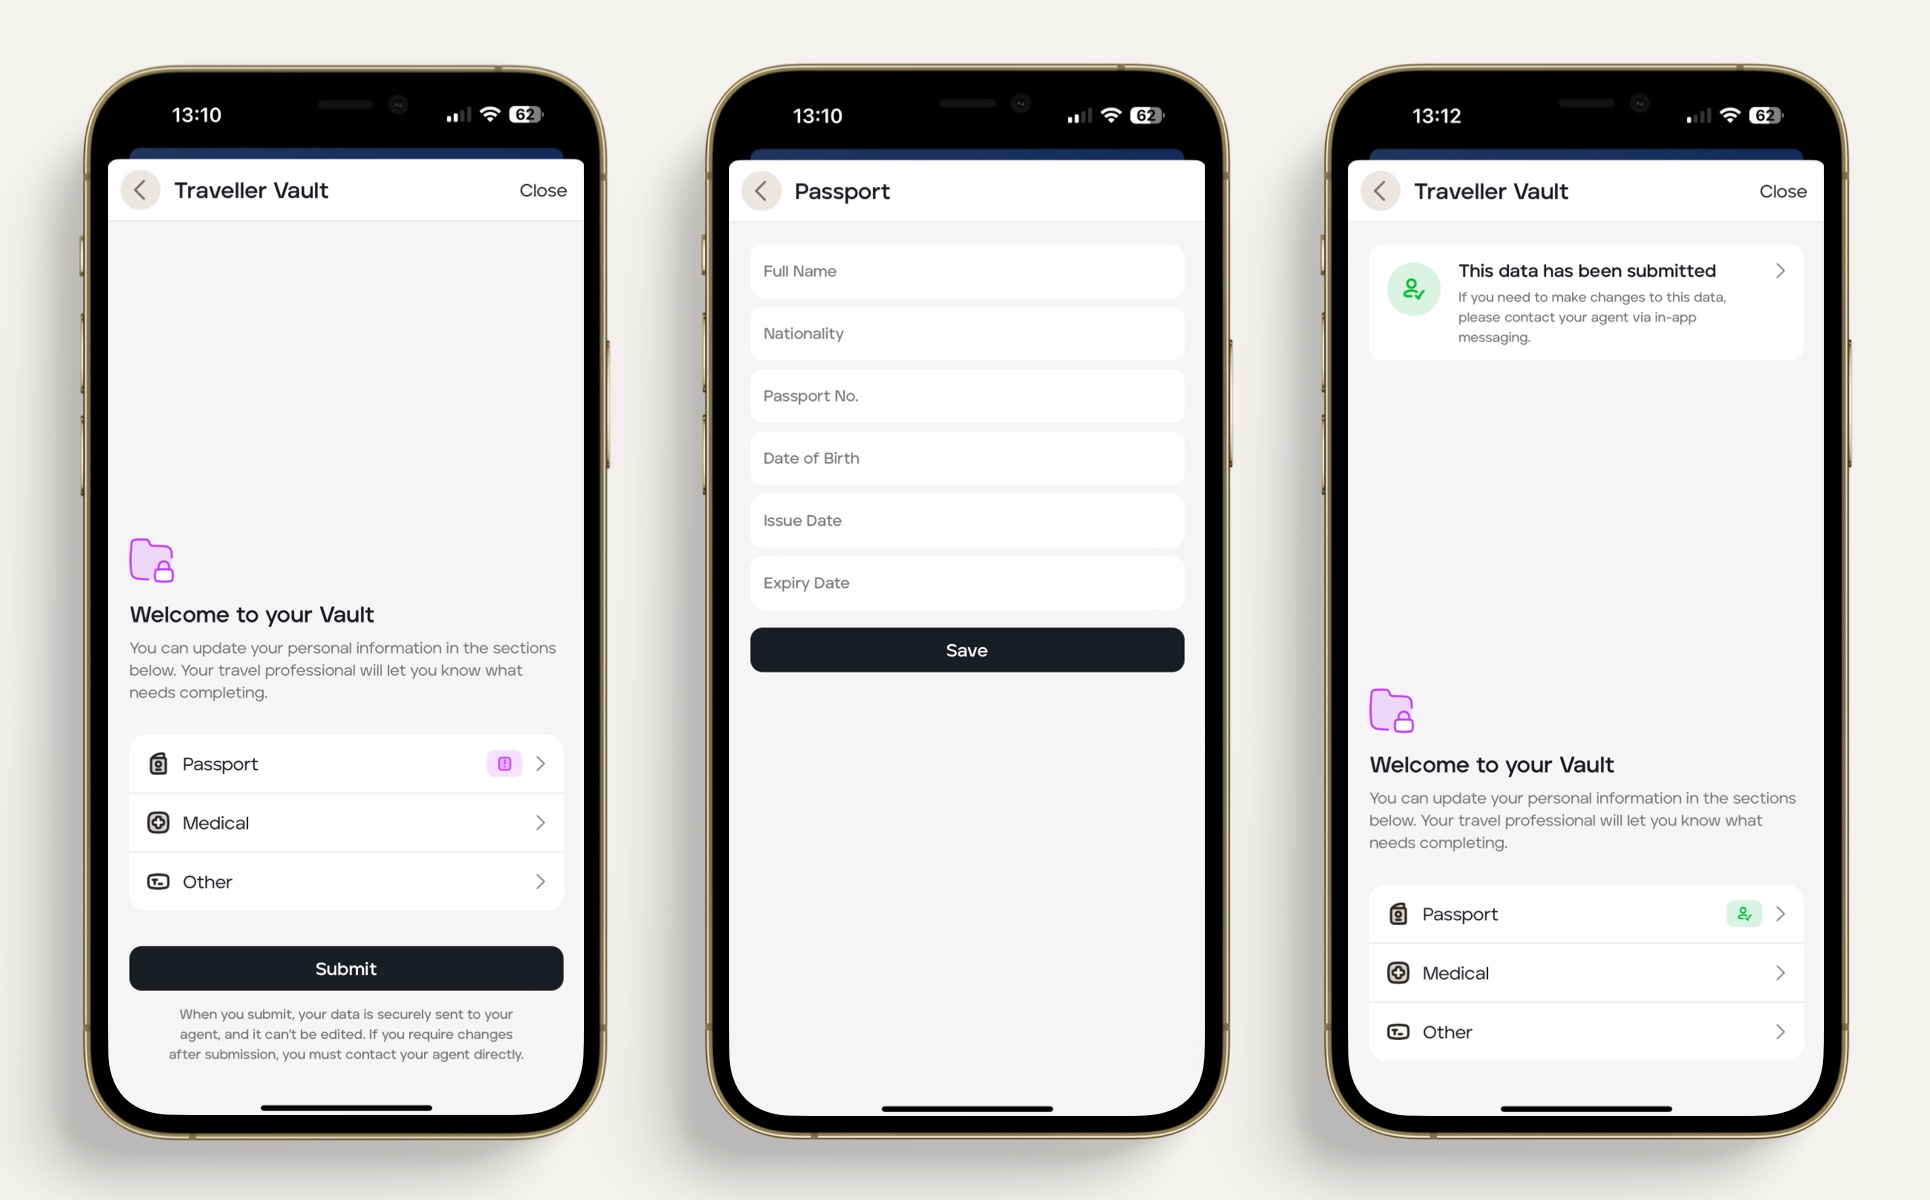
When your client accesses the trip on the mobile app, they will be prompted to upload the information you've requested:
You will be able to view the information your client has submitted by selecting the applicable upcoming trip and clicking the 'Travellers' tab.
If data has been submitted, the 'Data' icon will be shown in green.
If data has been submitted but the passport has expired or is near expiry, the 'Data' icon will be shown in red.
Click the '...' button to the right of the traveller and then click 'View Vault.'
Click 'Unlock Vault' to review all the information submitted by the client.
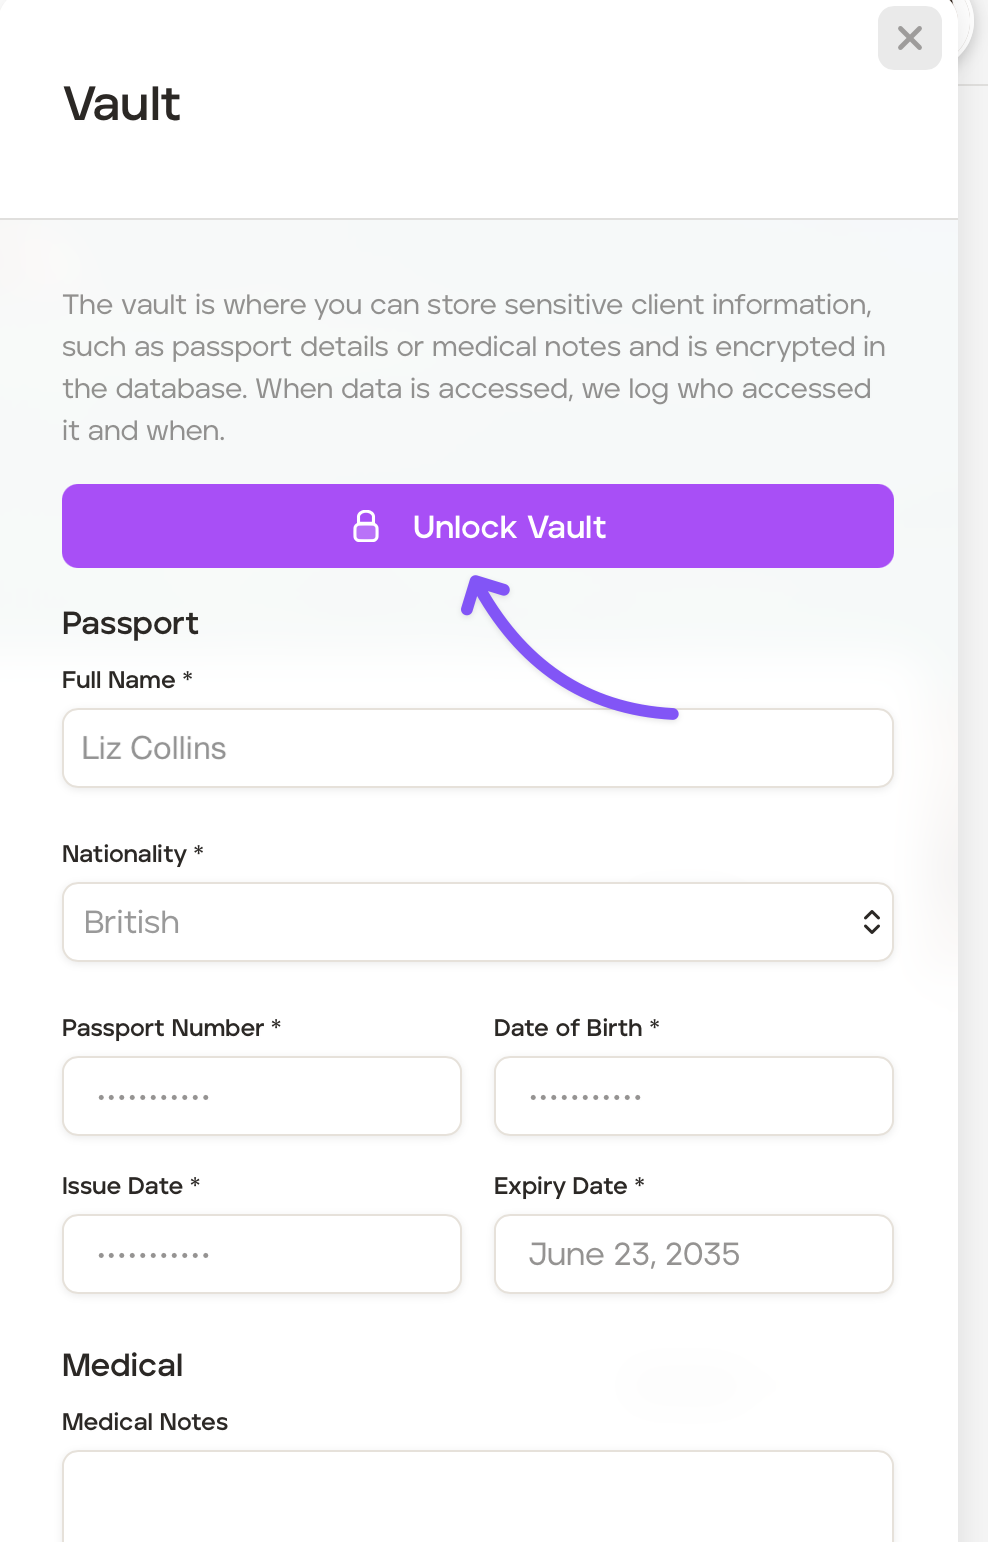
When promoted input your account password to view all the information submitted by the client.