

Forward email booking confirmations
You can email booking confirmations directly to your TripMapper for Business account and add them to the relevant itinerary.
To forward booking confirmation emails, follow the steps below:
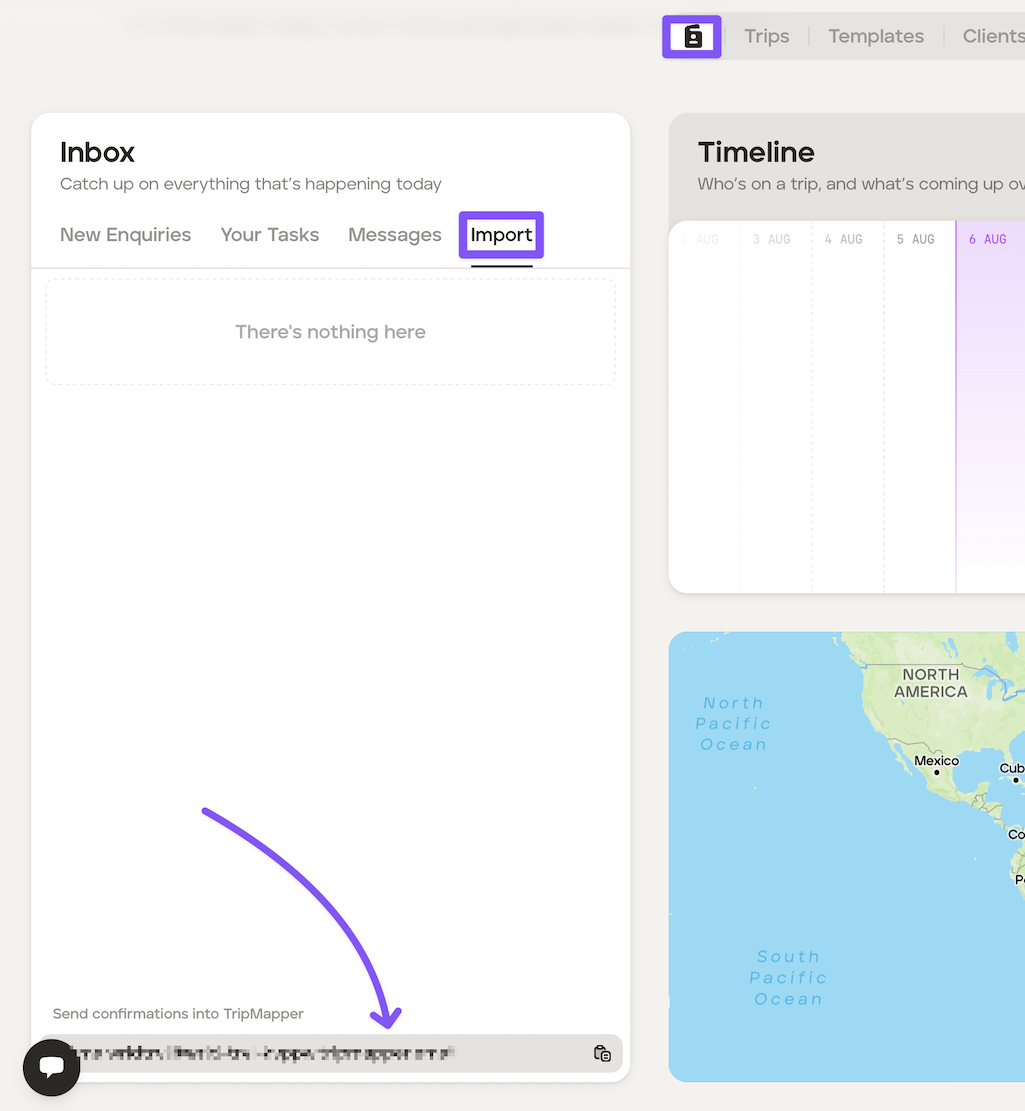
Go into your Dashboard.
Click the 'Import' tab.
At the foot of the tab there is a bespoke email address for your own TripMapper for Business account. Use the copy and paste icon to copy the email address as this is the email address used for forwarding.
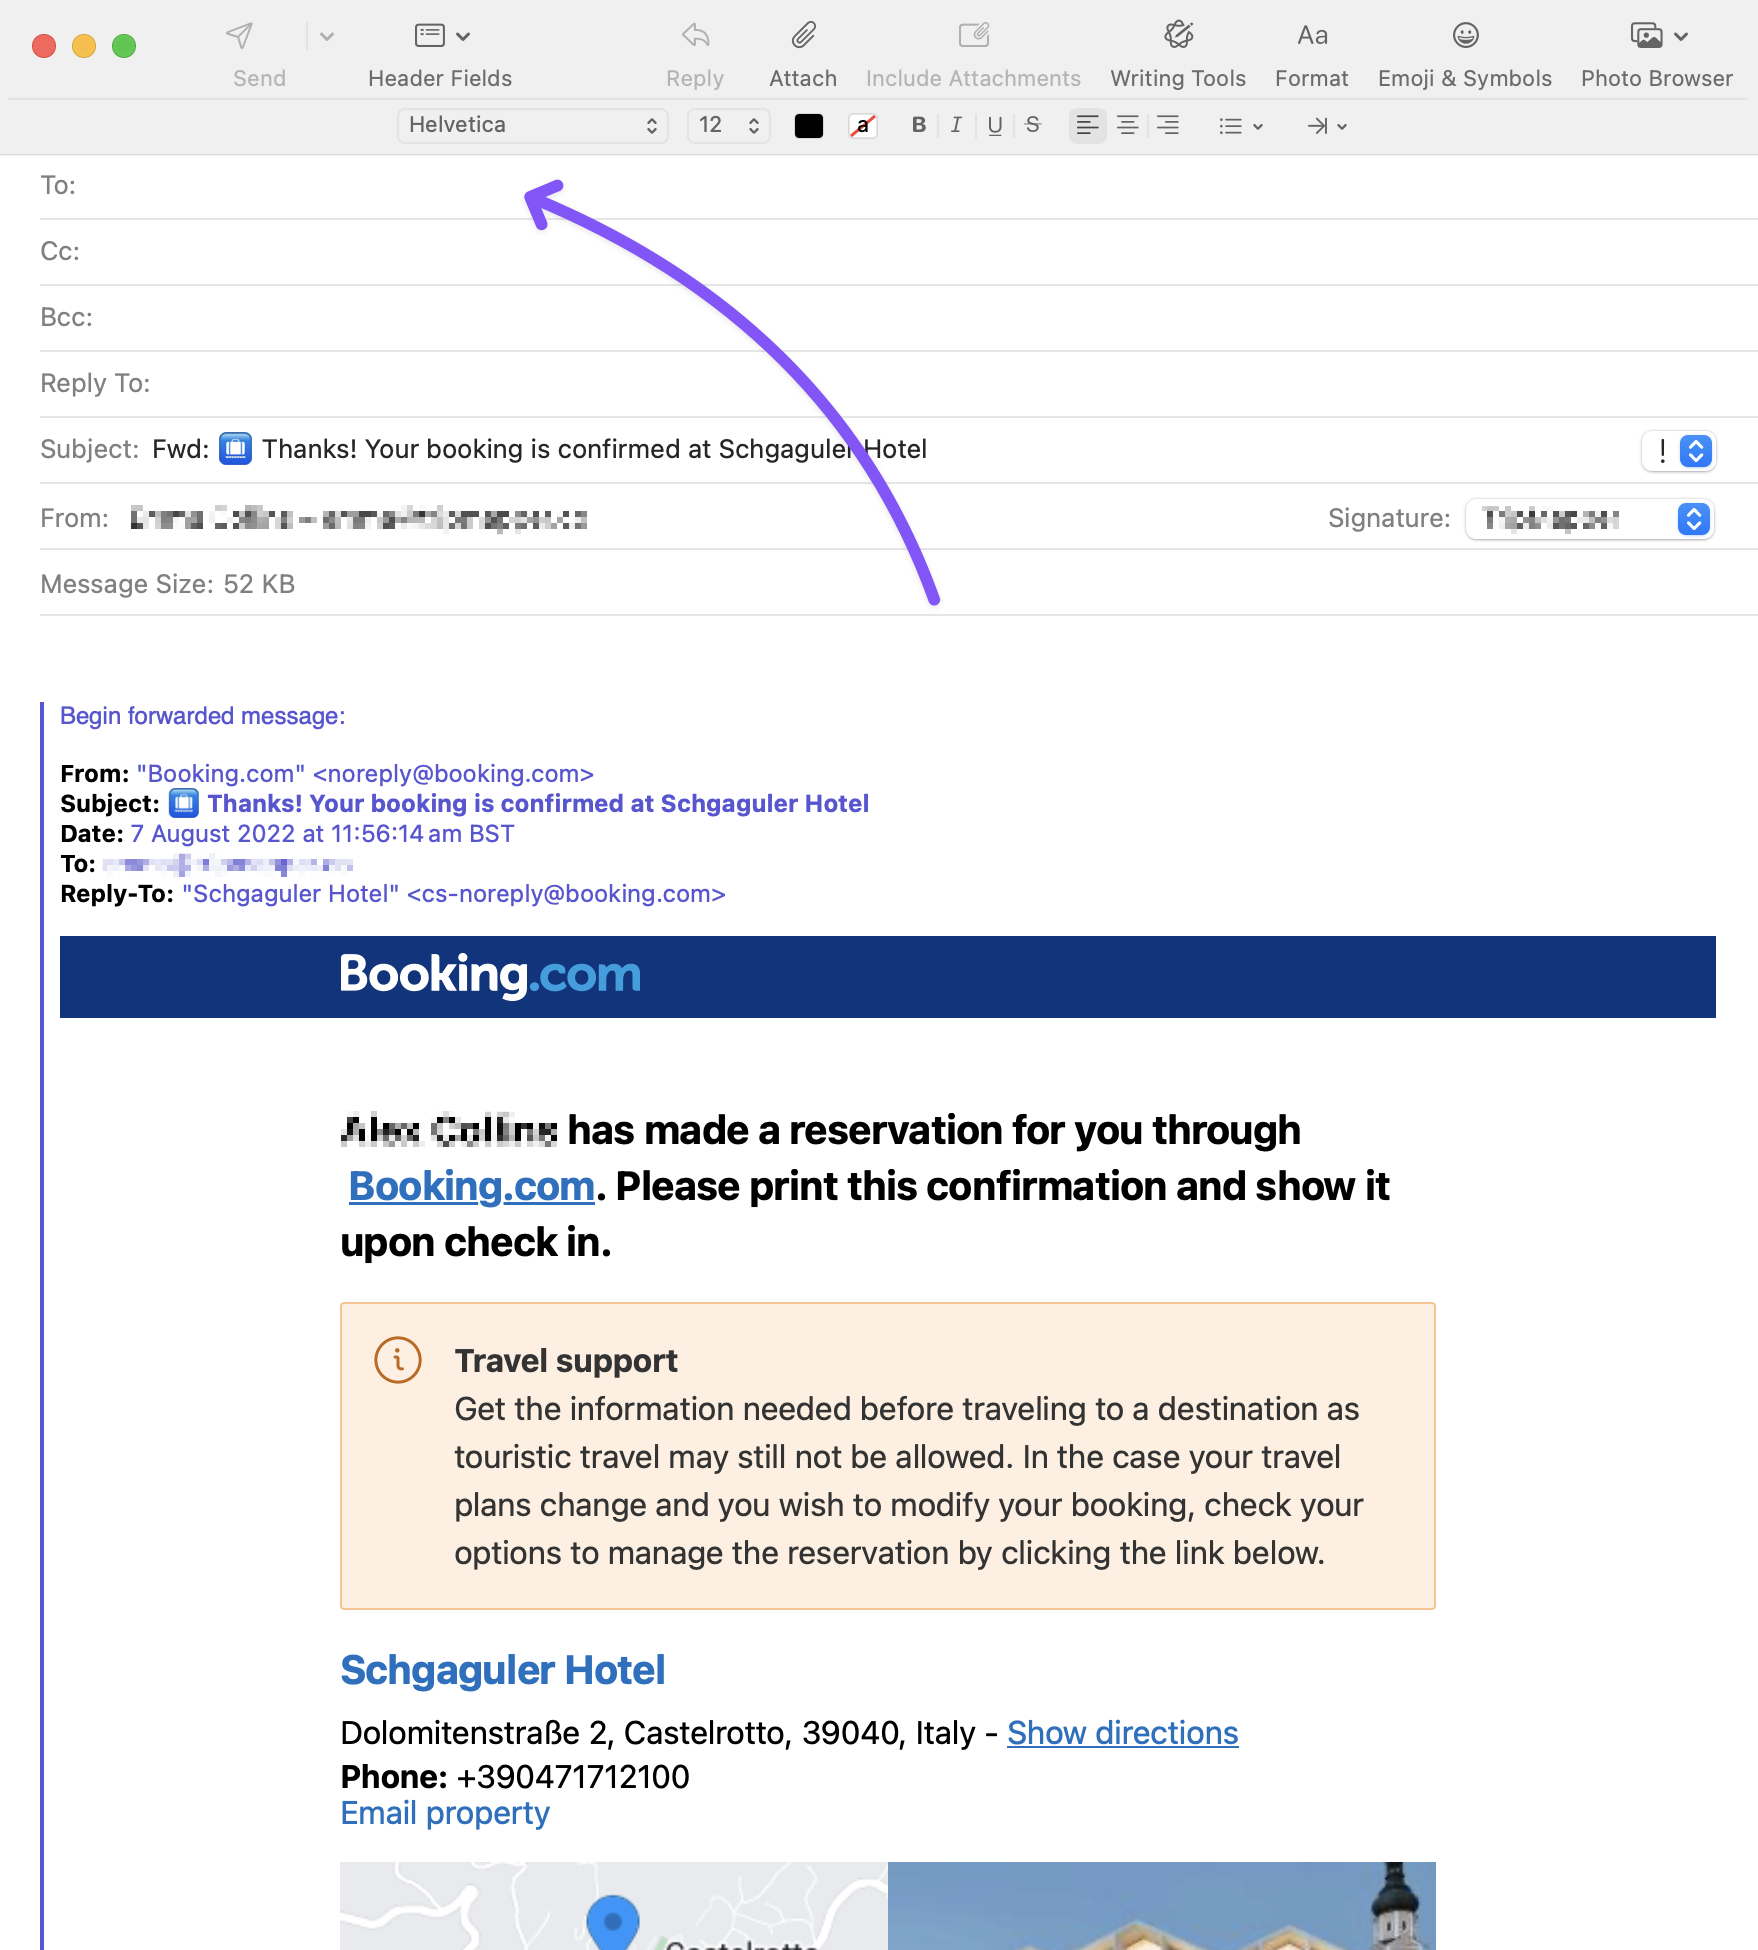
When you receive your booking email confirmation from your supplier, forward it to your bespoke email address.
The booking will be shown in the Dashboard's 'Import' tab:
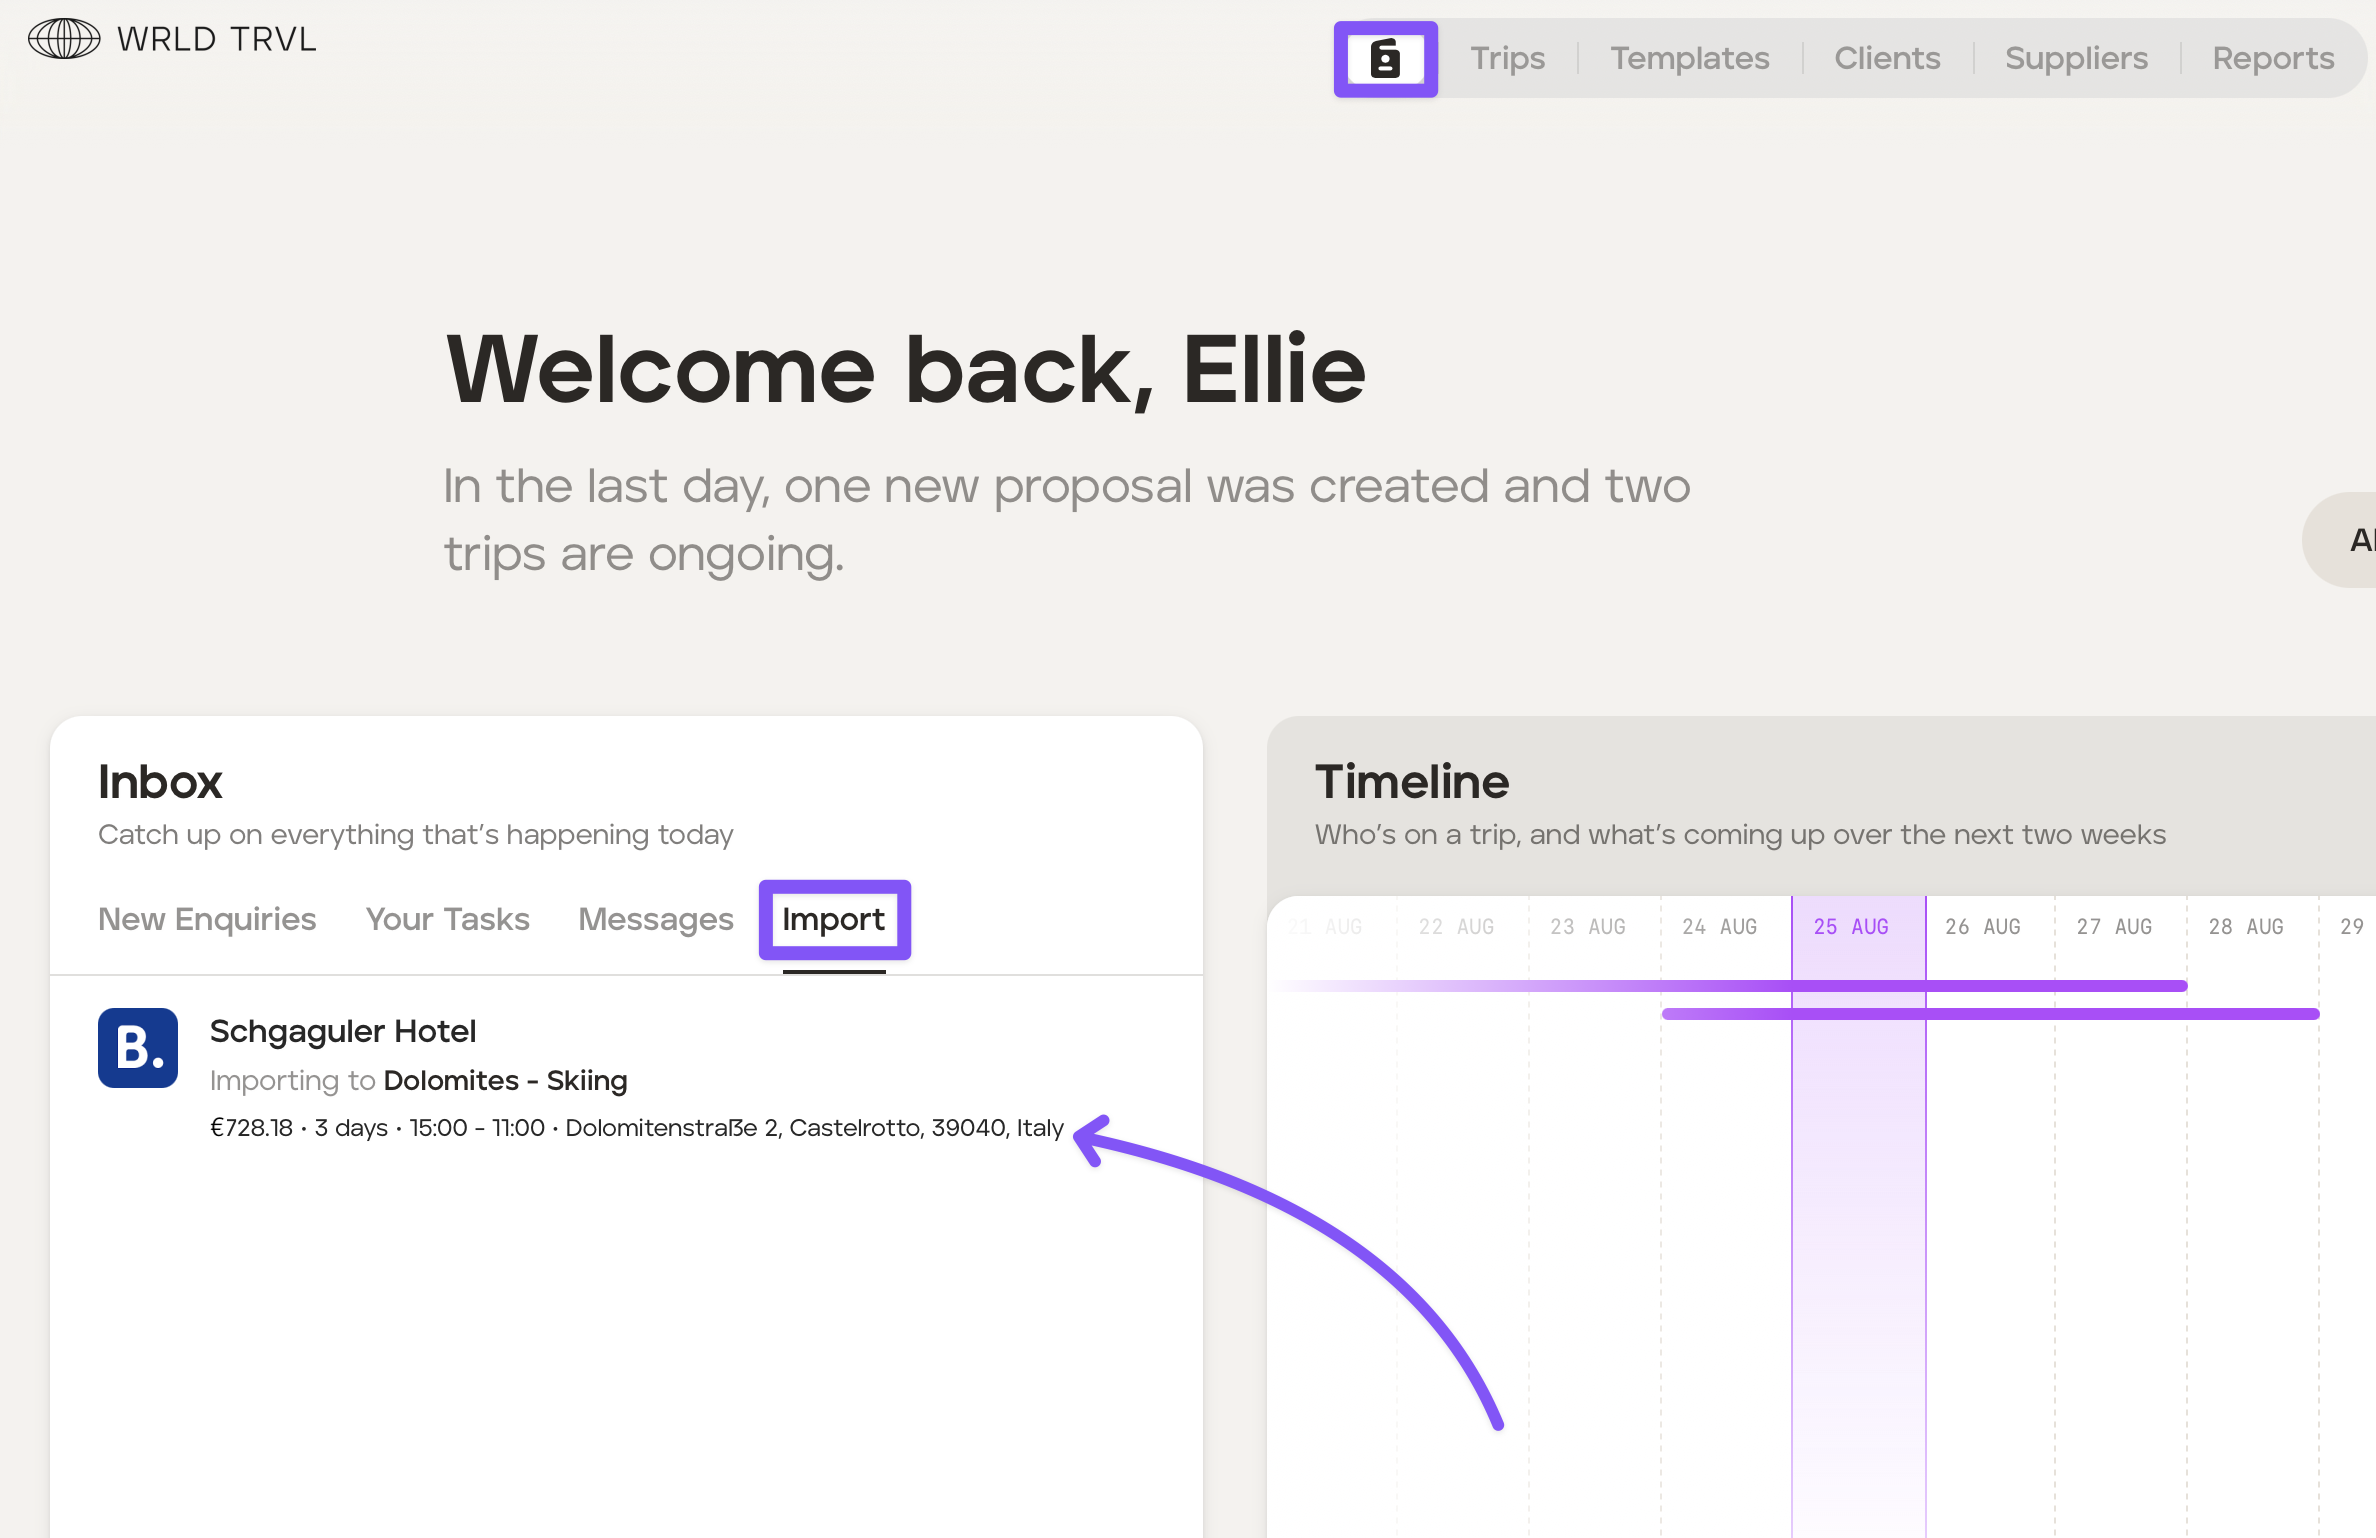
Click on the booking within the 'Import' tab.
A pop up with show the default trip and a preview:
Ensure that the correct trip has been selected. If not, click the dropdown and select the correct trip you want the new itinerary cards to be added (point 1 in the screenshot below).
Ensure the preview is correct (point 2 in the screenshot below).
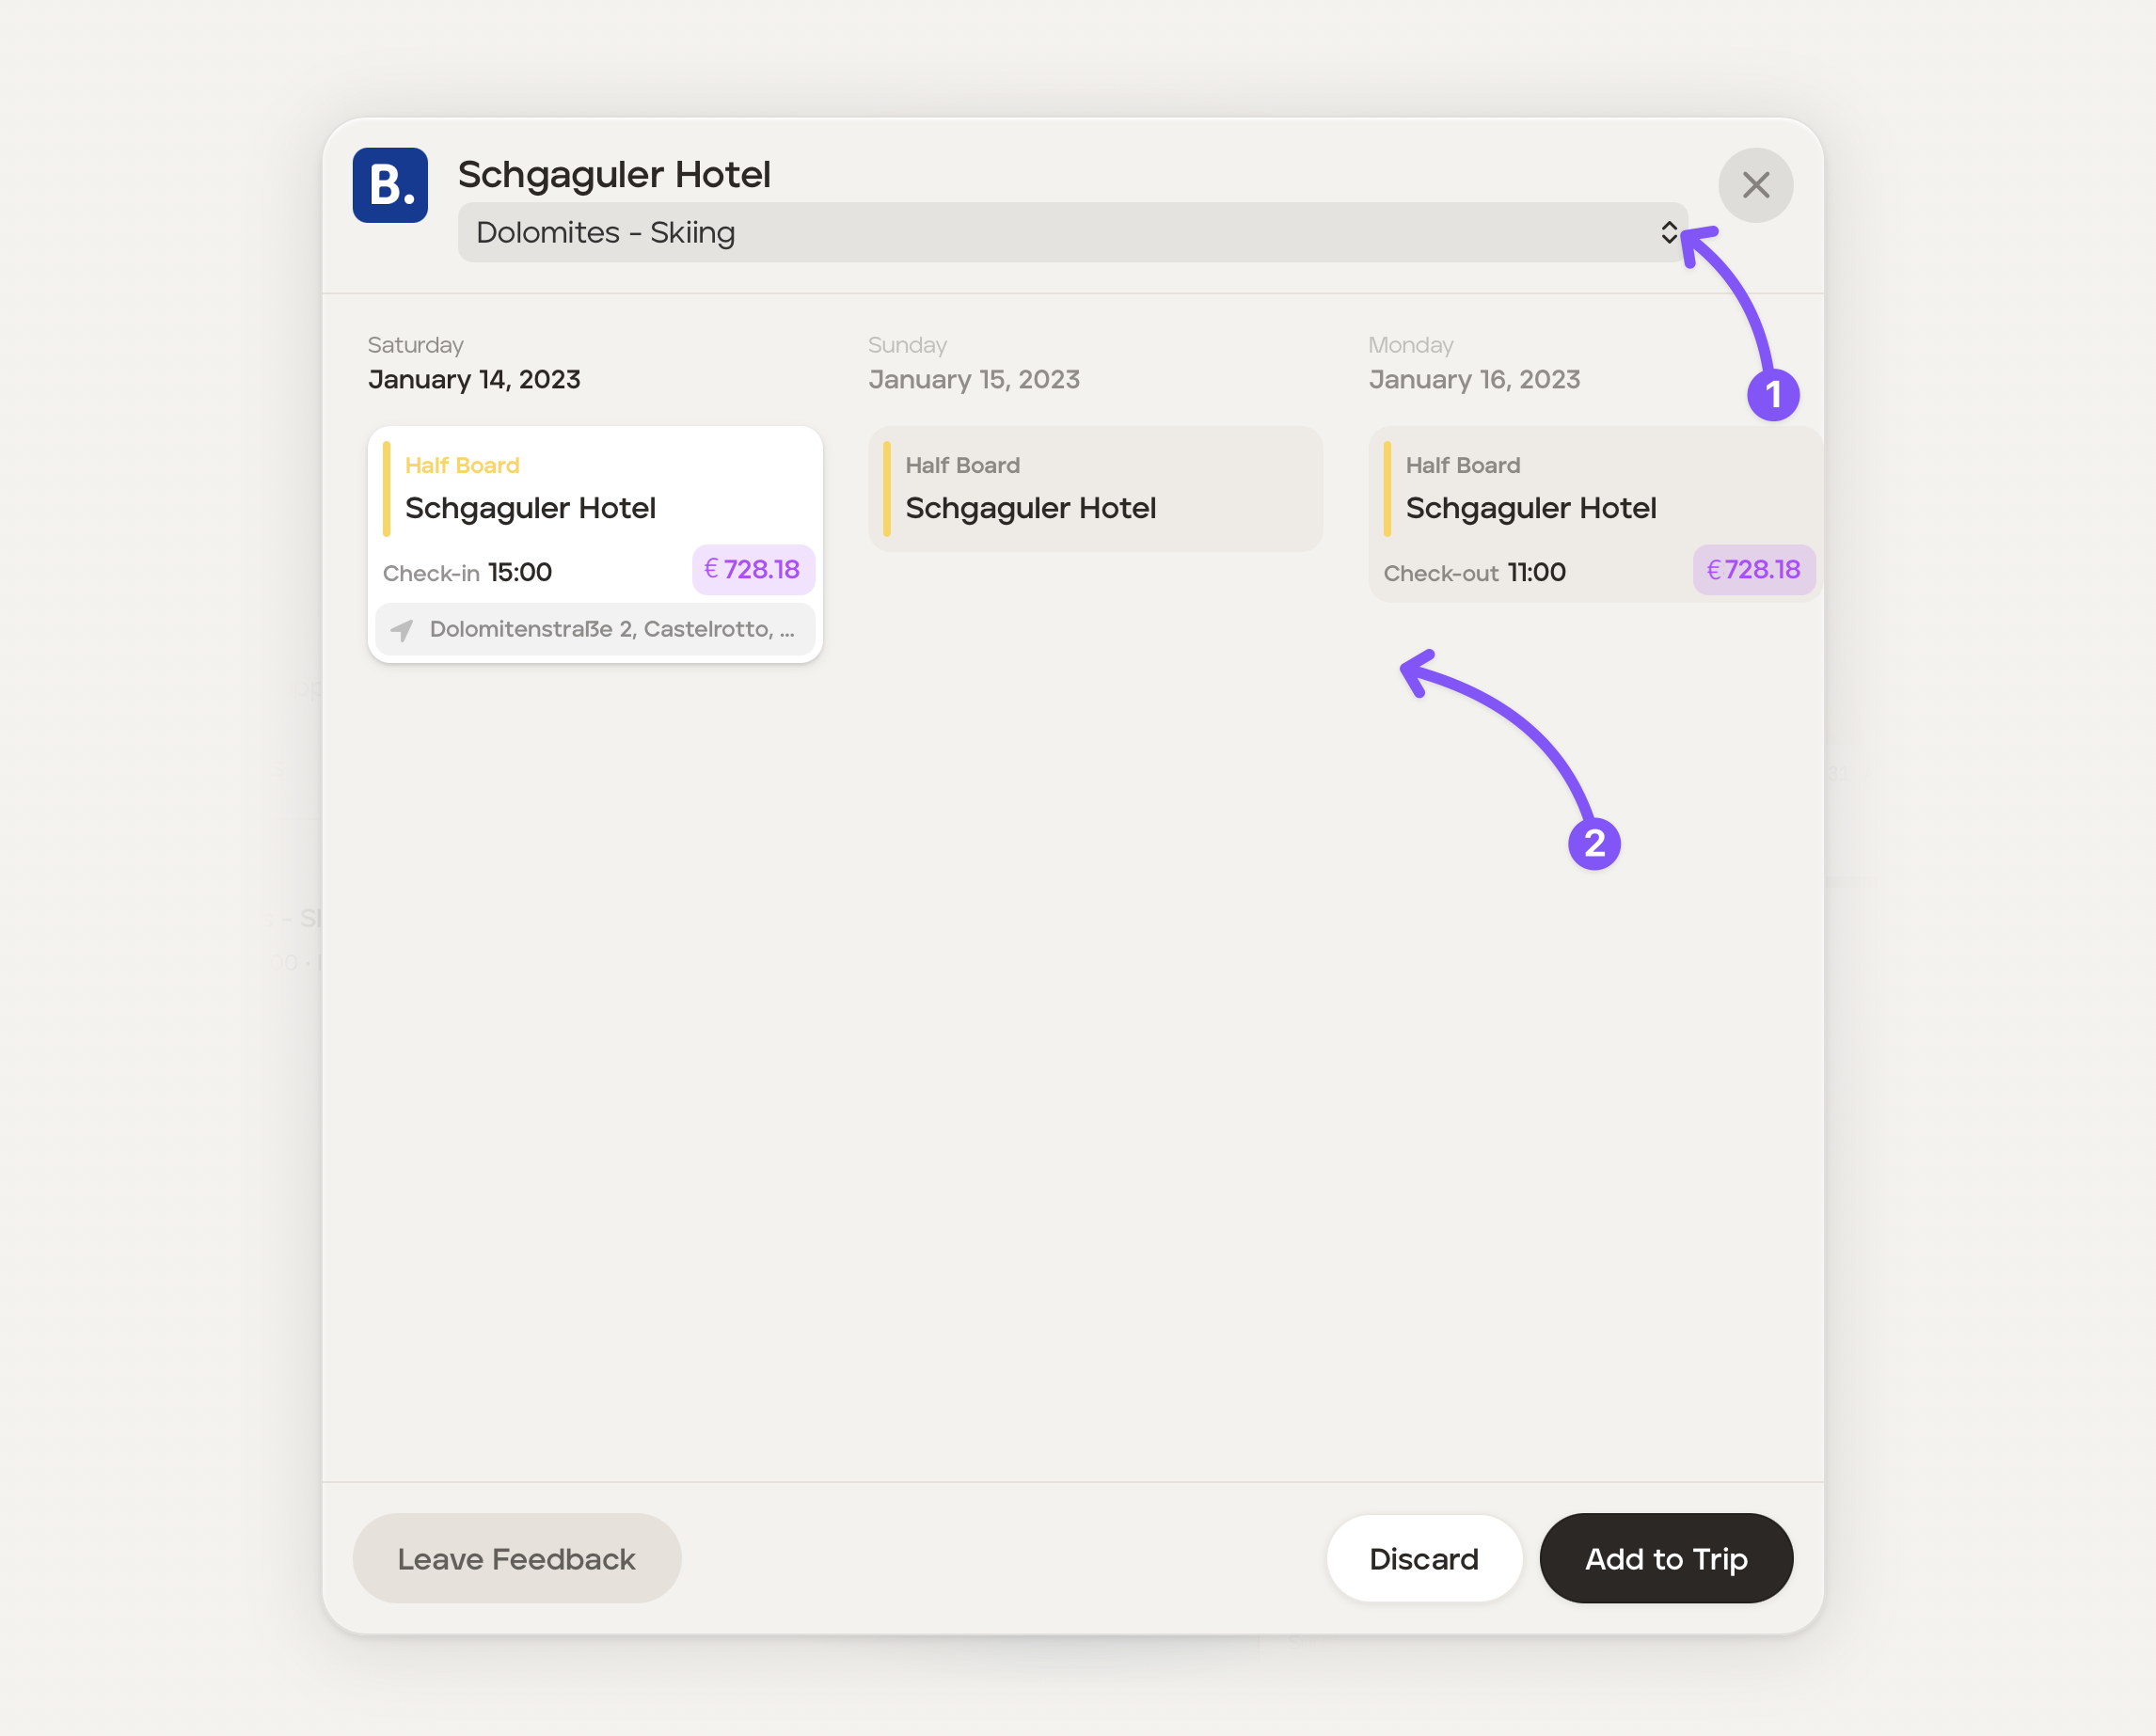
Once happy, click the 'Add to Trip' button which will take you to the trip with those new itinerary cards added to the itinerary.